Library
The Library is similar to the File Browser, but rather than showing files on your disk, it shows effects, content, presets, fonts, music, photos, and other elements available in Motion.
Library content can be expanded by adding fonts, music, or photos, as well as by saving content that you create in Motion. You can also save modified versions of existing effects (such as customized behaviors or camera animations) as custom additions to the Library.
Like the File Browser, the Library is divided into three sections. The top section is the preview area; the middle section is the sidebar; and the bottom section is the file stack, where effects and other objects are displayed.
The Library, File Browser, and Inspector share the same pane on the left side of the Motion workspace.
Click Library in the top-left corner of the Motion workspace.
Choose Window > Library (or press Command-2).
The Library opens.
Note: If the Library is open, choosing Window > Library (or pressing Command-2) collapses the pane containing the Library, File Browser, and Inspector, maximizing the Canvas work area.
With the File Browser open, choose Window > Library (or press Command-2).
Click the “i” button in the lower-left corner of the Motion window.
Library Preview Area
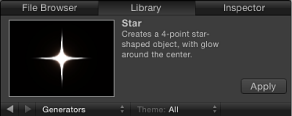
The preview area contains a visual thumbnail showing the multiple frames of moving footage, as well as previews of filters, behaviors, generators, particle emitters, replicators, and so on. The preview area also contains text information for the library item, such as a description of the behavior, filter, or generator. The Library preview area is almost identical to the File Browser preview area, but instead of an Import button it contains an Apply button.
Note: When some particle emitters are selected in the stack, an animated preview plays in the preview area.
In the Library, click the Replicators category, click a replicator subcategory, then click a replicator in the stack.
The preview plays in the preview area.
Note: To automatically play items selected in the File Browser or Library, choose Motion > Preferences (or press Command-Comma), then select “Play items automatically on a single click” in the File Browser & Library section of the General pane.
Move the pointer over the visual preview, then click the Pause or Play button that appears over the thumbnail.
Library Sidebar
Underneath the Library preview area is the sidebar, which contains a list of folders of effect types and content available in Motion. Clicking a folder in the sidebar displays its contents in the file stack below. Above the Library categories in the sidebar are several controls to navigate and sort the contents of the window.

- Forward and Back buttons: Steps backward and forward through the folders most recently viewed. These buttons work similarly to the Forward and Back buttons in a web browser.
If you have a Mac with a Multi-Touch trackpad, you can also swipe left or right with three fingers to navigate up or down the folder hierarchy.
- Theme pop-up menu: Lets you sort and organize Library content by theme. For more information about working with themes, see Working with Themes in the Library.
Library File Stack
Under the Library sidebar is the file stack, which displays the contents of the folder selected in the sidebar. You can scroll through long file stacks using the horizontal scroll bar or with a two-finger swipe on a Multi-Touch trackpad.
Double-click the folder.
Select the folder, then press Return.
The contents of the folder replace the current file stack view.
Click the Back button beneath the preview area.
Choose a folder from the Path pop-up menu beneath the preview area.
Press Command–Up Arrow.
Swipe left with three fingers on a Multi-Touch trackpad.
Library Content
The Library contains all effects, presets, fonts, and other content available in Motion. These items are grouped into categories listed in the left sidebar. Choose any of these items to display a list of subcategories in the right sidebar. The Library also contains two additional categories—Music and Photos—that provide quick access to your iTunes and iPhoto libraries.
For information on adding Library content to your project, see Adding Library Elements to a Project.
The Library contains the following categories:
- Behaviors: Contains all behaviors, divided into individual subcategories. Some behaviors can only be applied to specific objects. For example, Text Animation and Text Sequence behaviors can only be applied to text objects. For more information on how to apply behaviors, see Applying Behaviors.
- Filters: Contains all filter special effects, divided into individual subcategories. Third-party FxPlug filters appear in the category to which they belong. Most filters can be applied to any layer (text, images, shapes, footage, particles, and so on) or mask in your project. For more information on filters, see About Filters.
- Image Units (Filters): Contains all processing plug-ins based on core image processing installed on your computer.
- Generators: Contains a selection of checkerboards, noise patterns, color rays, animated text objects, and other computer-generated elements for use in your projects. For more information on generators, see About Generators.
- Image Units (Generators): Contains all generators based on core image processing installed on your computer.
- Particle Emitters: Contains a selection of preset particle systems organized into subcategories. For more information on particle systems presets, see Using the Particle Library.
- Replicators: Contains a selection of preset replicators organized into subcategories. For more information on preset replicators, see Using the Replicator Library Presets.
- Shapes: Contains a collection of preset shapes.
- Gradients: Contains a selection of preset gradients that can be applied to shapes or text.
- Fonts: Contains all fonts available on your system. For information on changing fonts in your project, see Changing Fonts.
- Text Styles: Contains a collection of preset type styles that can be applied to text. For more information, see Using and Creating Preset Text Styles.
- Shape Styles: Contains a collection of preset shape styles that can be applied to shapes. For more information, see Using Shapes, Masks, and Paint Strokes.
- Music: Allows you to browse for and import audio files from your iTunes library. The Music subcategories include the library and playlists created in iTunes. The contents of each playlist appear in the file stack. When displayed in list view, the Music category shows the Name, Artist, Album, Duration, and Size information created in iTunes.
Note: Rights-protected AAC files cannot be imported into Motion and do not appear in the file stack. This includes music purchased from the iTunes Store. Video content from iTunes cannot be imported to a Motion project.
- Photos: Allows you to browse for and import image files from your iPhoto library. The Photos subcategories include the library and albums created in iPhoto. The contents of each album appear in the file stack.
Note: When importing a large-scale image into Motion, you can scale the image to the size of the Canvas. For more information, see Using High-Resolution Still Images.
- Content: Contains elements used in the templates and other presets that ship with Motion. Use these images, text elements, patterns, and animations to create custom elements, such as particles and replicators, which can be saved to the Library for later use.
- Favorites: Stores the custom versions of effects you create and save, including particle systems, customized filters, animation curves, cameras, groups, or layers. You can also add shortcuts to frequently used items. By default, this folder is empty.
Note: The preview area does not display descriptions of built-in presets copied to the Favorites category. Control-click the favorite, then choose Edit Description from the shortcut menu to add a description that will appear in the preview area of the Library.
- Favorites Menu: Stores custom effects that you want to appear in the Favorites menu in the menu bar.
Working in the Library
Although you can’t modify the effects, elements, and folders built into Motion, you can manage custom content in the Library. You can organize custom effects, elements, and folders in the Library stack in the same way you manipulate files in the Finder. You can create folders and delete certain files or folders.
You can also easily create, save, and organize files and themes in the Library.
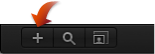
Click the New Folder button (+) in the lower-left corner of the Library.
For more information on organizing custom folders and content, see Adding Content to the Library.
In the Library stack, Control-click the custom file or folder, then choose Rename from the shortcut menu. When the text field becomes active, enter a name, then press Return.
Click the name of the folder or file once to select it, then click it again to activate the text field. Enter a name, then press Return.
Warning: Renaming custom folders or files from the Library renames the item on your hard disk or networked hard disk. If projects use files from the originally named folder, Motion may list the item as missing.
In the stack, Control-click the custom file, then choose Move to Trash from the shortcut menu.
Warning: Deleting custom folders or files from the Library removes the files from your hard disk or networked hard disk and places the files in your Trash.
Drag the file to the folder icon.
The file is moved inside that folder.
Click the Search button, then enter text in the Search field.
The contents of the file stack are filtered to include files whose names contain the entered text. Folders containing no matches are filtered out.
Note: The Search field is not available unless the Search button is selected.
Click the Clear button at the right side of the Search field.
Note: Folders are not filtered out.
Icon View and List View
The Library file stack can be displayed in icon view or list view.
Click the Icon View button in the lower-right corner of the Library.
Click the List View button in the lower-right corner of the Library.
Click the Icon Scale button in the lower-left corner of the Library, then drag the slider to the right to make the icons larger, or to the left to make them smaller.
On a Multi-Touch trackpad, pinch open to make the icons larger or pinch closed to make the icons smaller.
Working with Themes in the Library
The Library lets you create new custom themes (categories that contain effects and content), assign content to existing themes, edit how themes are displayed, remove themes, and search for themes.
In the Library, below the preview area, choose New Theme from the Theme pop-up menu.
In the Create New Theme dialog, type a theme name, then click OK.
A new theme is added to the Library. New themes appear in the Theme pop-up menu.
Custom themes are saved in the “themes” document in your /Users/username/Library/Application Support/Motion/Library/ folder.
Control-click a custom item in the Library stack (such as a shape saved to the Favorites folder), choose Theme from the shortcut menu, then choose a theme from the submenu. An item must be saved in the Library before you can assign the item to a theme. For more information on saving items to the Library, see Saving and Sharing Custom Library Elements.
Items that can be assigned a theme include the following:
Replicators
Emitters
Shapes
Gradients
Text styles
Shape styles
Layers or groups
Note: You cannot assign a theme to behaviors, filters, fonts, images, image sequences, or movies.
Select a category in the Library sidebar or stack, then choose a theme from the Theme pop-up menu.
To sort using the default themes, select the Content category, then choose an item from the Theme pop-up menu.
Choose the theme to remove from the Theme pop-up menu.
The Remove Theme item becomes available in the Theme pop-up menu.
Choose Remove Theme from the Theme pop-up menu.
The theme is removed from the list.
Note: You can only remove custom themes.
Adding Library Elements to a Project
Effects and content elements can be added to a project from the Library in two ways. You can drag an element from the Library stack to your project, or you can select an element in the Library stack and then click the Apply button in the preview area.
Note: To add behaviors and filters, a third option is available. You can select objects in the project and use the Add Behavior or Add Filter pop-up menus in the toolbar. You can also create custom particles and replicators (using an existing layer in your project) via the Make Particles and Replicate buttons in the toolbar. For more information on making custom particles, see Creating a Simple Custom Particle System. For more information on making custom replicators, see Creating a Simple Custom Replicator Pattern.
Select the layer or group (in the Canvas, Layers list, or Timeline layers list) to apply the effect or content element to.
Select the element in the Library.
For example, click the Filters category, click a filter subcategory, then click the filter to apply from the stack.
Click the Apply button in the preview area.
The filter is added to the layer or group in your project. If you apply an element such as a generator, the element is added to the selected group.
You can also drag an effect or element from the Library to a layer or group in the Layers list, Canvas, or Timeline. For more information about placing and reordering objects in a project, see Organizing Groups and Layers in Motion.
Saving and Sharing Custom Library Elements
You can save nearly any object in Motion to the Library, including animated cameras and lights, customized behaviors, filters, particle systems or replicators, shapes and text, as well as layers and groups. After an object is placed in the Library, it can be added to a project like any other element in the Library.
You can save multiple objects to the Library as one file or multiple files. For example, if you create an effect using multiple filters and you want to save the cumulative effect of those filters to apply to other objects, you can save the filters as one item in the Library.
Although you can save custom objects into their namesake folders, it is better to save customized objects that you use frequently to the Favorites category. Because some Motion Library categories contain numerous items, placing custom items in Favorites or Favorites Menu categories can save you search time. In the Favorites category, you can create additional folders to better organize custom items.
Note: You can create folders in the built-in categories, such as the Color Correction filters subcategory; however, those folders only appear in the Library stack and not the sidebar. Folders added to the Favorites category appear in the Library sidebar.
Open the Library and select the Favorites, Favorites Menu, or other category.
Drag the customized object to save from the Layers list, Timeline, or Inspector into the stack at the bottom of the Library.
Objects saved to the Favorites Menu category can be applied to objects using the Favorites menu.
When you save a customized object, it is placed in the /Users/username/Library/Application Support/Motion/Library/ folder.
Note: Items dragged to the wrong category are placed into their namesake categories. For example, if a custom behavior is dragged to the Filters category, it is placed in the Behaviors category and the Behaviors category becomes active.
Open the Library and select the Favorites, Favorites Menu, or another category.
In the Layers list, select all objects to save, then drag them to the stack, holding down the mouse button until the drop menu appears.
From the drop menu, choose “All in one file” or “Multiple files.”
“All in one file” saves all the objects together, listing them as one item in the Library. “Multiple files” saves the objects as individual objects in the Library.
To name the files, do one of the following:
Control-click the icon in the Library stack, choose Rename from the shortcut menu, then enter a name.
Select the icon, click “Untitled,” then enter name.
You can enter custom notes about a saved item in the Library. To do so, Control-click the icon, choose Edit Description from the shortcut menu, enter notes in then dialog that appears, then click OK.