Getting Started with the Replicator
Although you can use the numerous replicator controls to create complex, intricate animated patterns, the easiest way to add a replicator to your project is to apply a premade replicator from the Library.
Using the Replicator Library Presets
The easiest way to add a replicator to your project is to use a replicator preset from the Library. Presets can be tailored to better suit your specific project.
For information on replicating your own objects, see Creating a Simple Custom Replicator Pattern.
Select the group you want to add the replicator to.
In the Library, select the Replicators category.
The Replicators category is divided into subcategories, such as Mattes, Transitional, Backgrounds, and so on.
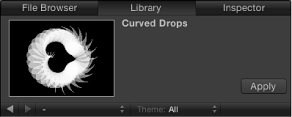
Select a subcategory, then select a replicator object, such as Curved Drops (in the Miscellaneous subcategory).
A preview appears in the preview area.
Note: If the preview does not start playing, position the pointer over the preview and click the play button.
After you select a replicator preset, do one of the following:
Click Apply in the preview area to add the replicator to the center of the Canvas.
Drag the replicator to the Canvas.
Drag the replicator to a group in the Layers list or Timeline layers list.
Drag the replicator to the track area of the Timeline or to the mini-Timeline. As you drag, a tooltip displays the current frame number.
The replicator preset appears in the project, composited above objects below it in the Layers list.
After you add a replicator preset from the Library, it acts exactly as it appeared in the preview area. If necessary, modify the replicator parameters in the HUD or in the Replicator Inspector. You can also replace the preset source with one of your own images, clips, shapes, or text layers.
Note: You can only modify a replicator after it’s been added to a project.
In the File Browser or Library, select the file you want to use as the replacement graphic for the replicator preset, then add it to the project.
In the Layers list, drag the object to the replicator cell you want to replace.
Note: If the cell layer is not visible, click the disclosure triangle next to the replicator layer.
When the pointer becomes a curved arrow, release the mouse button.
The original source object is replaced with the new object.
Creating a Simple Custom Replicator Pattern
Creating a custom replicator pattern begins by selecting a layer in your project to use as a source for the cells, then replicating that layer. By default, a nonanimated, filled rectangular pattern is created from the source. You can then modify the replicator parameters to suit your project needs.
Place an object to replicate into your project.
This example uses a bird graphic from the Content folder in the Library.

Select the object, then do one of the following:
In the toolbar, click the Replicate button.

Choose Object > Replicate (or press L).
When a layer is replicated, the following occurs:
The replicator layer (labeled “Replicator”) appears in the Layers list and is selected.
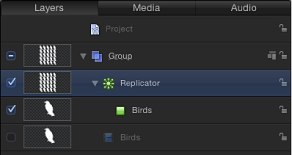
A duplicate of the original layer (the bird shape) becomes the replicator cell.
The original source layer (the bird shape) is disabled.
Note: Changes made to the original source layer, such as opacity or shearing, are respected in the pattern after the replicator is created.
In the Canvas, the default rectangle pattern appears, centered in the same location as the source object.
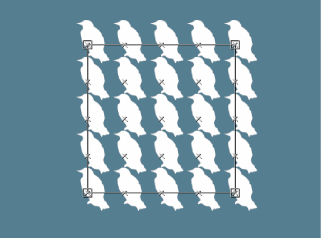
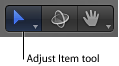
In the toolbar, the Adjust Item tool is selected so you can immediately begin using the replicator’s onscreen controls.
When the Adjust Item tool is selected, dragging the pattern’s onscreen controls (the bounding box) resizes the replicator. Dragging in the Canvas (not over the bounding box outline) repositions the replicator object as a whole.
The Replicator HUD appears.
Note: If you have hidden the HUD, press D.
Removing a Replicator
You can remove a replicator from the Layers list or Timeline.
Select the replicator, then press Delete.
The original source layer or layers remain in the project.
Using Multiple Source Layers for the Replicator
When using the replicator, you can create a single pattern with multiple elements by placing more than one cell inside a single replicator.
You can add multiple sources to a single replicator. Each source becomes a cell in the replicator, and each cell has its own set of parameters. When you select a replicator cell in the Layers list or Timeline, its parameters appear in the Replicator Cell Inspector.
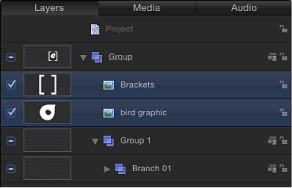
In the Layers list or Timeline, Shift-click to select the layers to replicate.
This example uses two graphics from the Content folder in the Library.
Note: Command-click to select noncontiguous layers to add to the replicator.
Do one of the following:
In the toolbar, click the Replicate button.
Choose Object > Replicate (or press L).
The cells of the default rectangle replicator pattern are created from the source layers (which are deselected so they do not appear in the composition).
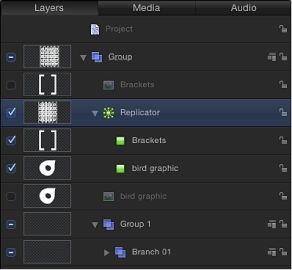
When multiple cells create a replicator pattern, the elements appear at the same points on the pattern. The replicator is positioned at the average of the source’s positions.

The elements in the pattern are stacked according to their order in the Layers list and Timeline. To change the stacking order of the layers, drag the lower cell above the upper cell in the Layers list.
Select the cell in the Layers list, then adjust the Opacity tag in the gradient editor in the Replicator Cell Inspector (or change Color Mode to Colorize and adjust the Opacity parameter in the Color controls).
Select the original source layer—not the replicator cell—and change its opacity in its HUD or Properties Inspector.
Removing a Source Layer from a Replicator
In the Layers list or Timeline, you can remove a cell from a replicator that contains multiple cells.
In the Layers list or Timeline, select the cell to remove, then press Delete.
The original source layers remain in the project.