Adding Text
In Motion, you create text in the Canvas using the Text tool. After selecting the Text tool in the toolbar, click once in the Canvas and begin typing at the insertion point. Alternatively, you can type text in the Text Inspector, or drag or import a text file into the Motion workspace. After you add text to a project, you can apply filters to create special effects or behaviors or keyframes to animate the text.
Adding Basic Text in the Canvas
This section describes basic techniques for adding text in the Canvas.
For information on adding paragraph text using the Text tool, see Adding Paragraph Text in the Canvas.
For information on adding text using the Text editor, see Adding Text with the Text Editor.
For information on adding text to your project from an existing text file, see Adding a Text File to a Project.
When Create Layers At is set to “Start of project” in the Project Preferences pane, text is created at the first frame of the project. For example, if you are working in a 900-frame project and you add text, the duration of the text is 900 frames. To shorten the duration of the text, shorten the text layer duration in the Timeline or mini-Timeline. For more information, see Using the Timeline.
In the Layers list, select the group to add a text layer to.
Note: If no group is selected, the text is added to the last selected group (the group with the underline beneath its name in the Layers list).
In the toolbar, click the Text tool (or press T).

Click in the Canvas.
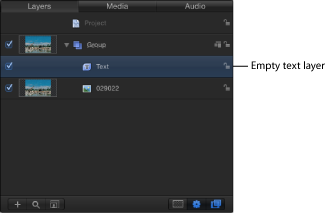
The cursor flashes in the Canvas at the insertion point. Before you enter text, an empty text object is added to the project and the Text HUD appears.
Note: If the HUD does not appear, click the Show HUD button in the toolbar.
Enter text.
As you type, the following occurs:
The text appears in the Canvas.
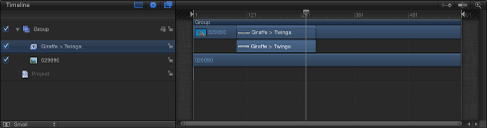
The text layer in the Layers list and mini-Timeline are labeled using the first 31 characters you type.

The same text appears in the track bars of the group and layer in the Timeline.
Note: By default, the text layout method (adjustable in the Layout pane of the Text Inspector) is set to Type. The Type layout option creates no right margin. Therefore, if you enter a long string of text, the characters extend on a single line beyond the edge of the Canvas until you create a manual line break (by pressing Return). The Type layout mode is useful when you are working with short strings of text and also when animating horizontal scrolling effects in the Canvas. For information on changing text layout and setting margins, see General Text Controls in the Layout Pane. To see items that extend beyond the edge of the Canvas, choose View > Show Full View Area.
When you finish typing, press Esc or click the Select/Transform tool in the toolbar.
The text is selected and appears with a bounding box in the Canvas.
Important: After you finish typing, press Esc or select another tool on the toolbar—do not use a keyboard shortcut. When the Text tool is selected, typing a keyboard shortcut (other than Esc) adds text to the Canvas.
Select the Text tool, then drag within the text object in the Canvas.
If you don’t begin the drag within a text object, a new text object is created.
Click between two characters in the Canvas, and then while holding down the Shift key, press the Right Arrow key or the Left Arrow key to select characters.
Click the Select/Transform tool, then double-click the text in the Canvas.
Click between two characters in the Canvas, then press Option–Right Arrow to move the cursor forward between words; press Option–Left Arrow to move the cursor backward between words.
Click in the Canvas at the end of the word you want to delete, then press Option-Delete.
Adding Paragraph Text in the Canvas
While clicking in the Canvas with the Text tool prompts basic text entry, dragging the Text tool in the Canvas activates paragraph-style text entry. Paragraph text is contained within margins that cause the text you type to wrap to the next line. You can adjust the margins of the paragraph to create a column of text as narrow or as wide as you like.
With the Text tool selected, drag in the Canvas to draw a custom text entry field.
Note: You can create a text entry field with margins that extend beyond the edge of the Canvas.
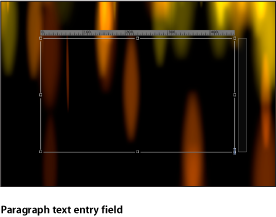
When you release the mouse button, the paragraph text entry field appears in the Canvas. You can begin typing at the flashing insertion point. A ruler appears above the text field, and an empty rectangular column appears on the right side. In the Layout pane of the Text Inspector, the Layout Method pop-up menu is set to Paragraph.
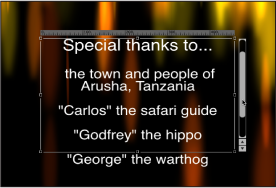
When text extends beyond the upper and lower edges of the text entry field, the empty rectangular column becomes a scroll control.
Note: You can also type paragraph text in the Text editor field of the Format pane (in the Text Inspector). For more information, see Adding Text with the Text Editor.
Working in the Canvas, you can adjust the margins of the text entry field without affecting the scale of the text.
With the Text tool selected, drag a text entry field’s onscreen scale handle.
Note: Do not use the Select/Transform tool to resize text margins. When you exit text-entry mode (by pressing Esc or selecting a tool from the toolbar), a standard object bounding box appears around the text. If you resize a text bounding box (by dragging one of its scale handles), the text is resized, not just the width of the bounding box.
In the Text Inspector, click the Layout pane and adjust the Left Margin, Right Margin, Top Margin, or Bottom Margin values.

Note: When text is deleted from a paragraph, the paragraph margins remain in their original locations.
Paragraphs and 3D Space
Text can be modified in 3D space. As a camera rotates, the onscreen text entry controls rotate with the text. Although the controls (the ruler, text entry field, and scroll control) appear to change in scale, this is only a perspective shift caused by the movement of the camera.

Adding Text with the Text Editor
After you add a blank text object to your project (by selecting the Text tool and clicking in the Canvas), you can enter and edit text in the Text editor rather than the Canvas. The Text editor is useful when working with large amounts of text.
Click the Text tool (or press T), then click or drag in the Canvas to create a blank text object.
If you click in the Canvas, you activate the default layout method (Type), which requires that you insert manual line breaks (by pressing Return) to make text wrap to a new line.
If you drag in the Canvas, you activate the Paragraph layout method, which wraps text into a column.
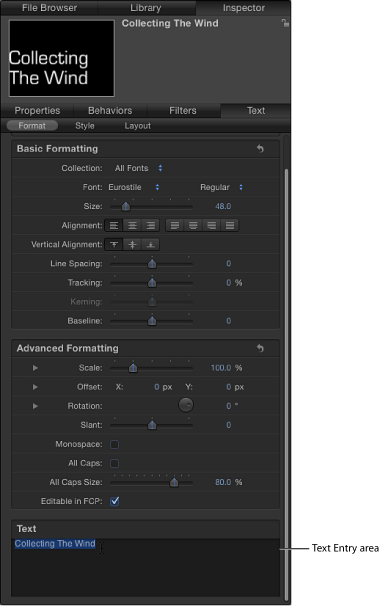
In the Text Inspector, click Format to open the Format pane.
Click in the Text editor and begin typing.
You can also edit text in the Text editor and use the Mac OS X spelling checker.
In the Layers list, select the text to be edited.
Note: You can also select the Text tool (in the toolbar) and click the text to edit in the Canvas.
The selected text appears in the Text editor.
Make changes in the Text editor.
Changes are reflected in the Canvas.
Click in the Text editor, then choose an option from the Edit > Spelling and Grammar submenu.
Control-click in the Text editor, then choose an item from the shortcut menu.
When a spelling error is found, the text is highlighted in the Text editor. If the Text tool is active when the spelling is checked, the text is selected in the Canvas.
Note: The spelling checker is not available when working with text in the Canvas.
Adding a Text File to a Project
You can add plain text (TXT) or Rich Text Format (RTF) to a Motion project. After you add a text file, you can edit its content the same way you edit Motion-created text. The appearance (font, size, layout, and so on) of the text imported from an RTF file is preserved; the text appearance in a TXT file is based on the settings in the Motion Text Inspector.
Important: Text behaviors such as Tracking, Type On, and sequence behaviors can be added to text from an imported text file. However, the more text characters a behavior must animate, the more performance slows.
Note: Some formatting options available in RTF files, such as text wrapping, are not supported in Motion.
In the File Browser, select the TXT or RTF file you want to use.
Do one of the following:
Drag the file to the Canvas, Layers list, or Timeline.
Click the Import button in the preview area of the File Browser.
The text is added to the project and can be modified.
Choose File > Import.
In the Import Files dialog, select the TXT or RTF file to import, then click Import.
The text is added to the project and can be modified.
About TXT Files
When you add a TXT file to a project, the following occurs:
The text is formatted based on the settings in the Text Inspector.
The Layout Method (in the Layout pane of the Text Inspector) is set to Paragraph.
Note: To change the layout of the text, choose another option from the Layout Method pop-up menu. The ruler and scroll controls become available in the Paragraph and Scroll layouts. The scroll control becomes available in the Crawl layout.
The paragraph margins are set to the Safe Zones of the project. (Press the Apostrophe key to turn Safe Zones on and off.)
About RTF Files
When you add an RTF file to a project, the following occurs:
The formatting of the text (font, style, line spacing, outline, and other styles set in the text editing application) is preserved in the project.
Double-clicking in the text in the Canvas activates the text entry field, which includes a horizontal ruler at the top of the text and a scroll control to the right of the text.
The Layout Method (in the Layout pane of the Text Inspector) is set to Paragraph.
Margins in the original text file are preserved in the project. The size of the onscreen text entry field is determined by the margins set in the application that created the text. In Motion, the margins can be edited onscreen or in the Layout pane of the Text Inspector.
For more information on modifying margins, see Editing Margins and Tabs in RTF Files.
For more information on the Layout pane, see Editing Text Layout.
Tabs in the original text file are preserved in the project. The tabs appear as white triangles in the ruler above the text entry field. Tabs can be moved or deleted.
For more information on modifying tabs, see Editing Margins and Tabs in RTF Files.
Editing Margins and Tabs in RTF Files
Margins and tabs defined in another application (for example, the one that created the RTF text) can be modified in Motion.
For more information about the general use of tabs, see Working with Tabs.
Double-click the text to display the onscreen text entry field, ruler, and scroll control.
Note: The Text tool must be selected. If you adjust the text box using the Select/Transform tool, the text is scaled.
Do one of the following:
With the Text tool selected, drag a scale handle on the text entry field.
In the Layout pane of the Text Inspector, adjust the Left Margin, Right Margin, Top Margin, or Bottom Margin values.
Double-click the text to display the onscreen text entry field, ruler, and scroll control.
Note: The Text tool must be selected for the ruler and tabs to appear in the Canvas.
Do one of the following:
In the Canvas, drag a tab (the small white triangle) in the ruler.
In the Layout pane of the Text Inspector, use the Tabs controls to adjust the position and layout of the tabs.
Double-click in the text to display the onscreen text entry field, ruler, and scroll control.
Note: The Text tool must be selected for the ruler and tabs to appear in the Canvas.
Drag the tab (the small white triangle) off the ruler and release the mouse button.
The tab is removed from the ruler and from the Tabs controls in the Layout pane of the Text Inspector.
Copying and Pasting Text from Another Application
Text can be copied from another document or browser and pasted into a project.
Use the following guidelines when pasting text from another application into Motion:
Pasted RTF text retains the original font attributes, including family and typeface, size, color, outline, and drop shadow.
When pasted, pure black text is converted to white text.
White text copied from Motion is pasted to the clipboard as black text.
Text pasted into an empty text entry field retains the paragraph format, including alignment, justification, and tabs.
Text pasted into an existing text entry field does not retain its original paragraph format.
Paragraphs pasted into a text entry field retain the paragraph format, including alignment, justification, and tabs.
Note: A paragraph is defined as a block of text preceded by a carriage return. Text pasted into an existing text entry field does not retain its original paragraph format. However, a paragraph pasted into a text entry field retains its original paragraph format.
If an image is copied with the text, the image is not included when the text is pasted in Motion.
Dynamically numbered lists are not supported. Lists become standard text when pasted.
Open the text document (RTF, TXT, Pages, and so on) in a text-editing application.
Select and copy the text.
Do one of the following:
In the Motion Toolbar, select the Text tool, click in the Canvas, then choose Edit > Paste (or press Command-V).
In the Format pane of the Text Inspector, click in the Text editor and choose Edit > Paste (or press Command-V).
Text as an Object
When you create text, it becomes an object in your project. Because text objects share most characteristics of other objects in Motion, you can use the transform tools—Select/Transform, Anchor Point, Distort, Drop Shadow, Four Corner, and Crop—to manipulate a text object (when the Flatten checkbox is selected in the Layout pane of the Text Inspector). These onscreen tools are shortcuts to the Transform controls in the Properties Inspector. To set specific values, or to fine-tune transforms, use the Properties Inspector.
Important: Many transform tools are unavailable for text transforms until you select the Flatten checkbox in the Layout pane of the Text Inspector. Similarly, before you can apply a mask to text, you must select the Flatten checkbox in the Text Inspector.
For more information on the Properties Inspector and onscreen transform tools, see Parameters in the Properties Inspector. For more information on the Flatten checkbox, see General Text Controls in the Layout Pane.
Important: Some operations, as well the application of specific filters or a mask, cause a group to become rasterized. When a group is rasterized, it is converted into a bitmap image. Because all text objects reside in groups, rasterization affects how text interacts with other objects in your project. For more information, see About Rasterization.
When you make changes to text using the transform tools or the parameters in the Properties Inspector, modifications are applied to the text as an object rather than as editable text. The controls for editing the text are located in the Text Inspector. Although some object properties are similar to text Style and Format parameters, such as Shear (in the Properties Inspector) and Slant (in the Format pane of the Text Inspector), the object properties are independent of the text format parameters, and vice versa. For example, if you apply a Slant value of 20 in the Format pane of the Text Inspector, a Slant value of 20 is applied to each character in the word, simulating italics. However, if you apply a Shear value of 20 in the Properties Inspector (or via the onscreen controls), a Shear value of 20 is applied to the object as a whole, not to text characters.
For information on transforming text using the onscreen transform tools, see Using Text Tools. For general information on using the onscreen controls, see 2D Transform Tools.
In addition to moving text with transform tools, you can move text up and down in the composite in the Layers list and Timeline. Like all other objects in Motion, text can also be copied, pasted, duplicated, and deleted. For more information, see Managing Layers in a Project.