Text Style-Related Tasks
The tasks described in this section are useful when you are editing text Style parameters:
Text Face-Related Tasks
These tasks are useful when editing text Face parameters, including glyph style attributes, text color, text gradient and texture fills, and text opacity and softness.
For information on using the Texture option in the Face controls, see Text Texture-Related Tasks.
Changing a Style Attribute for a Single Text Character
The style attributes (face color, outline, glow, and drop shadow) for text characters (glyphs) can be individually defined.
Select the Text tool in the toolbar, then drag in the Canvas to select the glyph to modify.
In the Style pane of the Text Inspector, modify an attribute.
Only the selected text character is affected.
Note: You can also modify the style attributes of a glyph with the Transform Glyph tool. For more information, see Working with Text Glyphs.
Changing the Text Color
You can change text color using the Colors window, the color well in the Text HUD, or the color well in the Style pane of the Text Inspector.
Note: To adjust individual color channels, you must use the Style pane of the Text Inspector.
Select the text with the Select/Transform tool.
If the HUD is not displayed, press F7 (or D).
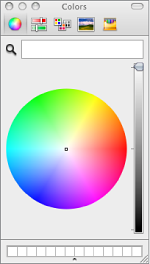
Click the color well, then use the Colors window to set the text color.
Note: There are many ways to choose a color using the Color parameter. For a complete list, see step 4 in the next section, which describes choosing a color in the Inspector.
The text is dynamically updated as you select a color.
Note: To select a color from the Canvas (or anything on the desktop), click the color picker in the Colors window, position the picker over the color you want to select, then click.
Select the text.
Open the Style pane of the Text Inspector.
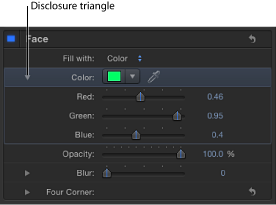
In the “Fill with” pop-up menu, ensure that Color is selected.
Do one of the following:
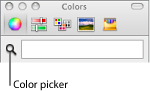
Click the color well, then use the Colors window to set the text color.
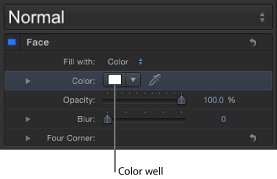
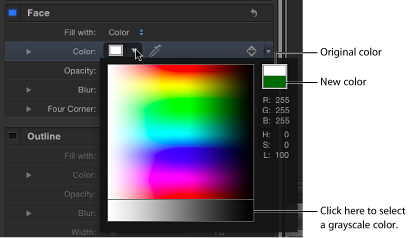
Click the downward arrow to the right of the color well (or Control-click the color well), then click in the pop-up color palette to select a color. Drag in the lower palette to set the color to a grayscale color.
Click the eyedropper tool to the right of the Color well, then click a color in the Canvas.
In the Inspector, click the Color disclosure triangle to show the color channel parameters, and then use the sliders or value sliders to adjust each color channel.
Applying a Gradient to Text
In the Inspector, you can apply a gradient fill to text. The gradient can be customized and animated in the Gradient editor. For general information about working with gradients, see Using the Gradient Editor.

Note: Text gradient controls are similar to gradient controls for shapes, particles, and replicators, with a few exceptions. For example, text gradient controls include a dial to specify the direction of a linear gradient. The shape gradient controls include Start and End settings to specify the direction of a linear gradient. For more information on working with gradients and shapes, see Using Shapes, Masks, and Paint Strokes.
Like preset text styles from the Library, preset gradients from the Library can be applied to text. Gradient presets are located in the Gradients category of the Library. A custom gradient that you apply to text can also be saved in the Library for use in future projects.
Select the text.
In the Text Inspector, click Style.
The Style pane opens.
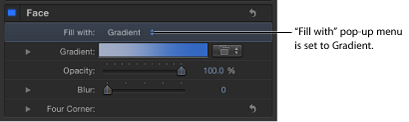
Choose Gradient from the “Fill with” pop-up menu.
In the Inspector, the Color controls are replaced with the Gradient editor. The default gradient is white and blue (Atlantic Blue).
In the Canvas, the default gradient is applied to the text.
Applying a Preset Gradient to Text
There are two ways to apply a preset (or saved) gradient from the Library to text. The first method is to use the Gradient preset pop-up menu in the Text Inspector. The second method is to drag a gradient from the Library to text.
Select the text and make sure the "Fill with” pop-up menu is set to Gradient.
Choose a preset from the Gradient preset pop-up menu (on the right side of the Gradient row).

The selected gradient is applied to the text.

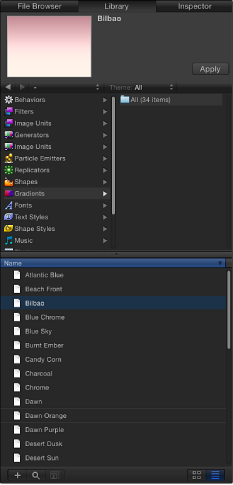
In the Library, click the Gradients category.
In the stack, select a gradient.
A preview of the selected gradient appears in the preview area.
Do one of the following:
Drag the gradient to the text in the Canvas, Layers list, or Timeline.
Make sure the text is selected, then click Apply in the preview area.
After the preset gradient is applied to a text object, the preset can be edited with the Gradient editor. For more information, see Using the Gradient Editor.
Changing Text Opacity
There are several ways to change the opacity of text:
To change the overall opacity of a text object, use the Opacity slider in the HUD or in the Properties Inspector.
To change the opacity of a Style pane parameter, such as Face, Glow, Drop Shadow, or Outline, use the respective Opacity controls in the Style pane of the Text Inspector.
Note: The Opacity parameter in the Properties Inspector and the Opacity parameter in the Style pane of the Text Inspector are separate controls. When both are adjusted for a text object, the effect is multiplicative. In other words, if Opacity is set to 50% in the Properties Inspector and then set to 50% in the Style pane, the resulting opacity for the text is 25%.
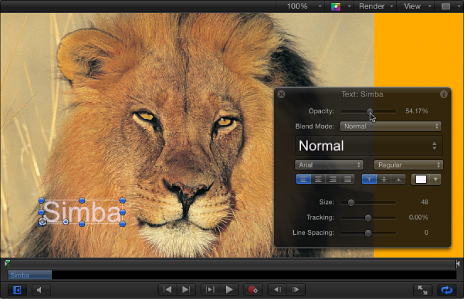
Select the text using the Select/Transform tool.
Press F7 (or D) to display the HUD.
Drag the Opacity slider.
Text opacity is updated as you drag the slider.
The Opacity parameter in the Properties Inspector (not in the Text Style pane) is updated.
Select the text.
Open the Properties Inspector.
In the Blending controls, drag the Opacity slider or enter an opacity value in the field.
The Opacity parameter in the HUD is updated.
Select the text.
In the Text Inspector, click Style to open the Style pane.
In the Face controls, drag the Opacity slider or enter an opacity value in the field.
Changing Text Softness
Use the Blur parameter in the Style pane of the Text Inspector to adjust the softness of text.
Select the text.
In the Text Inspector, Click Style to open the Style pane.
In the Face controls, drag the Blur slider, or enter a blur amount in the value slider.
The text softness is updated as you drag the slider.
Text Texture-Related Tasks
Use the Texture controls in the Style pane to apply and edit texture effects.
Using the Texture Image Well
Use the Texture image well to apply, replace, and remove textures.
Select the text.
In the Inspector, open the Style pane of the Text Inspector.
Choose Texture from the “Fill with” pop-up menu.
The Color (or Gradient) controls are replaced with the Texture controls.
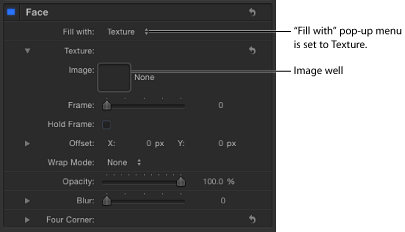
By default, no texture is applied to the text.
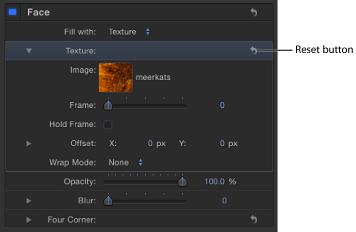
In the Layers list or Media list, drag the image to use for the texture to the Image well.
The image appears in the well and is applied to the text. When text is filled with an image, the texture is applied to each text character. To learn how to make the texture continuous through all text characters, see Applying a Continuous Texture to a Text Object.
Important: When dragging an image to the well, be sure to click and drag in one movement. If you click the image and release the mouse button, the image is selected and its Inspector appears.
Select the text and display the expanded Texture controls in the Style pane.
In the Layers list or Media list, drag an image into the Image well.
The new image appears in the well and is applied to the text.
Note: When an image (or a movie clip) is replaced in the Layers list or Media list and that image is used as a texture source, the texture for the text is replaced with the new image.
Click the Texture parameter reset button.
Drag the image out of the well, then release the mouse button. The image disappears.
Changing the Position of a Texture
You can adjust the position of a texture to fit the needs of your project.
In the Texture controls, do one of the following:
Press Command, then drag in the Image well.
The image moves in the well and is offset in the text in the Canvas.
Adjust the Offset values. The left value slider represents X position values; the right value slider represents Y position values. Click the disclosure triangle to display the labeled X and Y value sliders.
Note: You can adjust the position of a texture for a single glyph by selecting the glyph with the Text tool or by using the Transform Glyph tool. For more information on working with glyphs, see Working with Text Glyphs.
Animating a Texture
You can set keyframes for the offset values of the texture source to create a moving element within text. In the following example, an image of a leopard lying in the grass is used as the texture source for the text “leopard.”

Apply a texture to the text.
For instructions on how to apply a texture to text, see Using the Texture Image Well.
Move the playhead to the frame where you want the texture animation to begin.
Enable Record (press A or click the Record button).

Note: When Record is enabled, a keyframe is created for any change you make to an object in your project.
To position the texture, do one of the following:
Press Command, then drag in the Image well.
Use the Offset value sliders to enter an offset value.
The image within the text moves, and a keyframe is created in the Offset parameters.

Move the playhead to the next frame where you want to set a keyframe.
Move the texture to the new position.

Disable Record.
Go to frame 1 (or the start frame of the animation) and play the clip.
The texture offset is animated.
Note: You can also use the Animation menu in the Inspector to set keyframes without enabling Record. For more information, see Keyframes and Curves.
Apply a texture to the text.
For instructions on how to apply a texture to text, see Using the Texture Image Well.
Move the playhead to the frame where you want the texture animation to begin.
In the Style pane of the Text Inspector, add a keyframe to the “Fill with” parameter or the Offset parameter.
To position the texture, do one of the following:
Press Command, then drag in the Image well.
Use the Offset value sliders to enter an offset value.
The image within the text moves, and a keyframe is created in the Offset parameters.
Move the playhead to the next frame where you want to set a keyframe.
Move the texture to the new position.
Go to frame 1 (or the start frame of the animation) and play the clip.
The texture offset is animated.
For more information on the different keyframing methods, see Keyframing Methods.
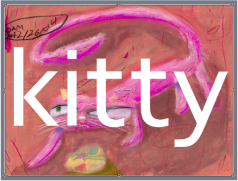
Applying a Continuous Texture to a Text Object
When you apply an image (or any object) as the texture for text, the texture is applied to each text character. To use the image as a continuous texture throughout the text, use the text as a mask.
In the Layers list or Canvas, select the object to use as the texture.
Choose Object > Add Image Mask (or press Command-Shift-M).
A blank image mask layer is added to the image.
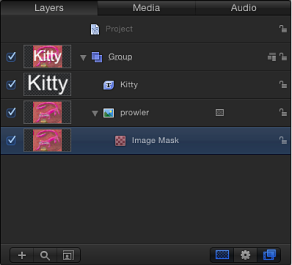
Drag the text to use as a mask to one of the following:
The Mask Source well in the Image Mask HUD
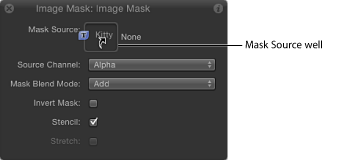
The Image Mask layer in the Layers list
The Image well in the Image Mask pane of the Inspector
The text masks the image.

For more information, see Using Shapes, Masks, and Paint Strokes.
Adding a Text Outline
To create a text outline, select the Outline checkbox in the Style pane of the Text Inspector.
Select the text.
In the Text Inspector, click Style to open the Style pane.
In the Outline controls, select the Outline checkbox.
The default outline color is red, with a width of one point.

Tip: Deselect the Face checkbox to display a text outline with no fill.
Editing Text Outlines
Use the Outline controls to soften the opacity or blur of a text outline, change the width of an outline, or to set and edit the fill of an outline.
For more information about adjusting text outlines using onscreen controls, see Working with Text Glyphs.
Note: The Outline fill controls—Color, Gradient, and Texture—are equivalent to the controls for the Face parameters. For information on using these controls, see Text Face Controls in the Style Pane.
Adding a Text Glow
To create a text glow, select the Glow activation checkbox in the Style pane of the Text Inspector.
Select the text.
In the Text Inspector, click Style to open the Style pane.
Select the Glow activation checkbox.
When selected the checkbox turns blue. The default text glow is yellow, with Scale and Opacity set to 100%, and Radius set to 0.

Note: To display only the text glow, deselect the Face parameter activation checkbox (and other active parameters).
Editing Text Glow
Use the Glow controls to soften the opacity or blur of the text glow, to change the size of the glow, or to set and edit the fill of a glow.
For more information about adjusting text glows using onscreen controls, see Working with Text Glyphs.
Note: The Glow “Fill with” options—Color, Gradient, and Texture—are equivalent to the controls for Face parameters. For information on using these controls, see Text Face Controls in the Style Pane.
Adding a Drop Shadow
To create a text drop shadow, select the Drop Shadow checkbox in the Style pane of the Text Inspector.
Select the text.
In the Text Inspector, click Style to open the Style pane.
In the Drop Shadow parameters, select the Drop Shadow checkbox.
The default black drop shadow is applied to the text.

Adjusting Drop Shadow Parameters
Use Drop Shadow controls to change the color or opacity of the shadow and to adjust the softness of the shadow. You can also change the distance the shadow is offset from the text, and adjust its angle.
For more information about adjusting text drop shadows using onscreen controls, see Working with Text Glyphs.
Note: The Shadow “Fill with” options—Color, Gradient, and Texture—are equivalent to the controls for Face parameters. For information on using these controls, see Text Face Controls in the Style Pane.