
Files you select in the Project navigator of the main window open in the editor area on the right. The editor that appears depends on the type of file that is selected. For example, if you select a source file, the file opens in the source editor, and if you select a property list file, the file opens in the property list editor. You can use the controls in the jump bar to configure an editor, display multiple editors, and change the layout of editors.
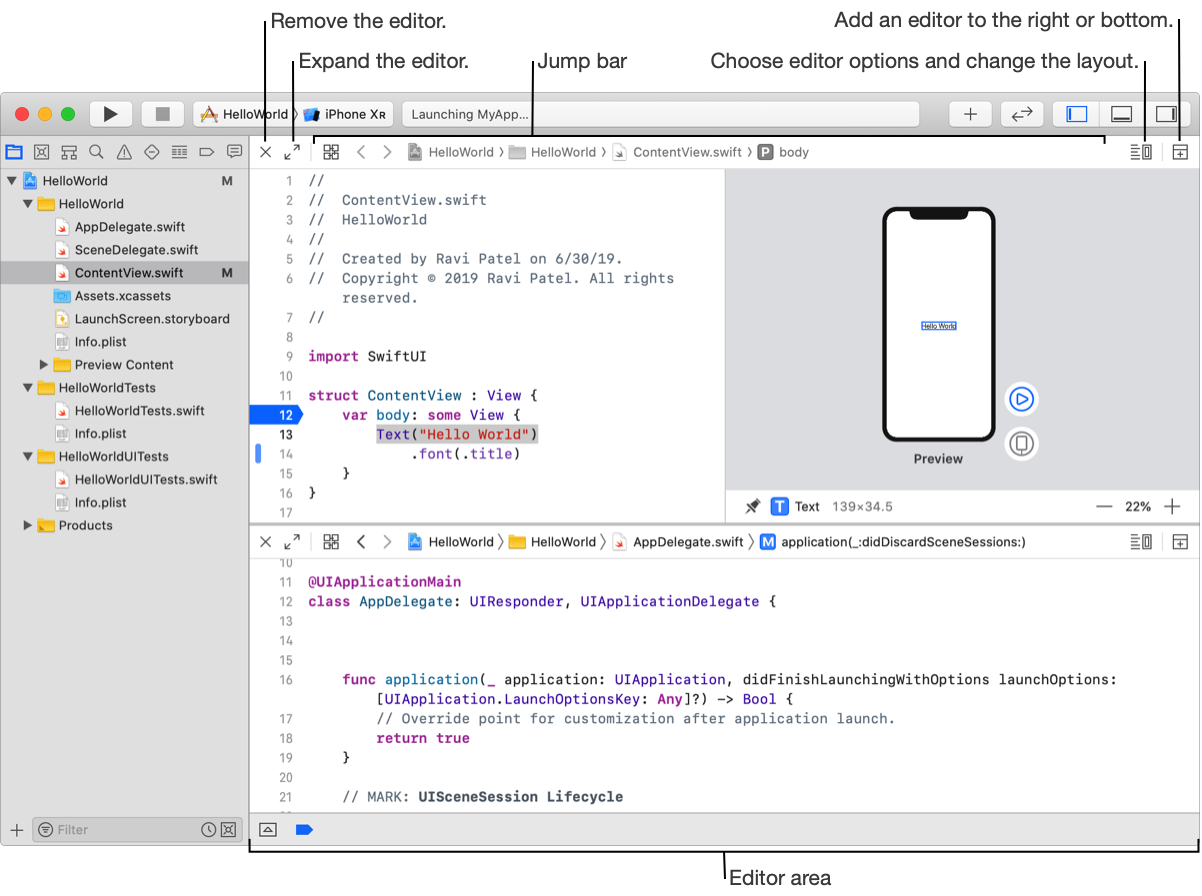
You can choose editor options depending on the file and type of editor from the Editor Options pop-up menu.
For files that have a related file:
To show an assistant editor, click the Editor Options button, then choose Assistant.
For files that open in the source editor:
To show or hide a minimap for navigating the file, click the Editor Options button, then choose Minimap.
To show or hide who made changes to the file, click the Editor Options button, then choose Authors.
To show or hide code coverage statistics, click the Editor Options button, then choose Code Coverage.
For files that use SwiftUI:
To show or hide a canvas containing a preview of the interface, click the Editor Options button, then choose Canvas.
To change the layout of the canvas, click the Editor Options button, then choose either Layout > Canvas on Right or Layout > Canvas on Bottom.
To show invisible characters, such as spaces and returns, click the Editor Options button, then choose Invisibles.
To hide all the editor options, click the Editor Options button, then choose Show Editor Only.
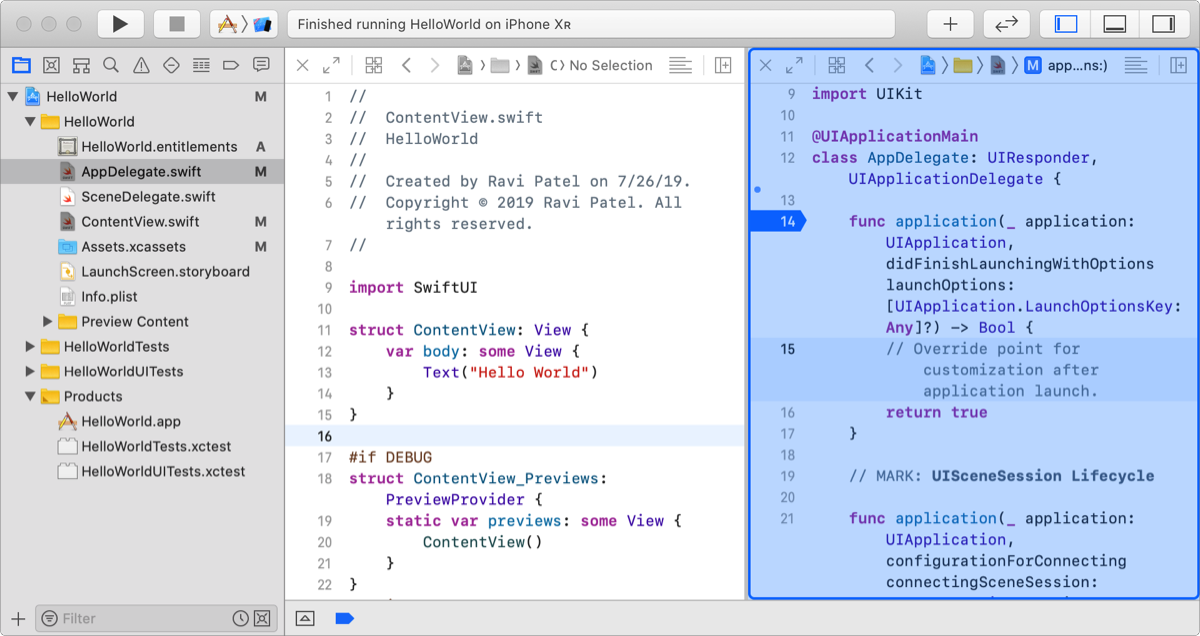
You can add an editor on the right or below another editor.
To add an editor on the right, click the Add Editor Below button in the upper-right corner.
To add an editor below, Option-click the Add Editor Below button in the upper-right corner.
Click the close button (X) in the upper-left corner.
When showing multiple editors, you can temporarily expand an editor to fill the entire editor area.
To expand or collapse an editor, click the double arrow button to the right of the close button.
When showing multiple editors, you can choose which area to open a file.
In the Project navigator, option-shift-click a file.
The default editor area, where the file will be opened, is highlighted in blue.
Hoover over the area where you want to open the file (the highlight follows the pointer), then click.
The file opens in that area instead.
The different editors that appear in the editor area are:
Editor | Description | ||||||||||
|---|---|---|---|---|---|---|---|---|---|---|---|
Asset catalog editor | Edit the contents of an asset catalog containing resources used in your app. | ||||||||||
Core Data mapping model editor | Graphically create and edit a mapping between an old Core Data store and a new one. | ||||||||||
Core Data model editor | Implement or modify your Core Data model. | ||||||||||
Interface Builder | Graphically create and edit a user interface file. | ||||||||||
Playground editor | Edit and execute Swift code in an interactive environment. | ||||||||||
Project editor | View and edit your project and target settings, such as build options, target architectures, and code signing characteristics. | ||||||||||
Property list editor | View and edit various types of property list files. To use the property list editor, go to Edit property lists. | ||||||||||
Rich text editor | Open, write, and edit rich text ( | ||||||||||
SceneKit particle system editor | Create and edit a system of particle emitters for SpriteKit. | ||||||||||
SceneKit scene editor | Create and edit a scene for SceneKit. | ||||||||||
Script editor | Create and edit AppleScript script files. | ||||||||||
Scripting dictionary editor | Create and edit the scripting definition ( | ||||||||||
Source editor | Write your code, set and enable or disable breakpoints, control program execution, and edit Markdown files. | ||||||||||
SpriteKit particle emitter editor | Create and edit particle emitters for SpriteKit. | ||||||||||
SpriteKit scene editor | Create and edit a scene for SpriteKit. | ||||||||||