Applying and Removing Filters
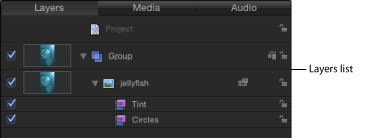
In Motion, filters modify image layers (still images, video clips, shapes, and so on). Filters are applied to image layers in the Canvas, Layers list, or Timeline. An applied filter is attached to its target layer (or a folder containing layers), nested underneath it in the Layer’s list and Timeline layers list.
Important: Some filters can cause a group to be rasterized. When a group is rasterized, it is converted into a bitmap image. In 2D groups, the application of any filter causes rasterization. In 3D groups, the application of specific filters causes rasterization. For more information on rasterization, see Filters and Rasterization.
Drag a filter from the Library stack to an object in the Canvas, Layers list, or Timeline.
Select an object or folder in the Canvas, Layers list, or Timeline, then select a filter from the Library stack and click Apply in the preview area.
Select an object in the Canvas, Layers list, or Timeline, then choose an option from Add Filter pop-up menu in the toolbar.

The filter is applied to an image layer.
Note: Although you can apply a filter from the Library to another effects object in the Layers list (a behavior or another filter), the filter affects the parent image layer, not the effects object.
Select a filter that’s been applied to an object in the Layers list or Timeline and do one of the following:
Choose Edit > Delete (or press Delete).
Choose Edit > Cut (or press Command-X).
Control-click the filter and choose Cut or Delete from the shortcut menu.
The filter is removed from the project.
Select a filter in the Filters Inspector and do one of the following:
Choose Edit > Delete (or press Delete).
Choose Edit > Cut (or press Command-X).
Applying Multiple Filters to an Object
You can apply any number of filters to an object (image layer or folder) in Motion. When multiple filters are applied to an object, they have a cumulative effect. In the Layers list and Timeline, multiple filters appear under the object they are applied to.

Select the image layer or folder to apply the filters to, Shift-select contiguous filters or Command-select noncontiguous filters in the Library, then click Apply.
Shift-select contiguous filters or Command-select noncontiguous filters in the Library, then drag them to the image layer or folder in the Layers list, Canvas, or Timeline.
The filters are applied to the image layer in the order they are selected. For example, if you select Echo, Brightness, and Bevel, in that order, and then apply them to an object, their stacking order in the Layers list is Bevel above Brightness above Echo. The stacking order of filters determines the order of application which, in turn, affects the result of the composite effect. For more information about managing filter order, see Reordering Filters.