On the Mac you want to run Xcode Server, set up Xcode Server and optionally, set an integration timeout, configure permissions for creating and viewing bots, and configure email notifications.
On your development Mac, add Xcode Server to your accounts and you can start creating bots.
Important: Although you can run Xcode Server on your development Mac, you should set up Xcode Server on another Mac that is reachable by all team members.
Choose Xcode > Preferences, then click Servers & Bots.
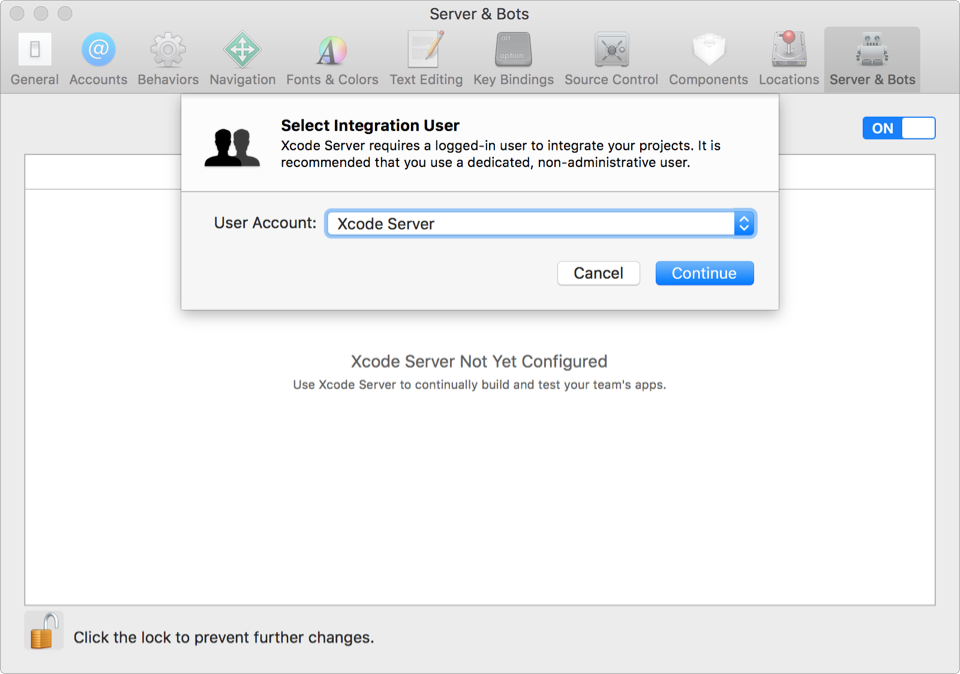
In the upper-right corner, click the switch to turn it from OFF to ON.
In the dialog that appears, enter the credentials for a system account with admin privileges, then click OK.
In the sheet that appears, choose an account for running Xcode Server from the pop-up menu.
To create a dedicated account on the Mac, choose “New user account” from the pop-up menu, then enter the account information in the fields that appear.
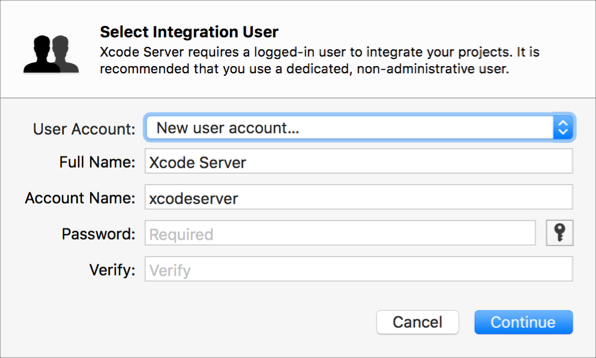
Click Continue.
Xcode configures the server.
If you choose a different account, click Log In on the next sheet, enter the password, then switch back to the account running Xcode.
When a green icon appears next to the system account—indicating that it is logged in and running the server—you are ready to create bots and perform integrations.
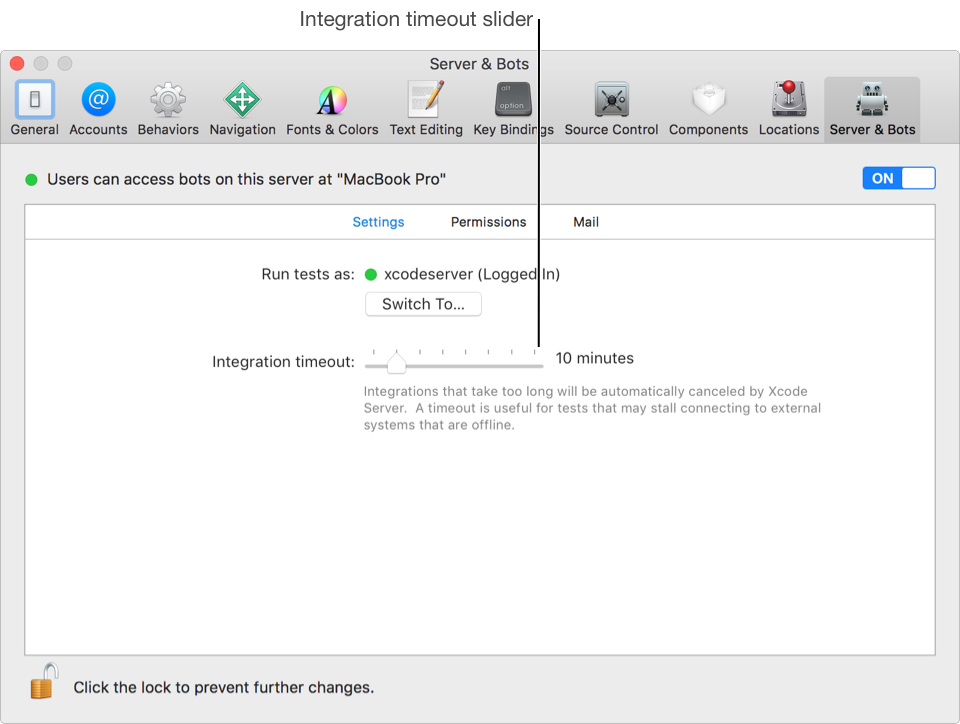
Set the amount of time that Xcode Server waits before cancelling an integration and sending an email notification.
Choose Xcode > Preferences, click Servers & Bots, then click Settings.
Drag the slider to set the integration timeout.
You can set user permissions for creating and viewing bots. The permissions for these actions can be the same or you can set them separately.
Choose Xcode > Preferences, click Servers & Bots, then click Permissions.
From the Create and View Bots pop-up menu, choose the users that have permission to create and view bots.
All users: All users and groups.
Logged in users: Only users that are logged in to the Mac running Xcode Server.
Only some users: Only the specified set of users and groups.
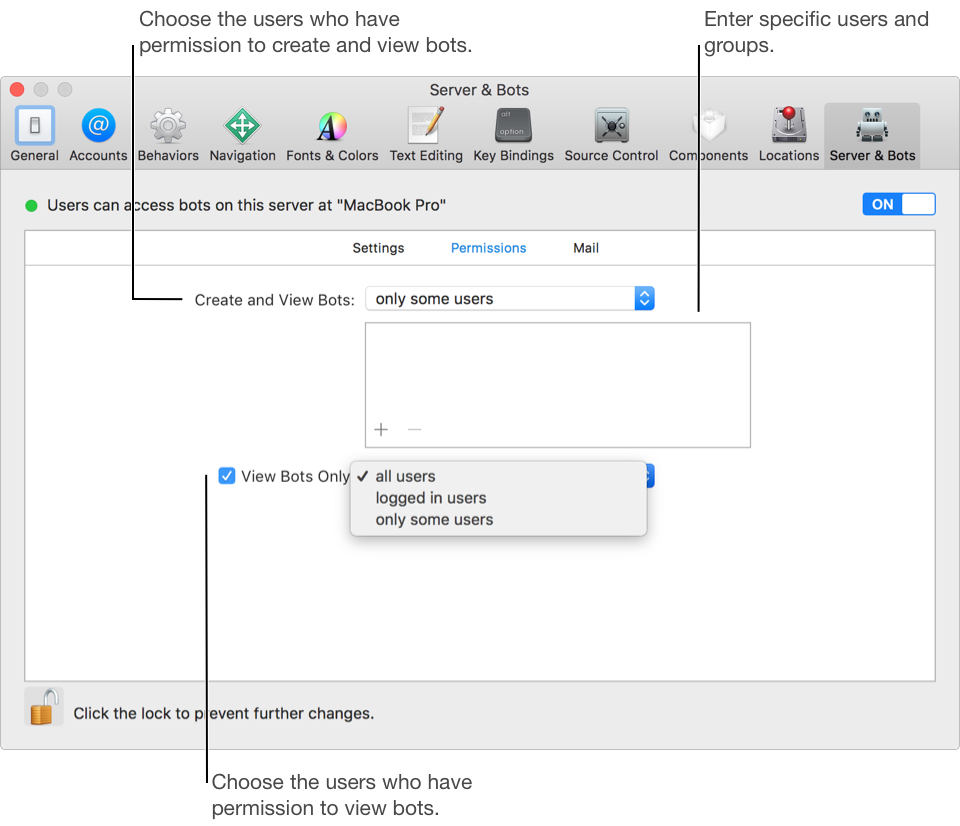
If you choose “only some users” (from the Create and View Bots pop-up menu), click the Add button (+) under the table to add the specific users.
From the View Bots Only pop-up menu, choose the users that can view bots only.
This menu only appears if you choose “logged in users” or “only some users” from the Create and View Bots pop-up menu.
If you choose “only some users” (from the View Bots Only pop-up menu), click the Add button (+) under the table to add the specific users.
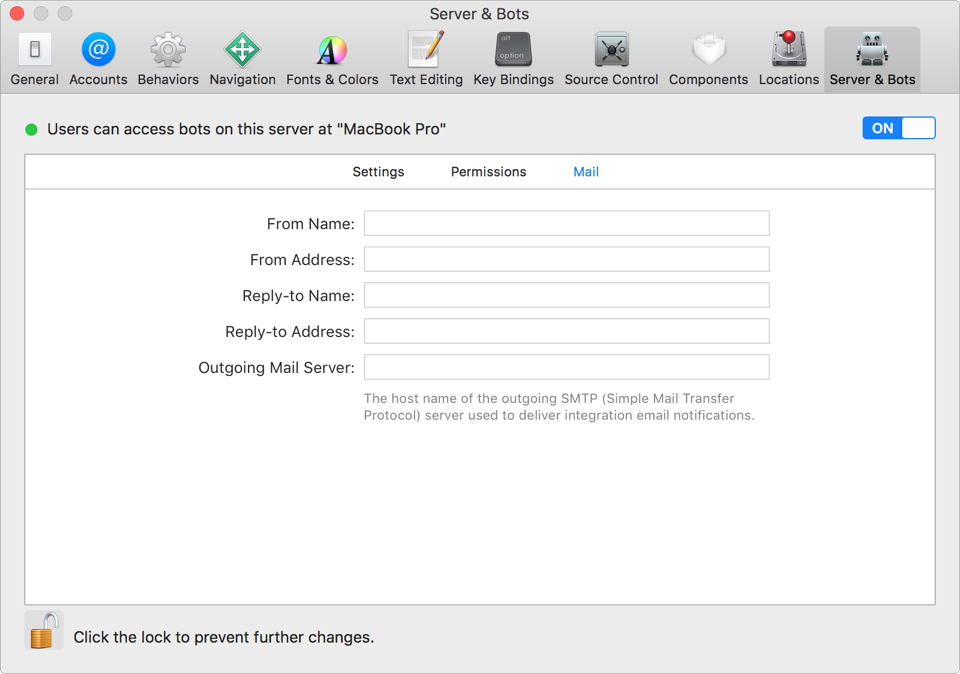
Choose Xcode > Preferences, click Servers & Bots, then click Mail.
Enter the email information needed to send notifications:
From Name: The name of the sender.
From Address: The email address of the sender.
Reply-to Name: The name of the person to reply to.
Reply-to Address: The email address of the person to reply to.
Outgoing Mail Server: The host name of the outgoing SMTP server to use.