
Use manual signing if you want to create your own provisioning profiles and signing certificates. For example, you use one build configuration to develop for the App Store and another build configuration to develop for distribution outside of the App Store. You’ll need to sign in to your developer account to perform some of the signing steps manually.
If you manually sign an app, “Automatically manage signing” is not a distribution signing option when you export an iOS, tvOS, or watchOS app or export a macOS app.
Note: Your program role determines what tasks you can perform in Xcode and the developer account.
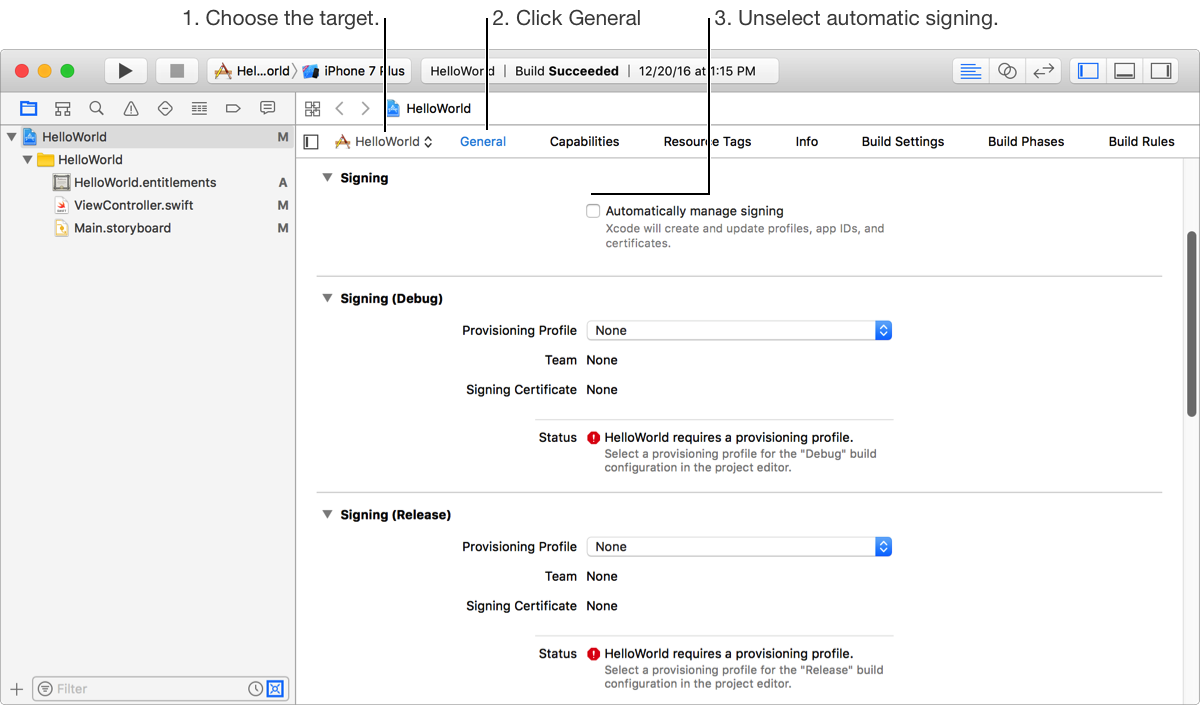
In the project editor, choose the target from the Project/Target pop-up menu.
Click General and expand the disclosure triangle next to Signing to reveal the settings.
Unselect "Automatically manage signing".
A Signing section appears for each build configuration—for example, the default Debug and Release build configurations.
Note: If the target doesn’t use a provisioning profile (for example, a framework), choose a team from the Team pop-up menu in the build configuration area.
From the Provisioning Profile pop-up menu (in the Signing section of the build configuration you want to use), choose a custom provisioning profile.
The menu contains all custom provisioning profiles for all your teams that match the target’s bundle ID. The menu may contain expired and invalid provisioning profiles—for example, a provisioning profile with an App ID that changed in your developer account.
If the provisioning profile you want to use doesn’t appear in the menu, you can either download the provisioning profile or import the provisioning profile.
After you create a custom provisioning profile in your developer account, download it directly in Xcode when you set the provisioning profile.
From the Provisioning Profile pop-up menu (in the Signing section of the build configuration you want to use), choose Download Profile.
In the dialog that appears, select a provisioning profile in the left column.
If a cloud icon appears next to the provisioning profile name, this profile hasn’t been installed yet.
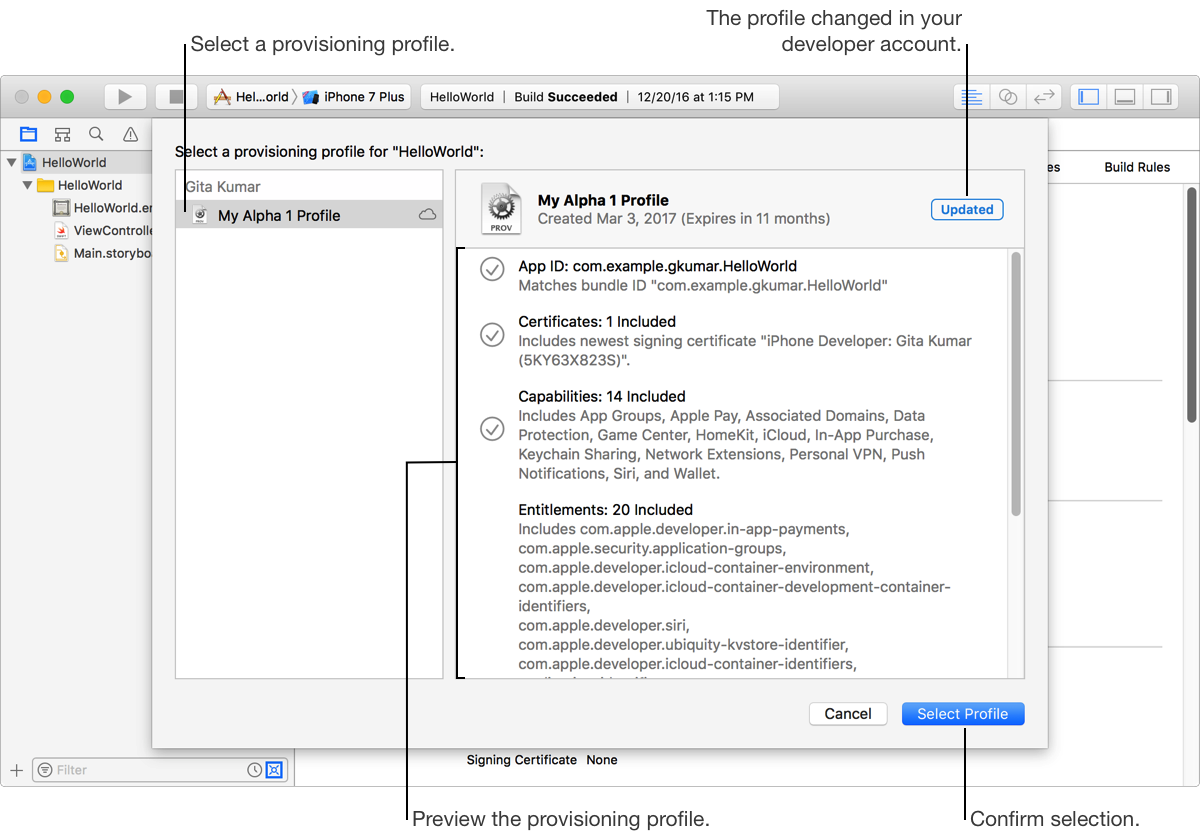
On the right, preview the contents of the provisioning profile.
If the provisioning profile in your developer account is more recent, an Updated badge appears in the upper-right corner.
Click Select Profile.
Alternatively, Download manual provisioning profiles using Accounts preferences.
From the Provisioning Profile pop-menu (in the Signing section of the build configuration you want to use), choose Import Profile.
In the sheet that appears, select the provisioning profile, and click Open.
A provisioning profile has a .mobileprovision filename extension. For macOS apps, it has a .provisionprofile filename extension.
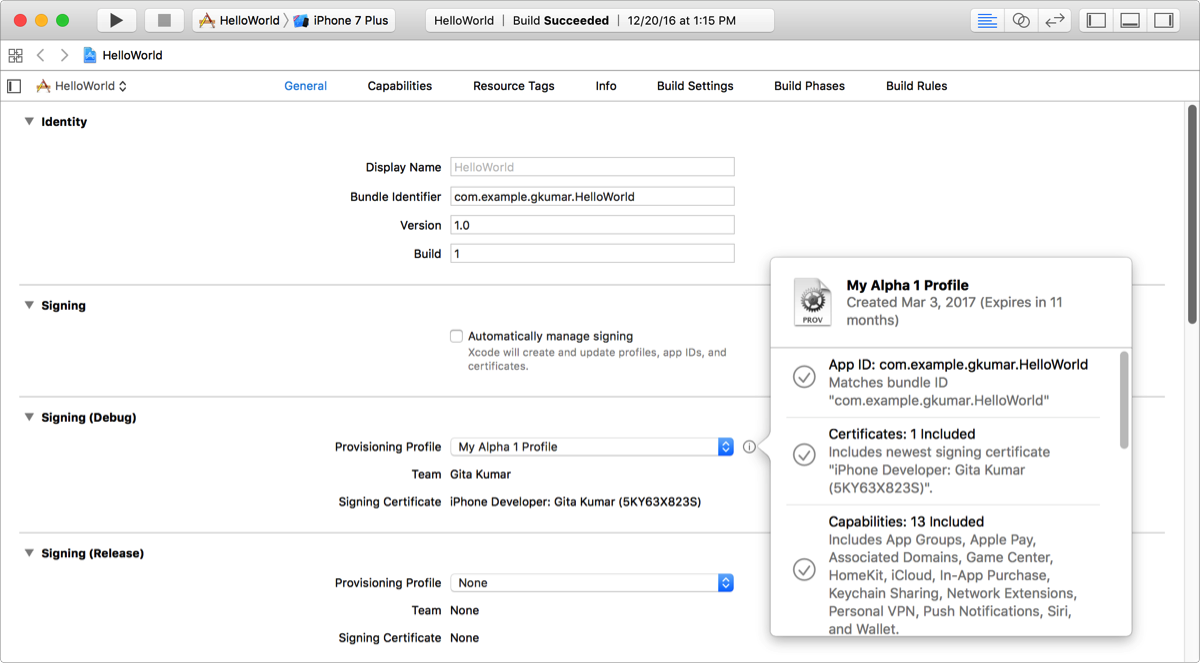
If successful, the Team and Signing Certificate change to match the signing assets in the provisioning profile. You can click the information icon to view the provisioning profile details.
If unsuccessful, read the errors under Status and fix the problem before running your app. For example, if you added capabilities to your target, those capabilities need to be enabled for the App ID specified in the provisioning profile.
Next to the provisioning profile pop-up menu, click the information icon.
In the dialog that appears, you can view the details about the provisioning profile: the App ID, certificates, entitlements, and devices.
To create a provisioning profile in your developer account, read “Maintaining Identifiers, Devices, and Profiles” in App Distribution Guide.
Important: All targets in a bundle should use the same signing certificate.