You use Interface Builder, the visual design editor that’s integrated into Xcode, to lay out your app’s user interface and make connections to your code.
In the Project navigator, select a user interface file and the file opens in Interface Builder in the editor area. The views appear in the canvas area and the structure of the underlying objects appear in the outline view. If you create your project from a template, the Main.storyboard file contains default view controllers and views that will appear when your app first launches.
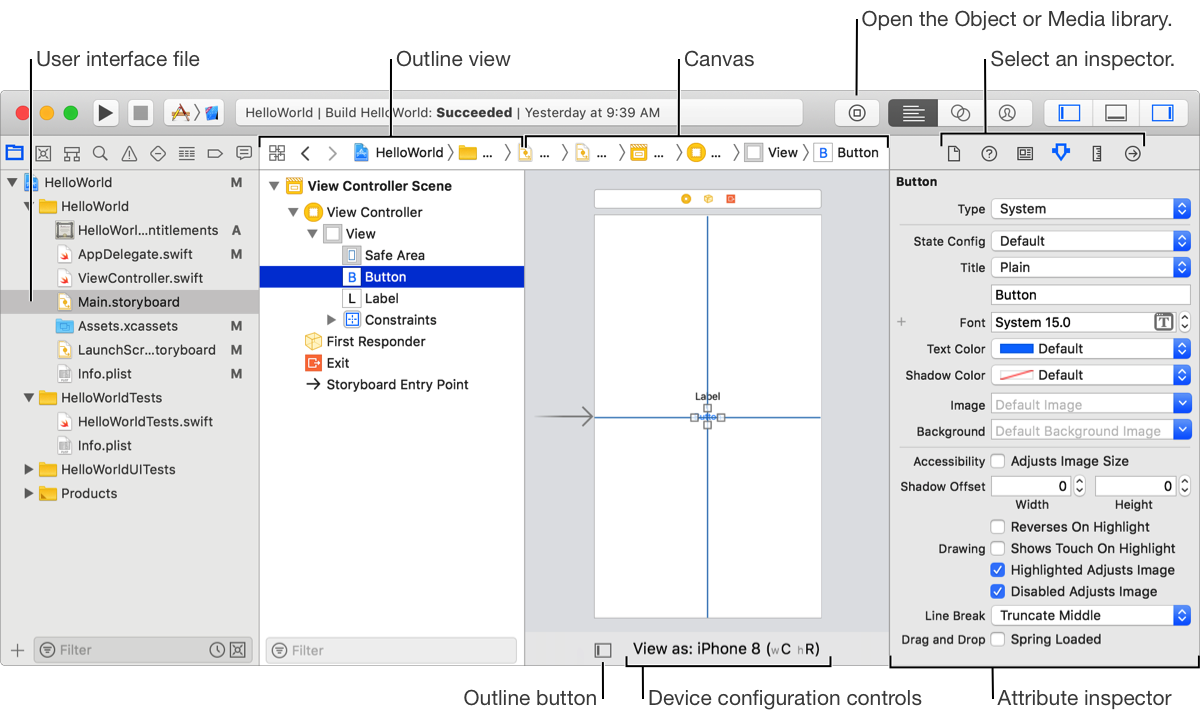
To hide or show the outline view, click the Document Outline button (![]() ) at the lower-left corner of the canvas or choose Editor > Hide Document Outline or Editor > Show Document Outline.
) at the lower-left corner of the canvas or choose Editor > Hide Document Outline or Editor > Show Document Outline.
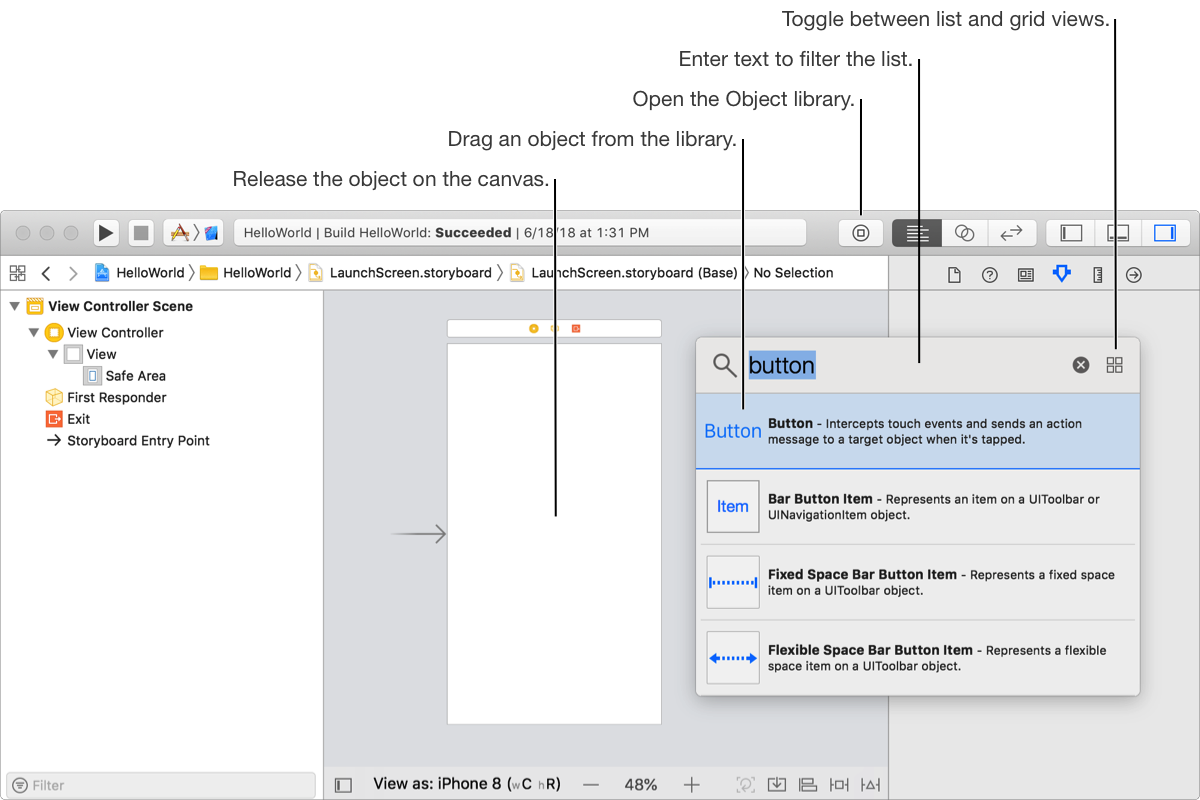
Drag objects from the Object library (![]() ) or media files from the Media library (
) or media files from the Media library (![]() ) to the canvas where you lay out your user interface. You can also add custom objects to the interface file.
) to the canvas where you lay out your user interface. You can also add custom objects to the interface file.
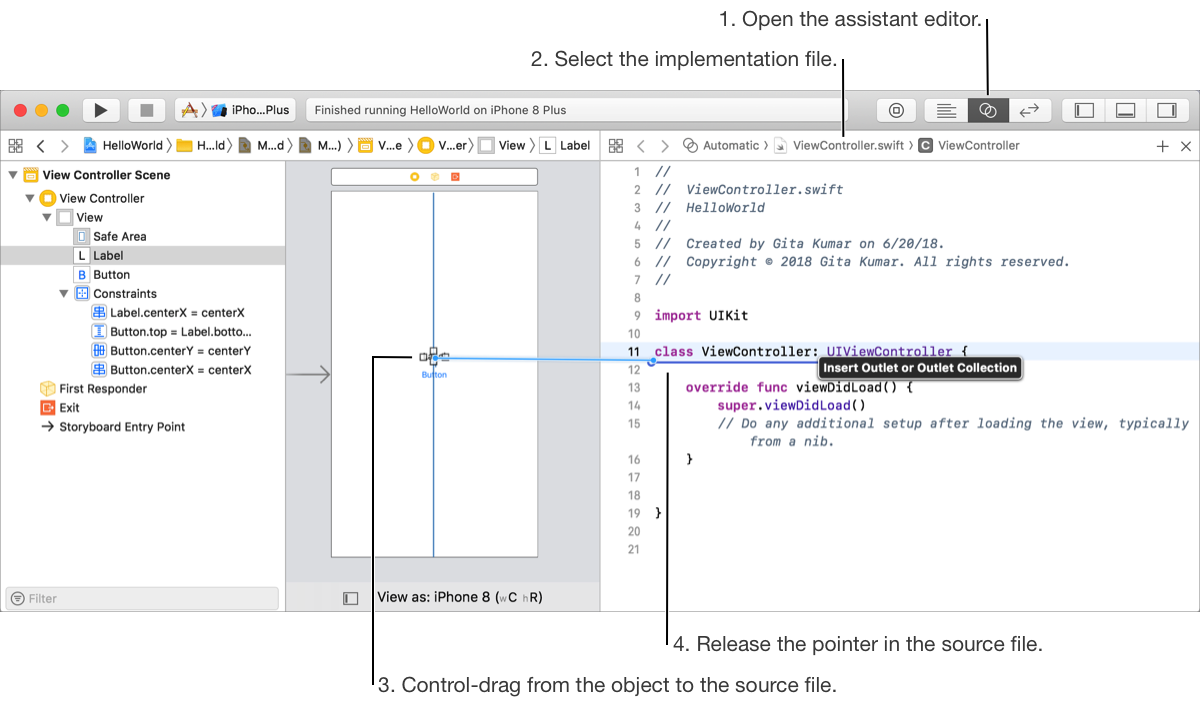
As you add objects to the user interface, you can write the code that implements their behavior in the assistant editor. Use Interface Builder to visually connect the user interface objects to your code.
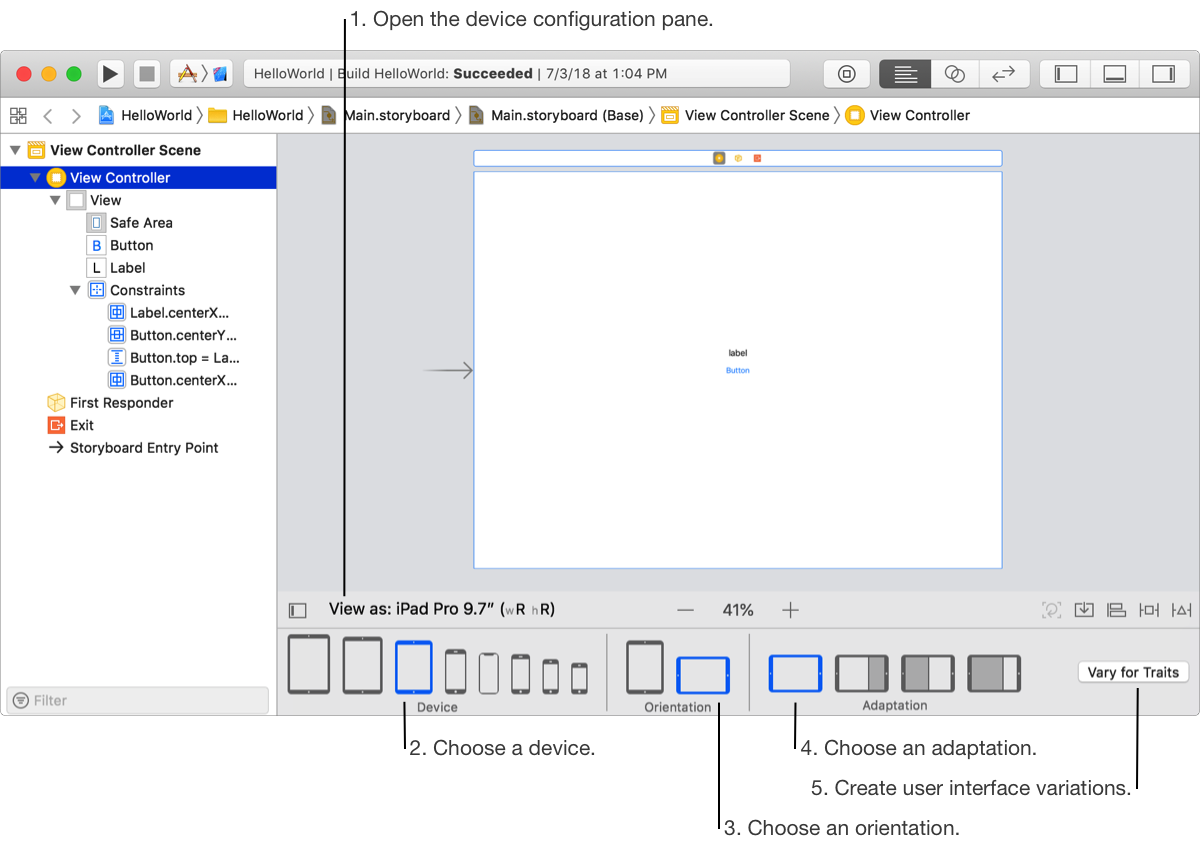
Start by viewing the user interface using different device configurations that you expect most users running your app will have. Then create variations of the user interface as needed.
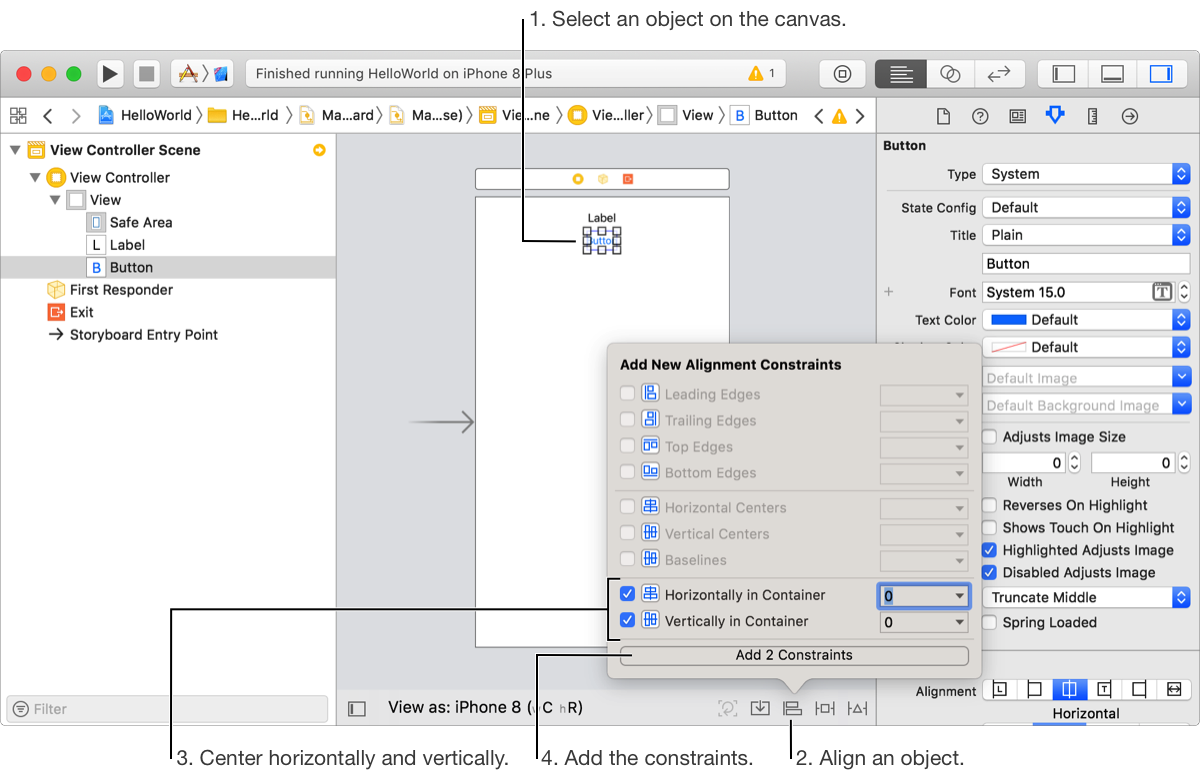
When an object in your user interface changes its size or position, layout constraints cause that object and its neighboring objects to adjust their sizes and positions automatically. Layout constraints are represented by blue lines on the canvas.
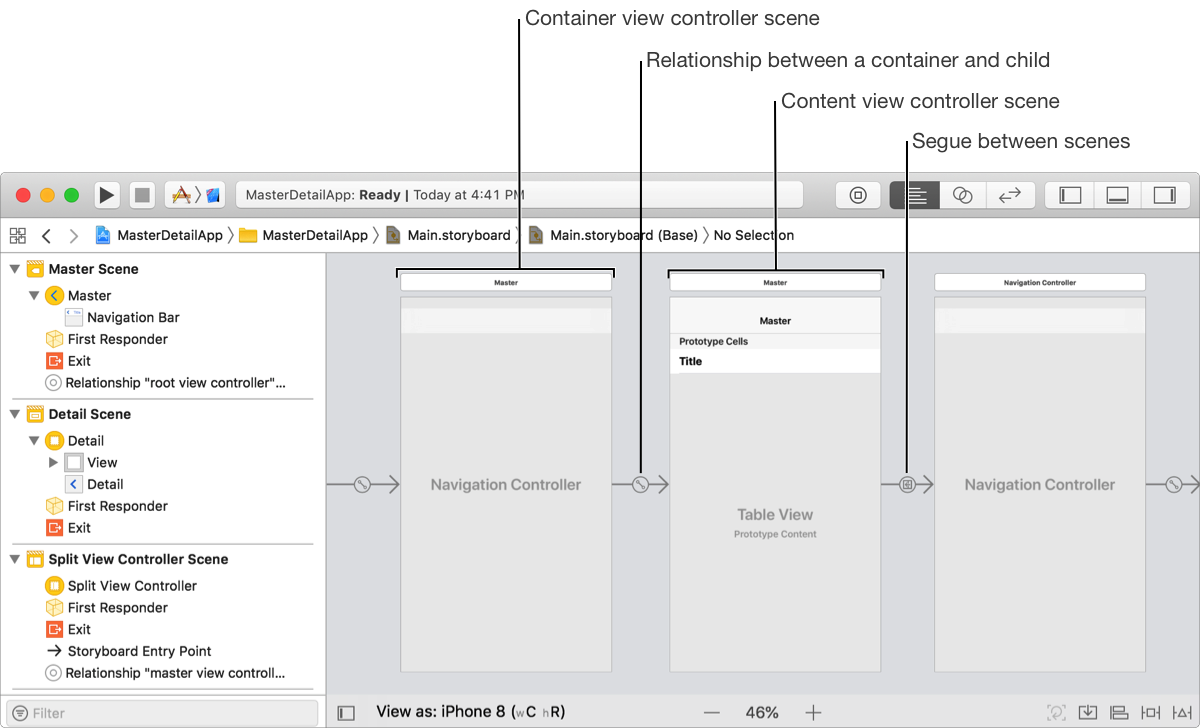
Graphically lay out the user’s path through your app in a storyboard consisting of scenes, segues that connect the scenes, and controls to trigger the segues.
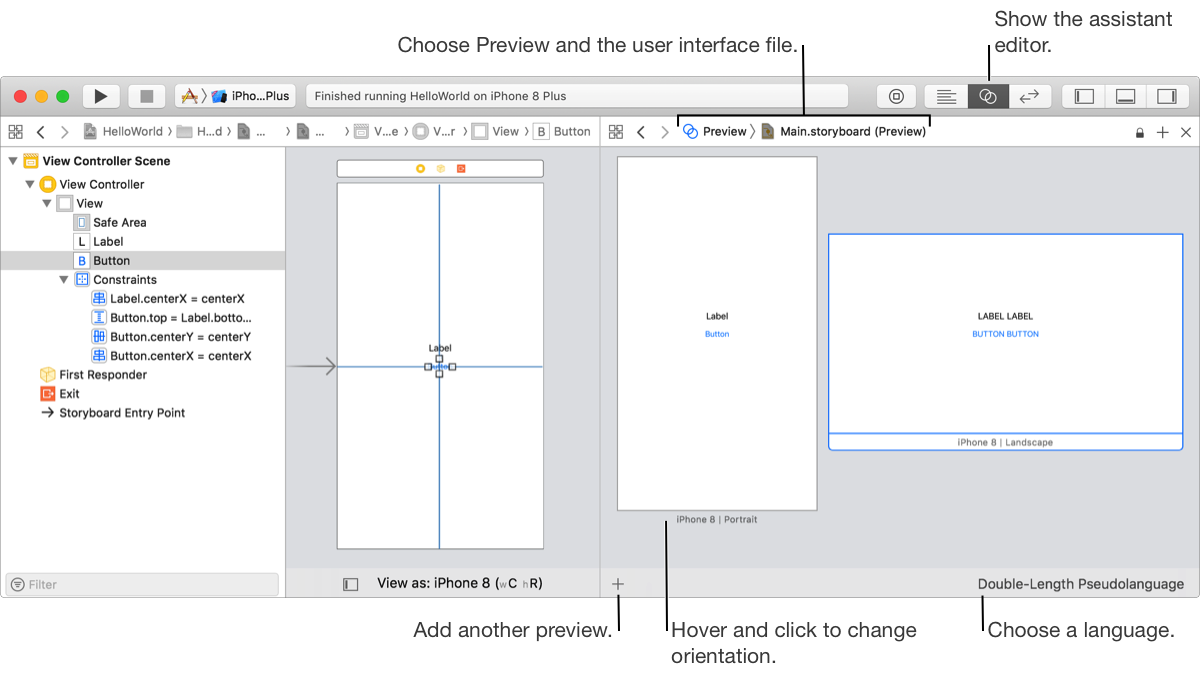
Preview your app’s user interface layout before building and running your app. You can preview different device families and localizations too.