
As with normal projects, you can add 2D or 3D elements to 360° projects to create complex scenes.
The same layering rules that govern normal projects apply to 360° projects, but there are some additional considerations when integrating layers with 360° projects:
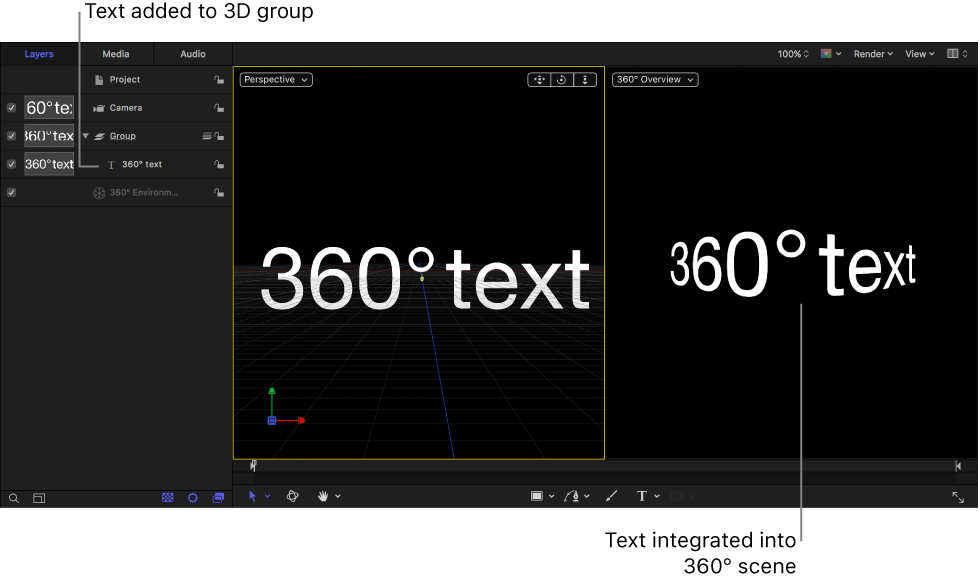
You can add any type of object to a 3D group in a 360° project, including 2D or 3D text, replicators, flat images, lights, and so on. Once added, objects are integrated correctly into the scene—locked in place as you pan the 360° video.
You cannot add objects (such as shapes or text) to a 360° environment. However, you can add image-based media and filters to a 360° environment.
The tools in the canvas toolbar (such as the Text tool or the Shape tool) are not available while the 360° Overview viewport is active.
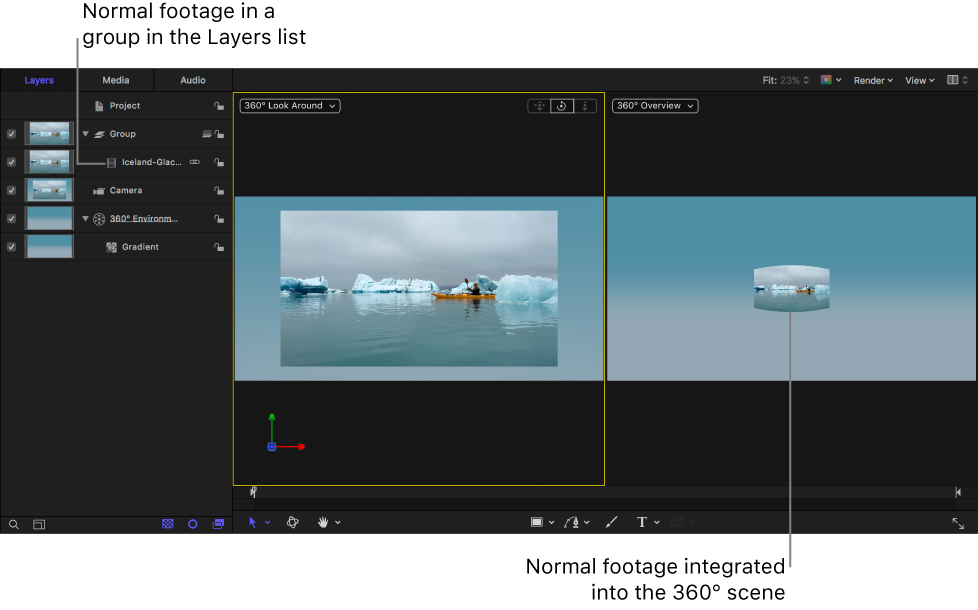
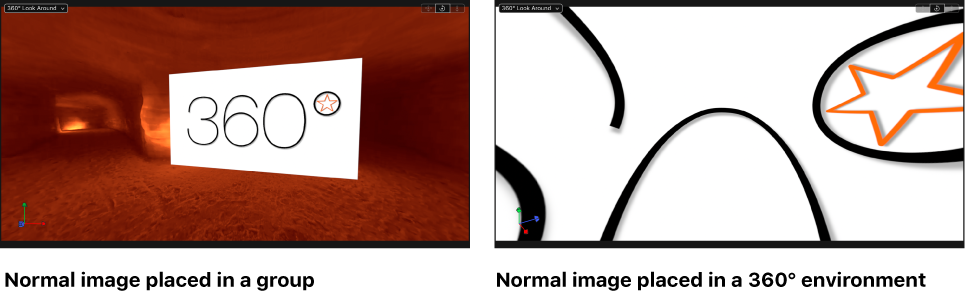
Nonequirectangular images such as logos or standard video clips should be placed in a normal 3D group, where they can be positioned in 360° space as a flat element. Adding such images to a 360° environment stretches the image to fill the entire 360° sphere, causing it to look distorted.
You can convert a normal image into an equirectangular image so it can be placed directly in a 360° environment without distortion. See Create an equirectangular image.
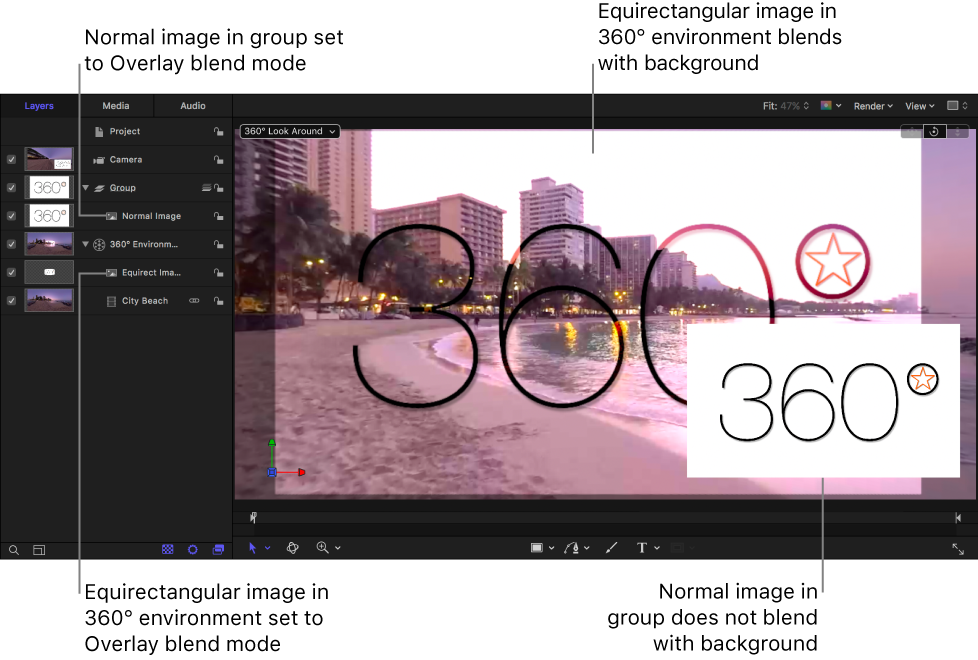
The Pass Through blend mode is not available for 360° environments. Pass Through (the default blend mode for groups) lets each layer in a group blend with all layers and groups that appear underneath it in the Layers list—including layers in other groups. In a 360° project, only layers contained in the same 360° environment will blend together.
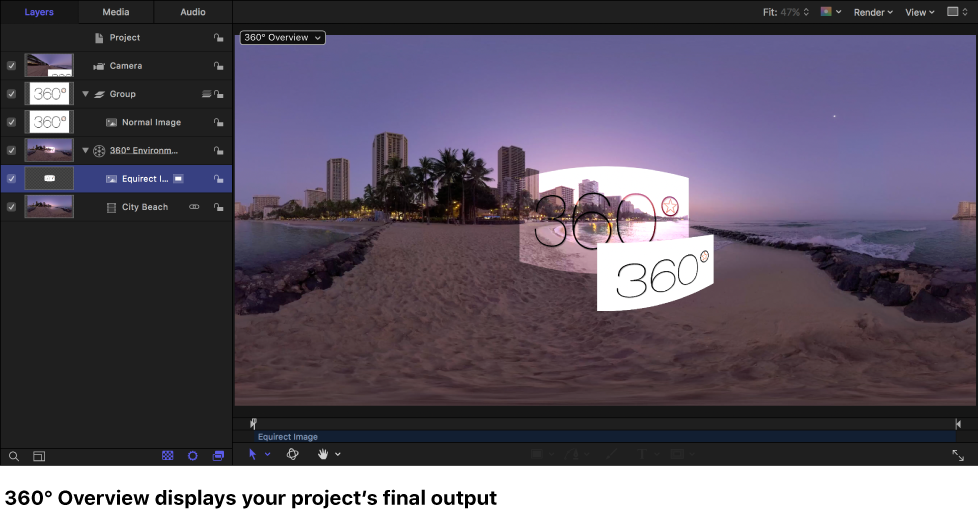
In certain situations, images in a 360° Look Around viewport may not represent your project’s final output. When in doubt, choose 360° Overview from the Camera pop-up menu in the canvas to display your project.
You can’t add a mask directly to 360° footage in a 360° environment. You can, however, use a clone layer to mask 360° footage. (Adding a clone layer is only recommended when masking 360° images. Cloning other objects may yield unexpected results.)
Because you’re working on the “inside” of a sphere, you must be aware of what’s above, behind, and below you in the project. Z space plays a much bigger role than in a normal project—you’re always working in 3D in a 360° project. It may be helpful to think of the center of the sphere as both the viewer’s head and as the main camera position.
To correctly place elements into the scene, you may need to use camera views and canvas layouts that you wouldn’t normally use (such as top or bottom camera views or more than two viewports).
Objects added to a 360° project cannot follow the movement of a VR headset. If you add an object to your 360° project, it’s integrated into the scene—locked in place on the inner surface of the sphere as you pan the 360° video. As in normal projects, however, you can animate objects (using keyframes or behaviors).
Although you can add any generator to a 360° environment, most generators do not project correctly and will appear with visible seams or other unwanted distortions. Generators may also appear at very low resolution. To avoid these issues, use 360°-compatible generators.
When working with 3D text, keep in mind that if you adjust the 3D text’s Lighting parameters to match the current view, the light will continue to come from the same direction when you rotate the camera or change the scene.
For more information about working in 3D, see 3D compositing overview. For more information on working with multiple viewports and different camera views, see About cameras and views.