Track Points Workflow
The Track Points behavior (located in the Shape Behaviors category) is designed for use with shapes, masks, and paint strokes. Use the Track points behavior in the following ways:
To track the control points of a shape or mask to a clip (for example, when rotoscoping)
To apply tracking data from another tracking analysis to the control points of a shape or mask
To apply the animation of an object to the control points of a shape or mask
Note: To apply the analyzed movement of an object to a shape or mask as a whole (not to the shape’s control points), use the Match Move behavior.
For a full description of the Track Points parameters, see Track Points Controls.
Tracking Control Points to a Clip
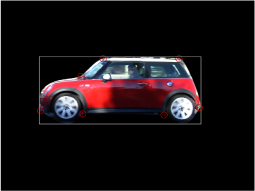
This section provides a brief overview of using the Track Points behavior to track the vertices of a shape or mask to a clip. In the following example, the Track Points behavior is applied to a loose mask of seven control points isolating a car in a background clip.
With a background clip visible in the Canvas, use a mask tool to isolate part of the background clip.
For more information on working with masks, see Masking a Layer or Group.
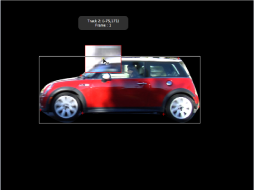
Select the mask object, then choose Shape > Track Points from the Add Behavior pop-up menu in the toolbar.
The behavior is added to the mask object, and trackers appear for each control point on the shape. The trackers are ordered in the same order that the shape was drawn: Control Point 1 is Track 1, Control Point 2 is Track 2, and so on.
Drag the trackers to fine-tune their position on the reference patterns.
As you drag, a magnified inset view of the area around the tracker appears.
To disable a tracker, deselect its checkbox in the Behaviors Inspector.
Note: Control points without an associated tracker are not modified.
Click the Analyze button in the HUD or Behaviors Inspector.
The mask control points are tracked to the reference patterns.
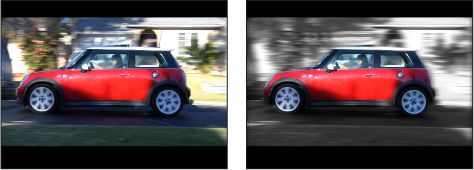
In this example, a mask is tracked to a moving car so the car can be isolated from the rest of the clip. The illustration on the left shows the original unmodified clip. In the illustration on the right, the tracked mask isolates the car (and can be seen as the desaturated background), allowing separate effects to be applied to the car and its background even though they are part of the same image. The mask protects the car from the effects of the heavy blur and desaturation.
As with all behaviors, you can drag or copy (Option-drag) a Track Points behavior to a new shape in the Layers list. When you apply the behavior to a new shape, the trackers are applied to the control points of the new shape. If the new shape has more control points than the originally tracked shape, only the original track points are applied. For example, if the originally tracked shape has three control points, and the new shape has five control points, trackers are applied to the first three control points of the new shape. If the new shape has fewer control points than the originally tracked shape, trackers are applied to the existing points on the new shape.
Note: Paint strokes usually have a large number of control points. Simplify a paint stroke by deleting or disabling control points before applying a Track Points behavior to the stroke. To track the stroke as a whole, rather than by its control points, use the Match Move behavior.
Using a Shape Object as the Animation Source
This section provides a brief overview of using the Track Points behavior to apply the animation of an object (another shape, in this example) to the vertices of a shape or mask. Applying the animation of one animated shape to another is an easy way to create fun, complimentary animations in which the objects appear to play with each other.
For this workflow, your project must contain an object animated with keyframes or behaviors.
In a project that contains two shapes, animate one of the shapes using keyframes or a Basic Motion behavior.
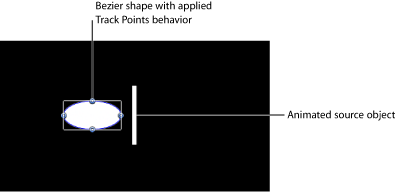
In this example, a simple line shape is animated with the Spin behavior.
For more information about animating with keyframes, see Keyframes and Curves. For more information about Basic Motion behaviors, see Basic Motion Behaviors.
Apply the Track Points behavior to a nonanimated shape.
The Track Points behavior inherits the animation data of the animated object closest to it in the Layers list. (A thumbnail of the animated object appears in the Source well of the Track Points Behaviors Inspector.)
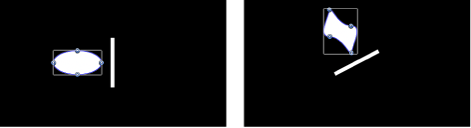
In this example, the Track Points behavior is applied to a Bezier shape.
Note: To reference another animated object, drag that object to the Track Points behavior’s Source well or to the behavior in the Layers list.
In the Behaviors Inspector, choose Attach to Source from the Transform pop-up menu.
The spinning animation of the line is applied to the Bezier shape. The Bezier shape changes form because the vertex tangents match the transformation of the source animation.
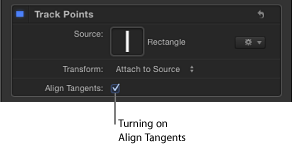
To align the tangents to the transformation of the source object, select the Align Tangents checkbox in the Behaviors Inspector.
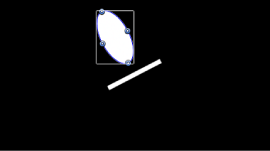
The spinning animation of the line is applied to the Bezier shape. The tangents remain aligned at their original angles along the shape.
Note: By default, Mimic Source is chosen from the Transform pop-up menu. For more information on the Transform pop-up menu, see Track Points Controls.