Modifying Generators
In this section, the Checkerboard generator is used to illustrate how to edit and animate a generator using the HUD. After you customize a generator, you can save it to the Library for use in future projects. This section also briefly discusses applying Parameter behaviors to the parameters of a generator.
Editing Generators
In this section, the Checkerboard generator parameters are edited to modify the appearance of the default generator.
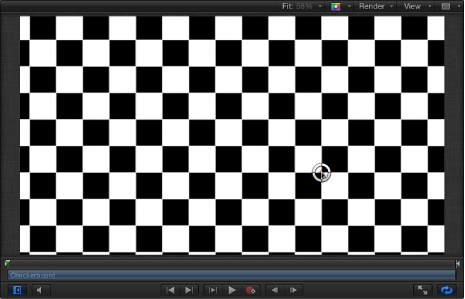
Add the Checkerboard generator to your project.
Note: For information on adding a generator to your project, see Adding a Generator.
The default Checkerboard generator appears in the Canvas, Layers list, and Timeline, and the HUD appears.
The Checkerboard generator HUD contains controls for editing and animating the checkerboard, such as Opacity, Blend Mode, Width, Height, Color, Size (of the checkers), and Contrast. The only Checkerboard parameters that do not appear in the HUD are Center and Pixel Aspect Ratio (which appear in the Generator Inspector).
In the HUD, click the Color 1 color well and select a color from the Colors window.
Color 1 is replaced with the new color.
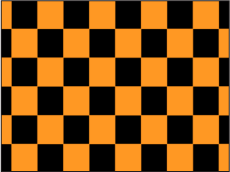
Click the Color 2 color well and select a color from the Colors window.
Color 2 is replaced with the new color.
Drag the Size slider to change the size of the squares.
The checker size is 80 by default. Drag the slider to the left to make smaller checkers, and to the right to make larger checkers.
To change the size of the generator (rather than the size of the checkers), adjust the Width and Height parameters.
Note: You can also use standard object scaling-methods—the onscreen transform controls or the Scale parameter in the Properties Inspector. However, scaling generators in this manner changes the size of the checkers and has a greater impact on your system’s performance.
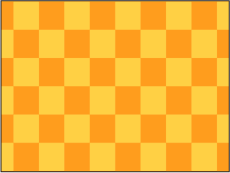
Drag the Contrast slider to adjust the contrast between Color 1 and Color 2.
Although the checkerboard pattern does not change, adjusting the Contrast parameter can create dramatically different textures.

Editing Generators Using Onscreen Controls
The onscreen object transform tools, such as Transform, Anchor Point, Drop Shadow, and so on, can be used to modify a nontext generator. Changes made to the generator using these tools are reflected in the Properties Inspector. The Adjust Item tool is the only tool that directly modifies a generator parameter, usually the Center or Offset parameter. These changes are reflected in the Generator Inspector.
For more information on the transform tools, see 2D Transform Tools.
Select the generator to modify.
Open the 2D transform tools pop-up menu in the toolbar and choose the Adjust Item tool (the last tool in the list).

In the center of the Canvas, the center onscreen control appears.
Drag the control to a new position.
The Offset or Center parameter is adjusted accordingly in the Generator Inspector.
Animating Generators
Although most generators create static images, you can animate the parameters of a generator to create a moving texture over time. This section discusses using the Generator Inspector to animate the Checkerboard generator from the above example.
Note: You can also animate the parameters of an animated generator.
For information on using Parameter behaviors to animate a generator, see Applying Behaviors to Generators.
Move the playhead to the frame where you want to begin the animation.
Press A to turn on keyframe animation recording.
With the generator selected, set the initial parameter values in the Generator Inspector:
Drag the Size slider to set the initial checker size.
Click the color wells and pick the initial colors.
Drag the Contrast slider to set the initial contrast value.
Drag a Center parameter value slider to set the initial Center value.
The value slider on the left of the Center parameter controls the X position of the checkers, and the value slider on the right controls the Y position. To animate checkers horizontally, use the left value slider. To animate checkers vertically, use the right slider.
Move the playhead to the frame where you want to create the next keyframe.
In the Generator Inspector, change the generator Size, Colors, and Contrast parameter values.
Play the project (press the Space bar).
The animated generator parameters create a moving, changing texture. If you’re satisfied with the result, press A again to turn off keyframe recording.

Saving Modified Generators
After you modify or animate the parameters of a generator, you can save the generator to the Library. For organizational purposes, name objects that you save to the Library with a descriptive title.
To rename the modified generator, double-click the generator name in the Layers list.
Type the new generator name, then press Return.
In the Library, navigate to the Generators category.
Note: You can also save the modified generator in another category, such as Favorites.
From the Layers list, drag the modified generator to the Library stack.
The modified generator is saved in the Generators category and appears organized alphabetically in the stack. Custom items saved in the Library are identified with a user badge in the lower-right corner of the icon.

Sharing Saved Generators
By default, any generator that you save in the Generators category in the Library is stored in your user folder: /Users/username/Library/Application Support/Motion/Library/Generators/. To share custom presets, templates, layouts, behaviors, filters, or Library content with another user, the other user must copy the files into his or her home directory.
Applying Behaviors to Generators
As with all other objects in Motion, you can apply Basic Motion, Parameter, or Simulation behaviors to a generator. This section describes applying the Randomize parameter behavior to the Opacity parameter of the Star generator to create a flickering star.
Add the Star generator to your project and display the Generator Inspector.
In the Generator Inspector, move the pointer over the Spike Opacity parameter row.
The Animation menu (an inverted triangle) appears on the right side of the parameter row.
Click the Animation menu for the Spike Opacity parameter, then choose Randomize from the Add Parameter Behavior submenu.

The Randomize parameter behavior is applied to the Spike Opacity parameter, and the Behaviors Inspector is displayed so you can adjust the Randomize parameters.
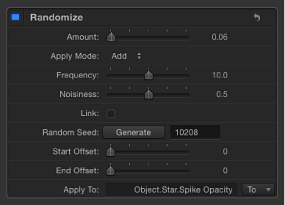
In the Behaviors Inspector, drag the Amount slider to the right to increase the randomization effect.
In the transport controls (under the Canvas), click the Play button (or press the Space bar).
Because the Randomize parameter behavior is applied to the opacity of the star spikes, the star appears to flicker.
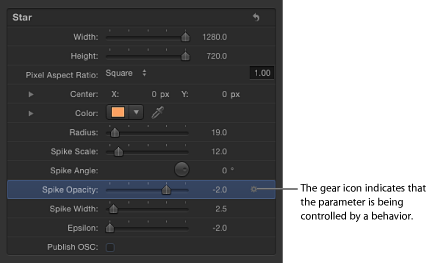
When a Parameter behavior is applied to a parameter of a generator, a behavior icon (a gear) appears in the Generator Inspector in the row for the affected parameter. In this example, the behavior icon appears in the Spike Opacity parameter row.
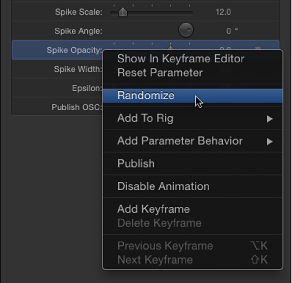
To increase or decrease the effect of the flicker, you can modify the Randomize parameters (in the Behaviors Inspector). To jump to the Randomize parameters from the Generator Inspector, control-click Spike Opacity parameter name, then choose Randomize from the shortcut menu.
For more information on using Parameter behaviors, see Parameter Behaviors.
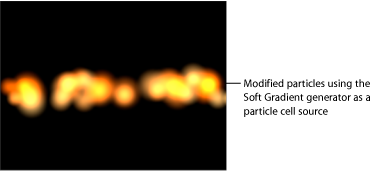
Using Generators as Particle Cell Sources
Like other objects, generators can be used as a source for particle cells. The following example uses the Soft Gradient generator. To give your particle system more flexibility and reduce processing strain on your computer, scale the generator down in the Generator Inspector.
Add the Soft Gradient generator to your project.
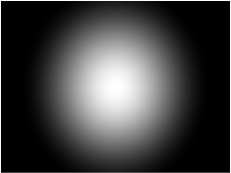
In the HUD or Generator Inspector, reduce the Radius value.
This example uses a Radius value of 40.
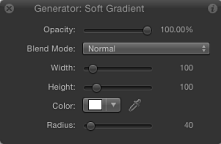
Reduce the Width and Height values.
In this example, both are set to 100. The size of the gradient and its bounding box are scaled down.

With the generator still selected, do one of the following:
Press E.
In the toolbar, click the Make Particles button.
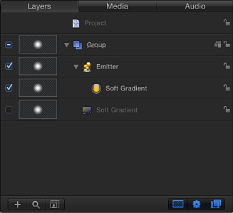
After you add an emitter to the project, the new “Emitter” object is selected In the Layers list; a duplicate of the generator object (the Soft Gradient) becomes an emitter cell for the new particle system; and the original source object (the Soft Gradient generator object) is disabled.
In the Canvas, the emitter bounding box appears. You can transform the bounding box using the onscreen controls or controls in the Inspector. The particle appears in the Canvas in the same location as the original object. Although it appears as if the particle is selected, the bounding box for the emitter is selected.
Press the Space bar to play the project.
Soft gradient particles are emitted.
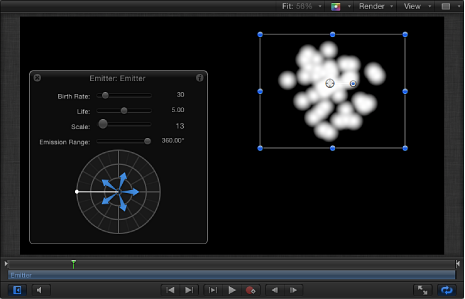
You can change the particle color, emitter shape, scale, emission angle, birth rate, and so on in the Emitter Inspector or HUD. For more information on working with particles, see Working with Particles.