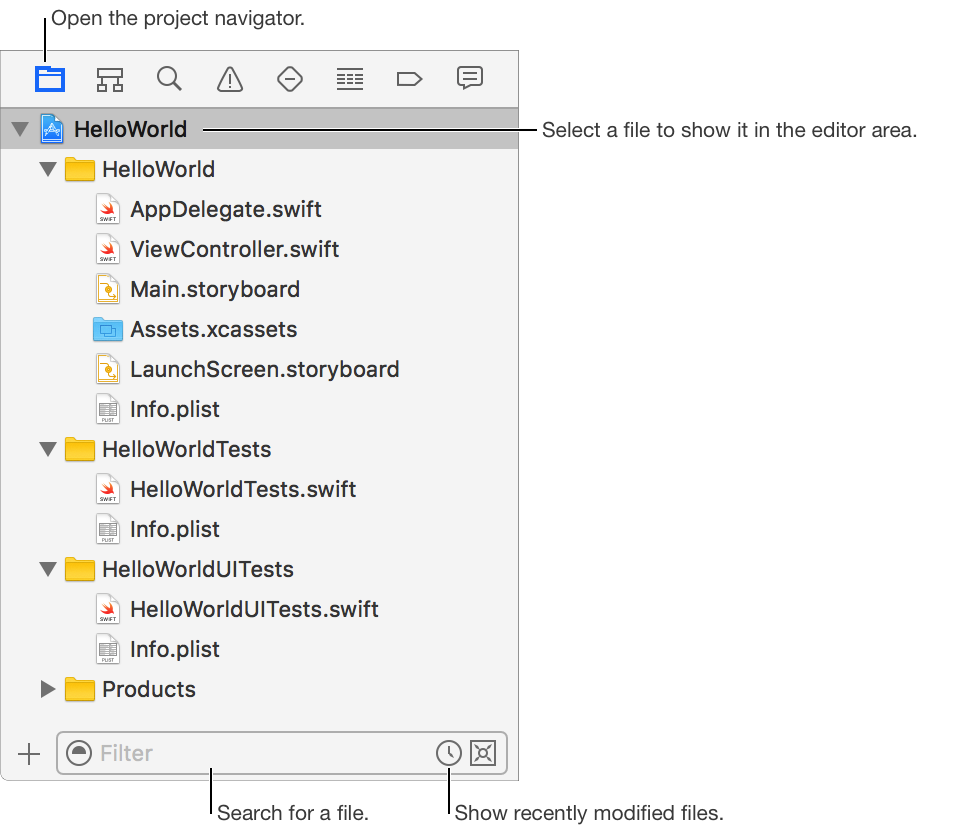

Use the Project navigator to open, add, delete, and organize files in your project. Click the Project navigator button (![]() ) at the top of the navigator area and your project files are displayed in the content area below.
) at the top of the navigator area and your project files are displayed in the content area below.

Open a file: Click the file to open it in the editor area. To learn more, go to Configure the editor area.
View properties of a file: Select the file, then choose View > Inspectors > Show File Inspector. The properties appear in the File inspector.
Search for a file: Enter text in the filter field below the content area.
Show recently modified files: Click the Recent Files icon (![]() ) in the filter field.
) in the filter field.
Show files with source control status: Click the Source Control icon (![]() ) in the filter field.
) in the filter field.
Unlock a file: Select the file, then choose File > Unlock. (If the file is unlocked or you don’t have permissions to unlock it, the menu item is disabled.)
Choose a relative or absolute location: In the File Inspector, choose a location from the Location pop-up menu. For example, choose Relative to Group (recommended) to preserve references when you move your project folder.
Modify the default move and copy behavior: To force a move operation, press and hold Command (⌘) while dragging files. To force a copy operation, press and hold Option (⌥). To force a reference operation, press and hold Command-Option (⌘-⌥).