Xcode provides templates for the common types of files you may want to add to your project, such as Playgrounds and Swift files. You can also add copies of, or references to, existing files and folders on your computer.
In the Project navigator (![]() ), select the location where you want to add the file.
), select the location where you want to add the file.
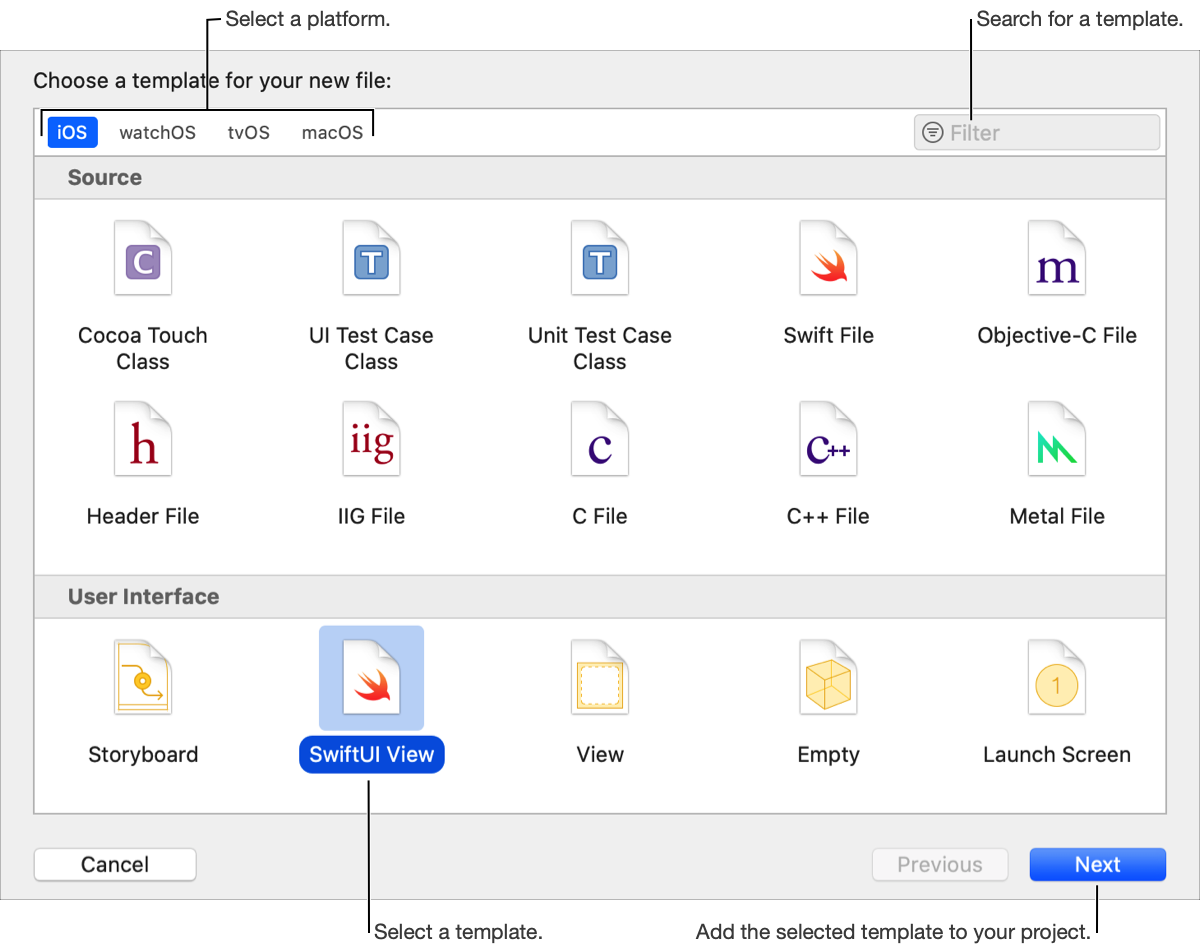
Click the Add button (+) in the filter bar and choose File from the pop-up menu (or choose File > New > File).
Click iOS, watchOS, tvOS, or macOS at the top of the sheet to display the templates for that platform.
Templates are organized into groups such as Source, User Interface, and Resource.
Select a template for the file type, and click Next.
In the following sheets, enter required information and click Next.
For example, enter a class name for a class implementation file.
In the last sheet, choose a location and enter a filename (if applicable).
Choose a group from the Group pop-up menu.
If the group is associated with a folder (the default when you create a group), the project structure is the same as the file system structure.
Select the targets that you want to add the file to.
Click Create.
The new file is selected in the Project navigator and opens in the appropriate editor.
In the Project navigator (![]() ), select the destination project or group for the item you want to add.
), select the destination project or group for the item you want to add.
Click the Add button (+) in the filter bar, choose Add Files to “[Project Name]” from the pop-up menu (or choose File > Add Files to “[Project Name]”), and select the files or folders.
At the bottom of the sheet, click Options.
Choose options for how the files and folders are added:
Copy items if needed: Copies the files and folders to the project folder.
Create groups: Keeps the group structure the same as the file structure.
Create folder references: Displays the folders in the Project navigator but doesn’t copy them to the project. A folder reference is a reference in the Project navigator to a folder in the file system.
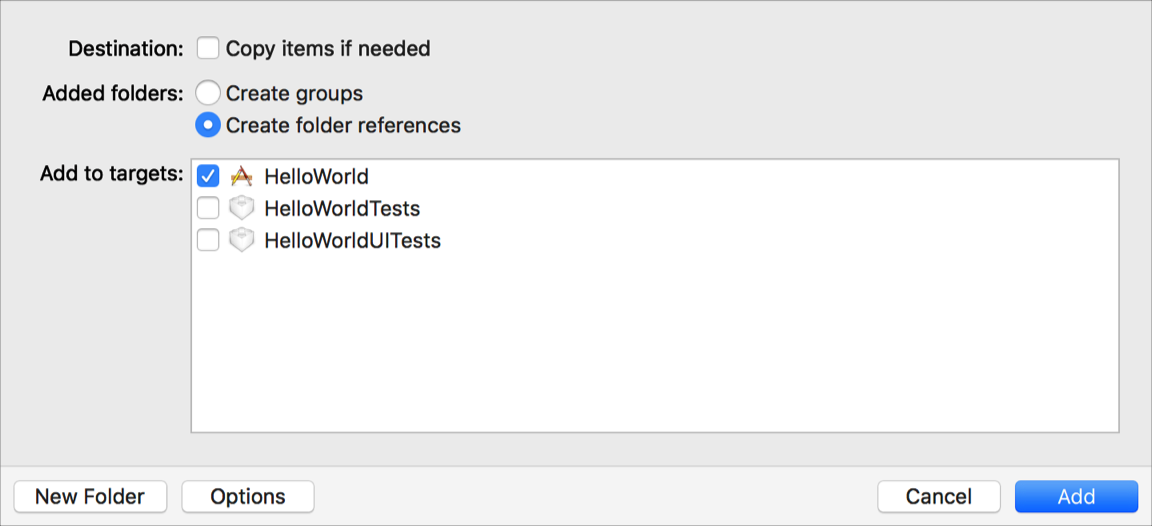
In Add to targets, select the targets that you want to add the file to.
Optionally, click New Folder to add a folder for your files.
Click Add.
Tip: You can also drag the files from the Finder to a location in the Project navigator to add them.
In the Project navigator (![]() ), select the files and folders.
), select the files and folders.
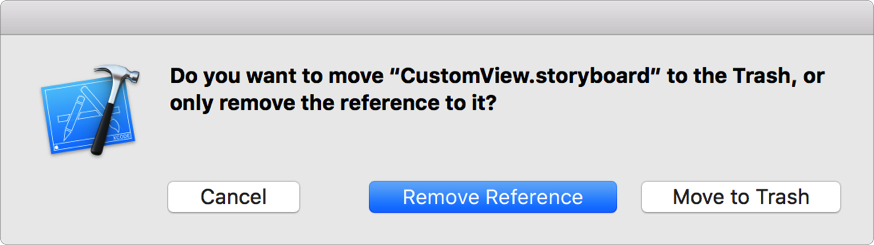
Choose Edit > Delete.
In the dialog that appears, choose a delete option.
Remove the files and folders from the project and the file system: Click Move to Trash.
Remove the files and folder references from the project only: Click Remove References.