
Using SceneKit scene editor, you can quickly build, edit, and preview games and interactive 3D apps. The visual interface reduces code, streamlines design, and helps you fine-tune the rendering of your apps. When you select a source file in the Project navigator, the file opens in the scene editor in the editor area.
With the scene editor, you can:
Build new scenes in a SceneKit scene file (a file with a .scn extension)
Edit animation files created outside Xcode
Adjust properties of the scene and its objects
Add 3D effects and sounds
Preview your scenes
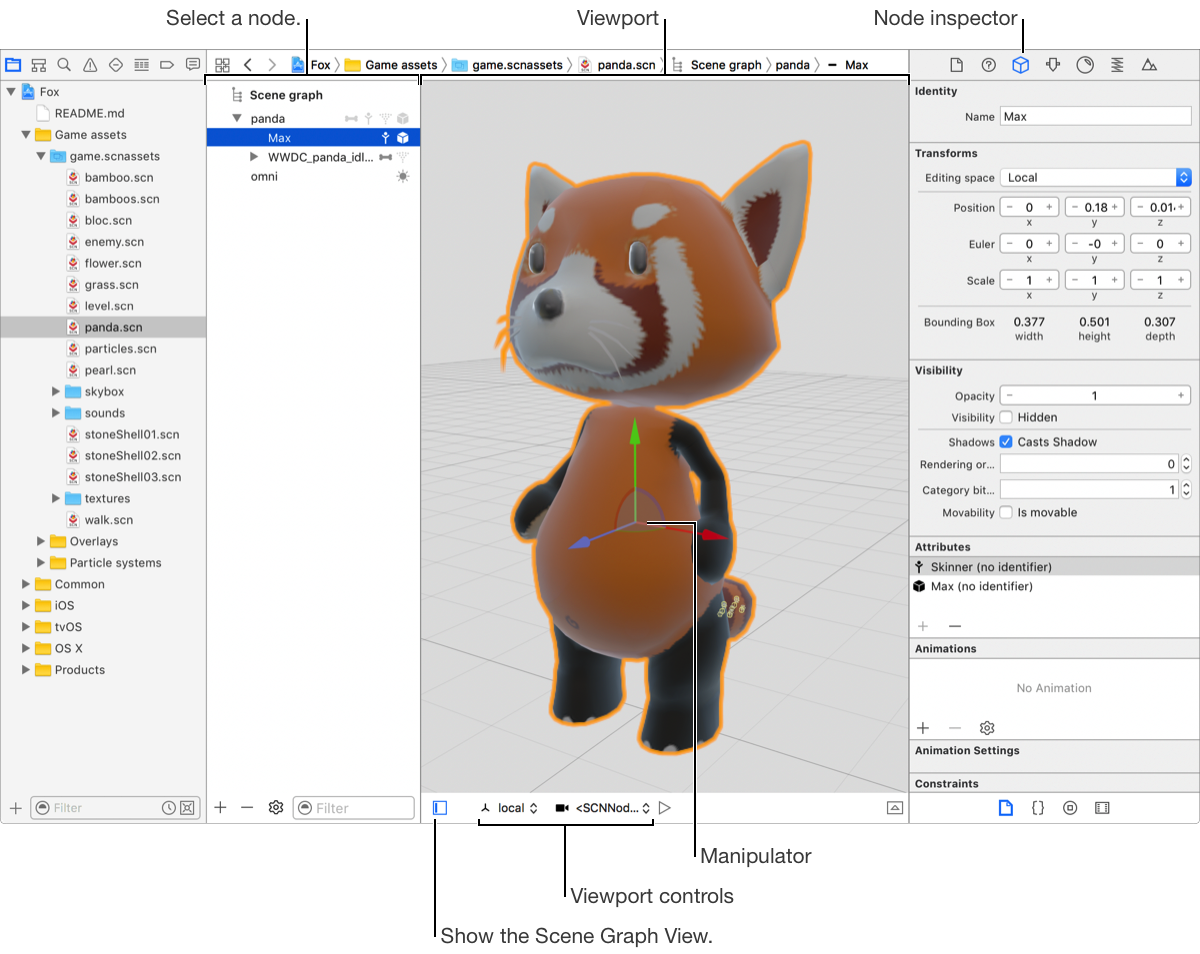
The scene editor area is made up of three components:
Scene graph view: Displays the underlying hierarchical structure of the scene. The objects in the hierarchy, called nodes, are paired with icons identifying the nodes’ attributes.
Scene editor inspectors: Displays information about the scene objects.
Viewport: Displays the scene, defaulting to a point of view contained in a scene’s structure.
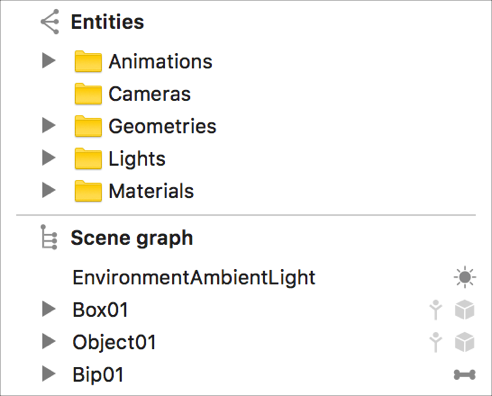
Note: If scenes are created outside Xcode, the Entities list appears above the scene graph list. Entities are separated into folders for animations, cameras, geometries, lights, and materials.
Add a new file from a template to your project. In the sheet that appears, select a SceneKit Scene template under Resource.
Optionally, add your new scene file to an asset catalog, which can be shared across multiple projects in the same workspace.
Add SceneKit objects—such as nodes, lights, cameras, parametric geometries, and physics fields—from the Object library (click the Library button (+) in the toolbar, then drag objects from the library).
Use the manipulator to adjust where the node is positioned in the scene. Drag an axis to move the node along that axis or drag an arc to rotate the node around that arc's associated axis.

Choose the alignment of the manipulator’s axes by selecting one of the options in the editing space pop-up menu.
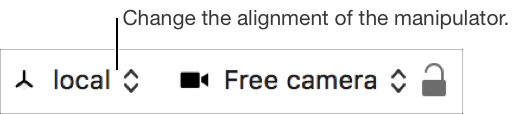
In the Scene graph view or Entities list, select a node or object.
Choose an editing space option.
Align with the selected node: Choose local.
Align relative to the parent of the selected node: Choose parent.
Align with the global X, Y, and Z axes: Choose world. This aligns with the default SceneKit coordinate system.
Align in screen space with the Z axis aligned with the point of view: Choose screen.
In the Project navigator, select a 3D scene file.
In the Scene graph view or Entities list, select a node or object.
In the inspector area, use the inspectors to view and change properties of the selection. The scene editor inspectors are:
Icon | Inspector | Description | |||||||||
|---|---|---|---|---|---|---|---|---|---|---|---|
| Node inspector | Edit settings like position and visibility. Rename a node, apply different values to its transform coefficients, and modify its visibility. | |||||||||
| Material inspector | Edit material properties like the lighting model, colors, and textures. | |||||||||
| Physics inspector | Adjust how physics settings affect a node. | |||||||||
| Scene inspector | Add and adjust properties applied to the scene, such as the environment’s lighting and physics. | |||||||||