
You can draw and inspect a custom view on the Interface Builder canvas. This allows you to incrementally refine your drawing code while visually confirming the changes.
Choose File > New > File.
In the sheet that appears, select the target OS.
Under Source, select a user interface class template.
For iOS and tvOS apps, select Cocoa Touch Class. For watchOS apps, select WatchKit Class. For macOS apps, select Cocoa class.
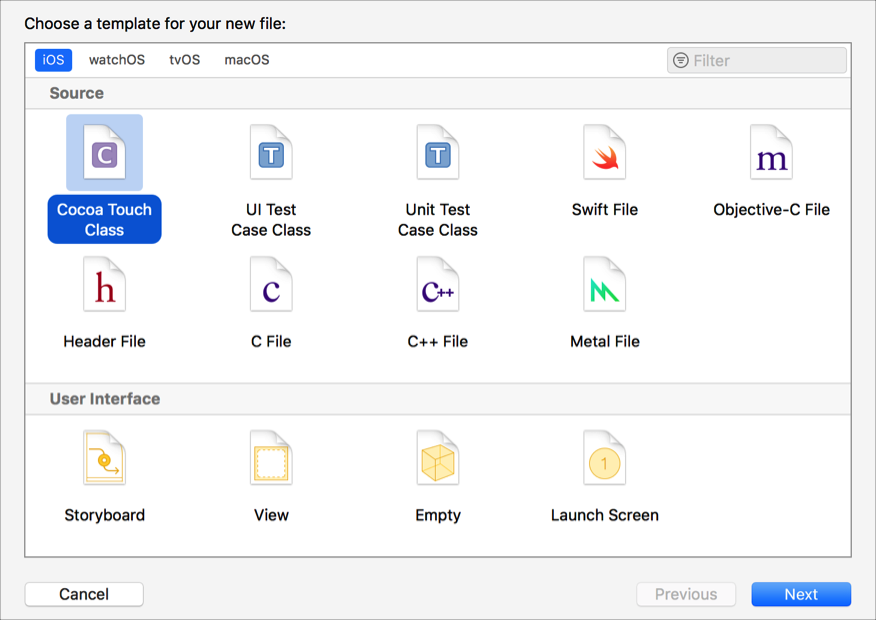
Click Next.
From the Subclass pop-up menu, choose the view class.
For iOS, watchOS, and tvOS apps, choose UIView, and for macOS apps, choose NSView.
In the Class field, enter a name for your custom class.
Choose a language from the Language pop-up menu.
Click Next and click Create.
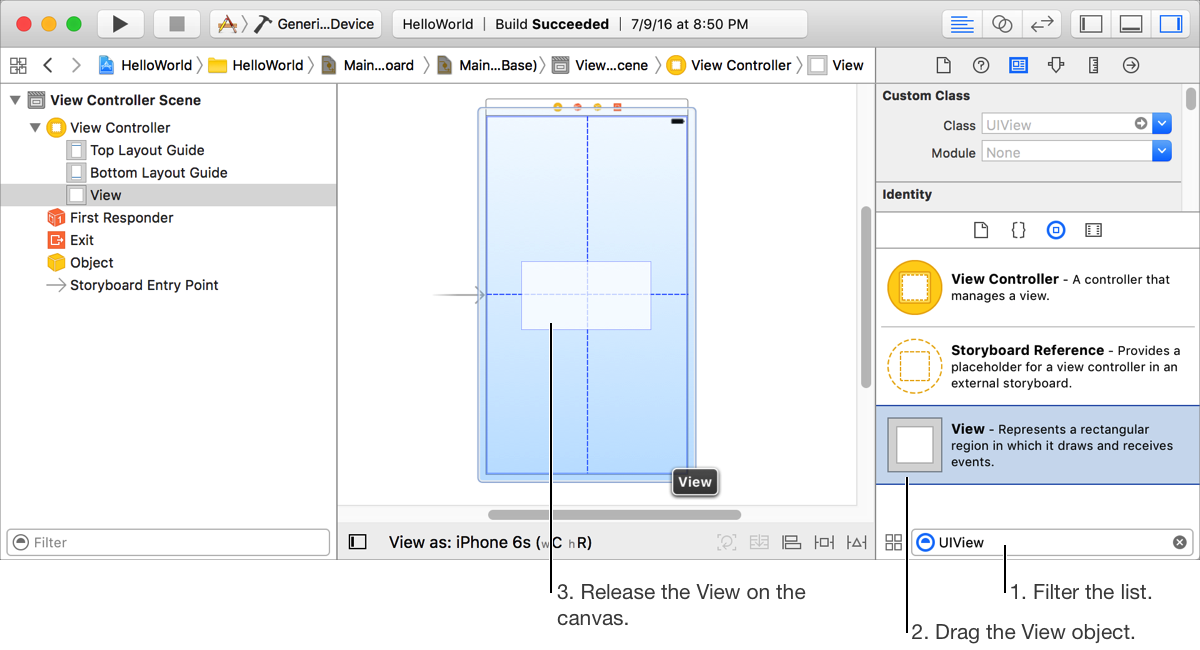
In Interface Builder, open the Object library.
In the library pane filter bar, enter UIView to quickly find the View object.
For macOS apps, enter NSView.
Drag the View object from the Object library to the canvas.
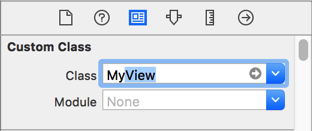
In the inspector area, click the Identity inspector button (![]() ).
).
In the Class field under Custom Class, enter the class name or choose it from the pop-up menu.
Choose View > Assistant Editor > Show Assistant Editor to open the assistant editor.
In the assistant editor, use the jump bar to navigate to the implementation file for your custom view.
Configure your main window so that the Interface Builder canvas is adjacent to your implementation file.
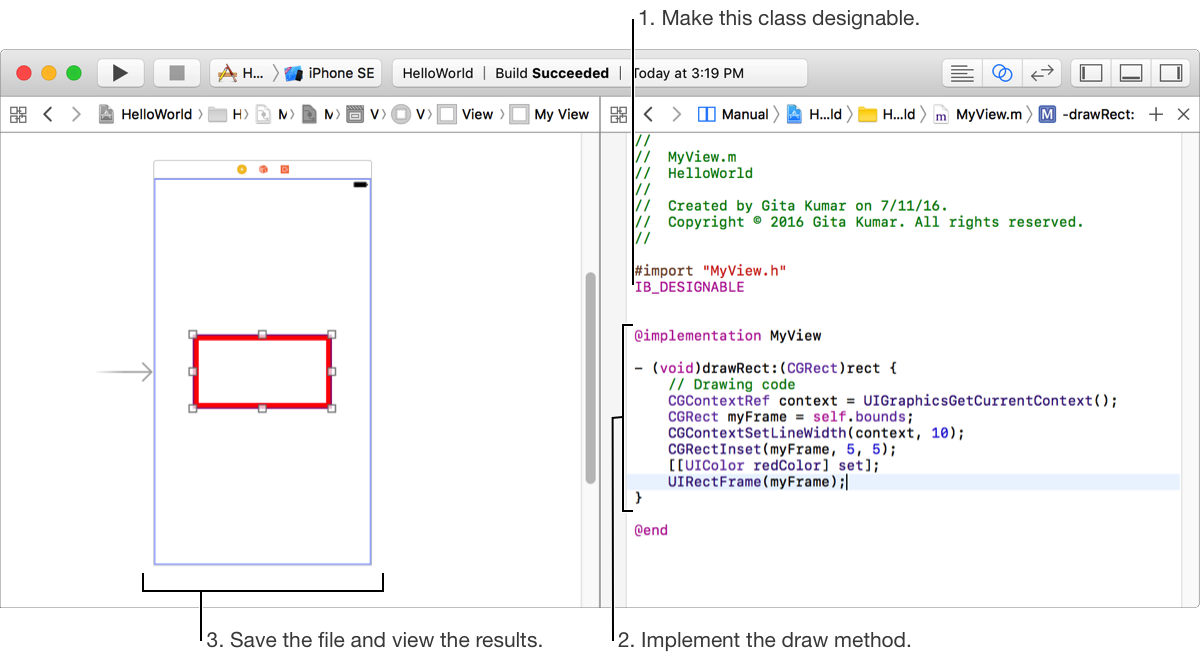
Above the class declaration in the implementation file, enter @IBDesignable for Swift and IB_DESIGNABLE for Objective-C.
For example, the implementation file for a Cocoa Touch class in Swift should appear similar to:
@IBDesignableclass MyView : UIView {…}Enter the code for your custom view’s draw method.
For example, uncomment the draw method provided by the template and enter the drawing operations.
Save the file.
Interface Builder renders the view in the canvas.
Choose View > Assistant Editor > Show Assistant Editor to open the assistant editor.
Use the assistant jump bar to navigate to the header file for your custom view.
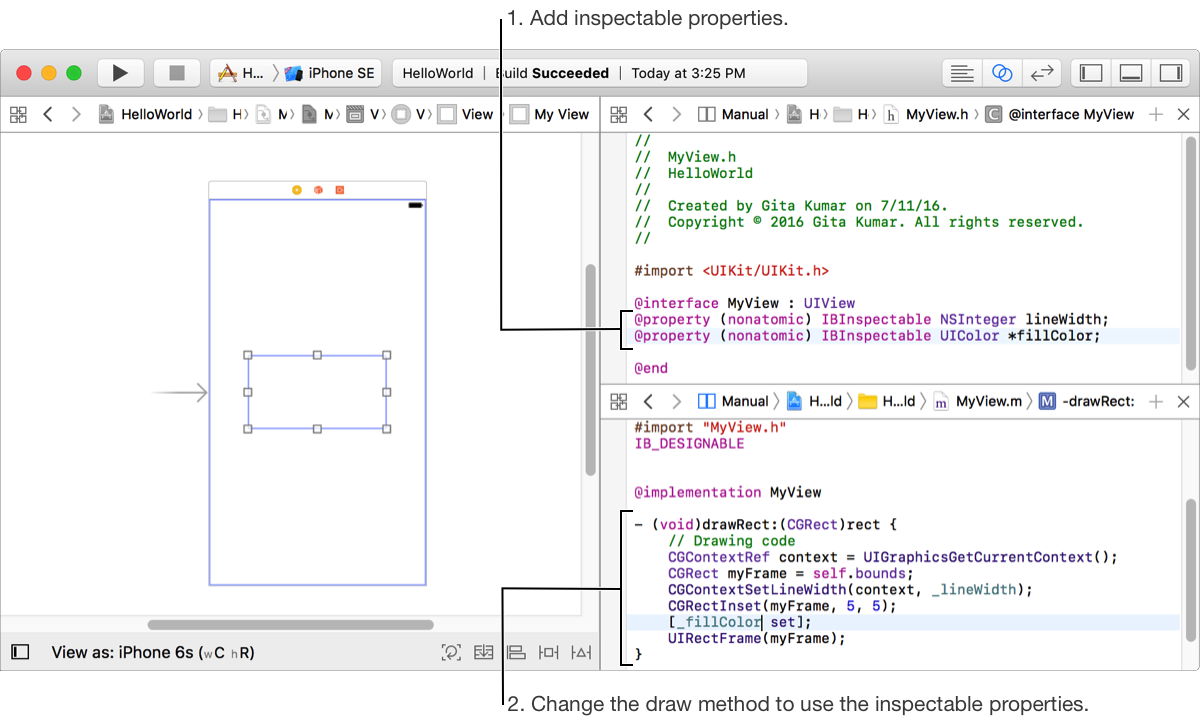
Add the attribute IBInspectable to the declarations of properties you want to inspect.
For Swift, the property declaration should appear similar to:
@IBInspectable var lineWidth: DoubleFor Objective-C, the property declaration should appear similar to:
@property (nonatomic) IBInspectable NSInteger lineWidth;Change the draw method implementation to use the inspectable properties.
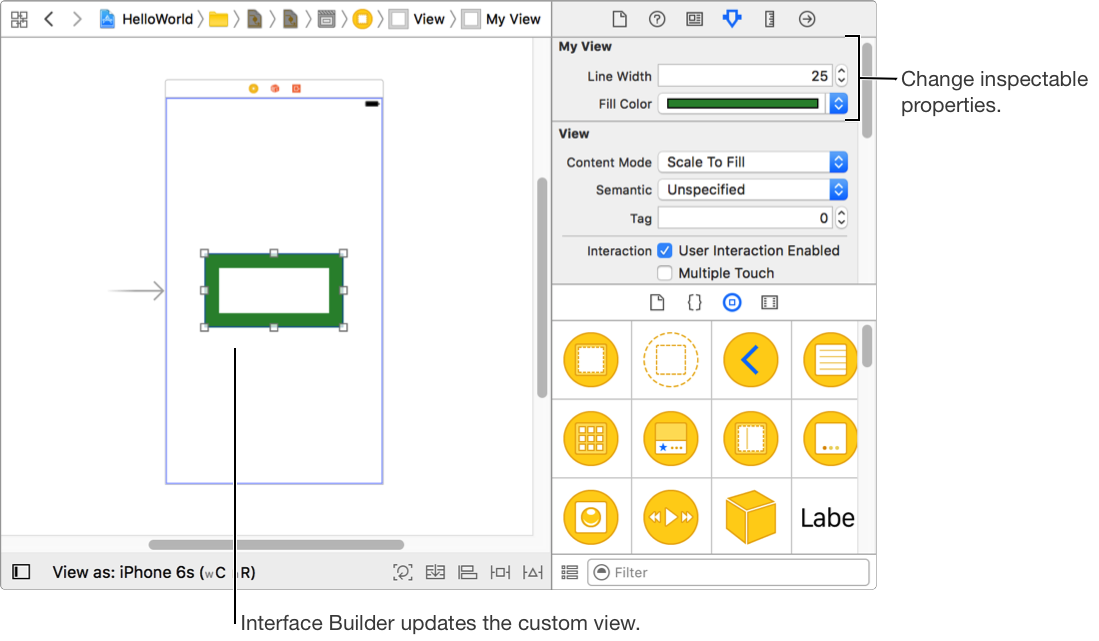
In Interface Builder, select the custom view and choose View > Utilities > Show Attributes Inspector.
The properties appear in the inspector.
Change the values of the properties.
Interface Builder renders the changes you make to the view.
You can add the IBInspectable attribute to any property in a class declaration, class extension, or category of type: boolean, integer or floating point number, string, localized string, rectangle, point, size, color, range, and nil.
If you want to write code for a custom view that runs only in Interface Builder, call that code from the prepareForInterfaceBuilder method. For example, while designing an app that uses the iPhone camera, you might want to draw an image that represents what the camera might capture. Interface Builder calls the prepareForInterfaceBuilder method instead of the awakeFromNib method. If you want to share code between these methods, move that code to another method that you call from both of these methods.
In Objective-C and Swift, you can use the preprocessor macro TARGET_INTERFACE_BUILDER to conditionally compile code for your custom view class.
#if !TARGET_INTERFACE_BUILDER // Run this code only in the app#else // Run this code only in Interface Builder#endif