
You import 360° video the same way you import any other media in Motion. However, there are a few special requirements to consider:
Before you import, make sure the footage has been properly formatted (using third-party stitching software) as a monoscopic equirectangular projection.
Make sure you import the footage into a 360° video-ready Motion project.
After import, make sure you place the footage in a special kind of container called a 360° environment. If you add 360° video to a standard group, Motion (and VR headsets) will display the video incorrectly.
Note: If you select the Import as 360° checkbox in the import dialog, 360° footage is automatically placed in a 360° environment.
In a 360° project, do any of the following:
Choose File > Import.
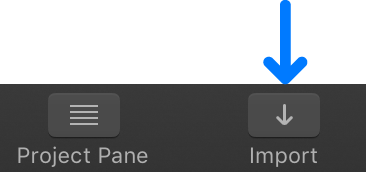
In the toolbar, click Import.
Control-click an empty area of the Layers list or canvas (in the black area outside of the project), then choose Import from the shortcut menu.
In the dialog that appears, navigate to and select one or more 360° media files.
When you select 360° media, Motion enables the Import as 360° checkbox in the import dialog. (If you select both 360° and non-360° media and leave the Import as 360° checkbox selected, all media will be placed in the 360° environment.)
Do any of the following:
Click Import.
If there are multiple 360° environments in the project and a 360° environment is not active when you click Import, the 360° media is added to the topmost 360° environment.
Drag the file or files to the canvas.
Drag the file or files into a 360° environment in the Layers list or into the empty lower area of the Layers list.
If added to a 360° environment, the imported files appear as new layers in that container, placed above existing layers in the environment. If added to the empty area, the imported files are added to the topmost 360° environment.
Drag the file or files into the Timeline.
Note: For more information on adding objects to the Timeline, see Timeline overview.
If you import media that has a 2:1 aspect ratio, Motion places the media in the project’s 360° environment (or if no 360° environment exists, in a new 360° environment).
In the Finder, select one or more 360° media files.
With a 360° project open, do any of the following:
Drag one or more files from the Finder to a location in the canvas.
If standard footage and 360° media are added simultaneously, the standard footage is added to a new group and the 360° video is added to the existing (or active) 360° environment.
Drag one or more files to the 360° environment in the Layers list, or into the empty lower area of the Layers list.
If added to a 360° environment, the imported files appear as new layers in that container, placed above existing layers in the environment. If added to the empty area, the imported files are added to the topmost 360° environment.
If standard footage and 360° media are added simultaneously, the standard footage is added to a new group and the 360° video is added to the existing (or active) 360° environment.
Drag the file or files into the Timeline.
Note: For more information on adding objects to the Timeline, see Timeline overview.
If you import media that has a 2:1 aspect ratio, Motion places the media in the project’s 360° environment (or if no 360° environment exists, in a new 360° environment).