Retiming
Your motion graphics projects might require you to perform special timing tricks on media: speeding a clip up, slowing it down, or playing it back at different speeds. Use the Timing controls in the Properties Inspector to modify speed and playback attributes of media clips.
Timing Controls in the Properties Inspector
Media layers (images and movie clips as opposed to Motion-created shapes) have timing parameters in the Properties Inspector. Click Show on the right side of the Timing category to reveal these timing controls.
Still images and other layers without an inherent time dimension have a reduced set of Timing controls.
- Speed: A value slider that sets the speed of the clip as a percentage. The default is 100%. Values lower than 100 play back the clip more slowly than its original speed and also extend the duration of the clip. Values higher than 100 play back the clip faster than its original speed and shorten the duration of the clip.
This parameter appears only when Time Remap is set to Constant Speed.
- Retime Value: Displays the time value of the clip at a given frame. When you set Time Remap to Variable Speed, two keyframes are generated at the first and last frame of the clip. The two default keyframes represent 100% constant speed. Adding keyframes to this parameter and assigning them different Retime Values makes the speed of the clip ramp from one speed to another.
This parameter appears only when Time Remap is set to Variable Speed.
- Frame Blending: Sets the method used to determine how the image is blended during each frame of playback. The Frame Blending pop-up menu contains the following items:
- None: Displays the frame from the original clip nearest the source frame.
- Blending: The default setting. Displays a blend of the individual pixels of adjacent frames.
- Motion-Blur Blending: Applies a motion blur algorithm to the blended frames.
- Optical Flow: Uses an optical flow algorithm to blend the two frames surrounding the desired frame. Using this method affects playback performance most significantly. To display frames properly, Motion analyzes the clip to determine the directional movement of pixels. Only the portion of the clip used in the project (the clip between the In and Out points) is analyzed.
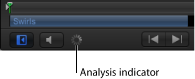
When you choose Optical flow, an analysis indicator appears in the lower-left corner of the Canvas.
If you play back the project before the analysis is complete, the clip will appear as if Frame Blending is set to None. When the analysis is complete, the indicator disappears, and the clip will play back properly. You can view more detailed information about the clip analysis and stop the process before it is finished.
You can perform optical flow analysis on multiple clips simultaneously. The clips are processed in the order—the first clip you apply optical flow to is processed first, and so on.
Note: The more motion contained in a clip, the longer the analysis takes.
For information on pausing, reordering, or stopping a clip analysis, see Displaying and Editing Retiming Tasks.
Important: When importing interlaced footage and using the Optical Flow method for frame blending, be sure the Field Order parameter (in the Media Inspector) is assigned to the correct value. Otherwise, artifacts might appear in the retimed layer.
- End Condition: A pop-up menu that lets you set how playback continues when the end of the clip is reached. There are four options:
- None: The default setting. The layer’s duration in your project is equal to the duration of its source media file.
- Loop: When the last frame of the clip is reached, the clip loops back to the first frame and plays again. This can cause a jump in the clip’s apparent playback unless the clip was designed to loop seamlessly.
- Ping-Pong: When the last frame of the clip is reached, the next iteration of clip playback is reversed. If you set a clip of a ball rolling on the floor to loop with the Ping-Pong option, it would appear to roll forward, then backward, then forward again for the duration of the layer. The Ping-Pong option lets you extend the duration of some video clips more smoothly than the Loop option.
- Hold: This freezes the last frame of the clip for the amount set in the End Duration slider.
Note: When using the Hold option with interlaced footage, ensure that field order is properly set in the Media Inspector. To modify a clip’s field order, select the clip in the Media list, then choose an option from the Field Order pop-up menu in the Media Inspector.
Displaying and Editing Retiming Tasks
You can display processing information when retiming a clip.
Choose Window > Show Task List.
Click the analysis indicator (in the lower-left corner of the Canvas (beside the Play/Mute audio button).
The Background Task List window appears.
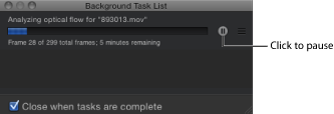
The Background Task List shows all processes Motion is working on in the background. Each task is labeled, has a progress bar, and displays text describing how far along the task is. You can interrupt current and pending operations by pressing the pause button next to the progress bar.
In the Background Task List window, click the Pause button.
A message appears detailing how many frames have been processed.
Note: When analysis is paused, projects play back at a much improved speed.
In the Background Task List window, click the analyze/pause button.

In the Background Task List window, drag the clip to analyze to the top of the list.
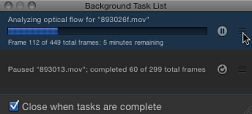
Analysis begins on the repositioned clip, and the clip previously being processed is paused.
In the Background Task List dialog, select the “Close when tasks are complete” checkbox.