Shape and Mask Drawing Tools
Shapes and masks (and paint strokes) are made with splines, and they’re created and edited using similar tools. This section covers the two spline-drawing methods available in Motion: Bezier splines and B-Splines. You can use Bezier shapes and B-Spline shapes interchangeably for any task. The default shape type is Bezier.
Bezier splines are good for drawing shapes for illustration. The controls used to manipulate Bezier splines are similar to those found in many other drawing and compositing applications, so they may be familiar to you. Bezier controls lend themselves to the creation of precise, detailed shapes. Tangent handles adjust the curvature of the shape on either side of the control point, and this defines the surface of the shape.
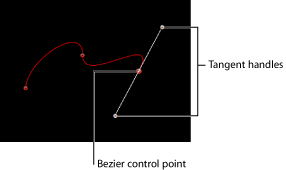
B-Splines can also be used to draw shapes, but unlike Bezier controls, B-Splines are manipulated using only points—there are no tangent handles. Furthermore, the points themselves do not lie on the surface of the shape. Instead, each B-Spline control point is offset from the shape’s surface, magnetically pulling that section of the shape toward itself to create a curve. By combining the influence of multiple B-Spline points, you can create different curves. B-Splines are extremely smooth—by default, there are no sharp angles in B-Spline shapes, although you can create sharper curves, if necessary.
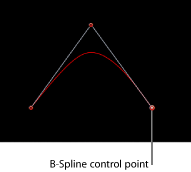
Because B-Spline controls are so simple, they’re easy to animate and manipulate. The tools you use for a specific task are largely a matter of personal preference.
Note: Shapes drawn with Bezier and B-Spline tools can be converted into paint strokes by selecting the shape’s Outline checkbox and choosing a different brush type in the Inspector. For more information, see Creating Paint Strokes.
Drawing Masks and Shapes Using Bezier Splines
This section describes how to draw a Bezier shape from scratch. These methods are identical whether you use the shape or masking tools. This section focuses on drawing shapes. For more information on drawing masks, see Using Masks to Create Transparency.
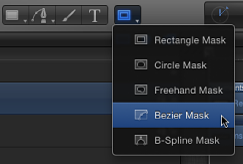
Choose the Bezier tool from the pop-up menu in the toolbar (or press B).

Note: The Bezier Mask tool is located in the mask tools pop-up menu in the toolbar.
The Bezier Tool HUD appears. (If it does not appear, press F7.) To change the color of the shape before it is drawn, use the color controls in this HUD. Select the Outline checkbox to create an outline with the shape. The Width slider adjusts the width of the outline. After you create the shape, the Shape HUD appears.
Note: Outlines can be added and edited after a shape is drawn.
Click in the Canvas to draw the first point.
To add points to further define the shape, do one of the following:
Click to make a linear corner point.
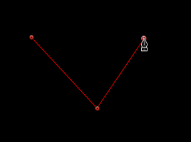
Click, then drag to make a curved Bezier point, adjusting it to the shape you want.
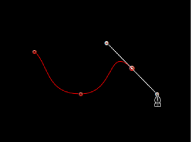
Note: Press Shift while making a curved point to constrain its tangents to 45-degree angles.
While you’re drawing a shape, you can also use any of the point-editing procedures described below to move and adjust existing control points before finishing the shape. You can adjust any control point except the first one you created, because clicking the first point closes the shape.
Tip: If you need a closer look at what you’re doing, magnify the Canvas while drawing a shape. Press Command-Equal Sign (=) to zoom in and Command-Hyphen (-) to zoom out. You can scroll around by pressing the Space bar as you drag in the Canvas. If you have a Multi-Touch trackpad, it’s even easier: pinch open or closed to zoom in or out, and use a two-finger swipe to scroll around.
To finish the shape, do one of the following:
Click the first point you drew to create a closed shape.
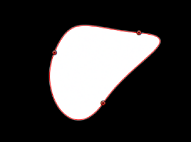
Press C to close the shape, joining the first point you created to the last.
Double-click anywhere in the Canvas to create the last point of an open shape.
Press Return to create the last point of an open shape.
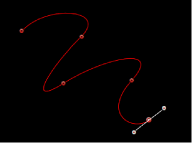
Note: Before a shape is closed, you can press Esc to cancel the entire operation, deleting the shape.
Immediately after finishing a shape, the Shape HUD appears and the Edit Points tool is selected, which allows you to edit the shape you’ve just created.
Drawing Masks and Shapes Using B-Splines
This section describes how to draw a B-Spline shape. These methods are identical whether you’re using the shape or masking tools, but this section focuses on drawing shapes. For more information on drawing masks, see Using Masks to Create Transparency.
Choose the B-Spline tool from the pop-up menu in the toolbar (or press B).
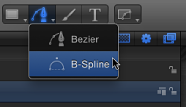
Note: If the Bezier tool is selected, pressing B once selects the B-Spline tool. If another tool is selected, such as the Text tool, press B twice to select the B-Spline tool. The B-Spline Mask tool is located in the mask pop-up menu in the toolbar.
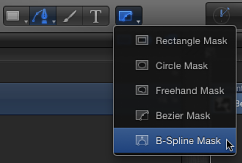
The B-Spline Tool HUD appears. (If it does not appear, press F7.) To change the color of the shape before it is drawn, use the color controls in this HUD. Select the Outline checkbox to create an outline with the shape. The Width slider adjusts the width of the outline. After you create the shape, the Shape HUD appears.
Click in the Canvas to draw the first point.
Continue clicking to draw additional points to define the shape you need.
Note: Press Shift while making a curved point to constrain its tangents to 45-degree angles.
As you create new B-Spline control points, keep the following in mind:
The control points you draw influence the shape of the curve from a distance. They do not lie directly on the surface of the curve.
To create more detailed curves, create more points. However, it’s best to use the fewest number of points necessary to create the amount of detail you need. Shapes with an excessive number of points can be difficult to edit later on.
In many instances, it is easier to create a loose group of control points first and then adjust them afterwards to create the precise curve you need in a later step.
While drawing a shape, you can move and adjust the control points you’ve created before finishing the shape. You can adjust any control point except the first one you created, because clicking the first point closes the shape.
Tip: If you need a closer look at what you’re doing, you can magnify the Canvas while in the middle of drawing a shape. You can also scroll around by pressing the Space bar while you drag in the Canvas.
When you’re ready to finish your shape, do one of the following:
Click the first point you drew to create a closed shape.
Press C to close the shape, joining the first point you created to the last.
Press Return to finish an open shape at the last point you made.
Double-click anywhere in the Canvas to define the last point of an open shape.
Note: You can press Esc to cancel the entire operation and delete the shape.
Immediately after finishing a shape, the Shape HUD appears and the Edit Points tool is selected, which allows you to edit the shape you’ve just created.
Controlling B-Spline Curvature
Each control point on a B-Spline path affects the curvature of the shape nearby. By default, these curves are very rounded, but you can adjust the degree of roundness, even creating corner points by adjusting the control point weight handle.
Create a shape using B-Splines.
With the Edit Points tool selected, Command-drag a control point.
A weight handle appears.
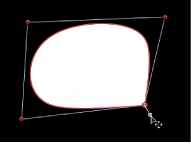
Drag the weight handle away from the control point to sharpen the path or towards the control point to smooth the path.
Drawing Masks Using the Freehand Mask Tool
This section describes how draw a freehand mask. Like the Paint Stroke tool, the Freehand Mask tool allows you to create a shape in one movement, rather than drawing the shape in a point-by-point fashion (like a Bezier or B-Spline shape). For best results, use a stylus and tablet when using the Freehand Mask tool. For more information on drawing masks, see Using Masks to Create Transparency.
Select the layer to mask, choose the Freehand Mask tool from the mask pop-up menu in the toolbar.
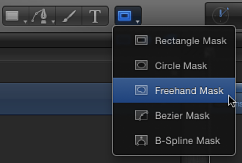
The Freehand Mask Tool HUD appears.
Adjust the controls in the Freehand Mask Tool HUD.
To change the blend mode of the mask before it is drawn, use the Mask Blend Mode pop-up menu in this HUD.
Adjust the Feather slider to soften the mask. Positive values spread the feathering outward, while negative values feather the shape inward.
Do one of the following:
If using a mouse, click in the Canvas, but don’t release the mouse button.
If using a tablet, touch the stylus on the tablet to begin drawing the mask in the Canvas.
Continue drawing around the layer you are masking. To close the mask, finish the line at the mask’s starting point. A small circle appears when the pointer is over the starting point.
Note: If you don’t close the mask at its starting point, the mask is closed when you release the mouse button.
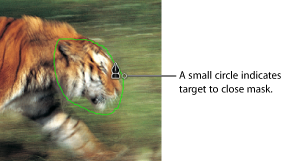
The mask is completed.
Edit your control points to fine-tune the mask.
For more information on editing control points, see How to Edit Shapes.