Importing Data and Settings from Other Projects
You can import the following data from another project:
Track region or folder content
Plug-ins (including settings)
Sends (including level, routing, and destination channel strips)
Input/Output assignments
Automation data
Track notes
For details, see Importing Data from Another Project.
You can also import the following settings from another project:
Screensets
Transform sets
Hyper sets
Score sets
Score staff styles
Score text styles
Score settings
Sync settings
Metronome settings
Record settings
Tuning settings
Audio settings
MIDI settings
Video settings
Asset settings
For details, see Importing Settings from Another Project.
Importing Data from Another Project
You have two options when importing data from another project:
You can import the data to new tracks in your current project.
You can replace data in your current project with the imported data.
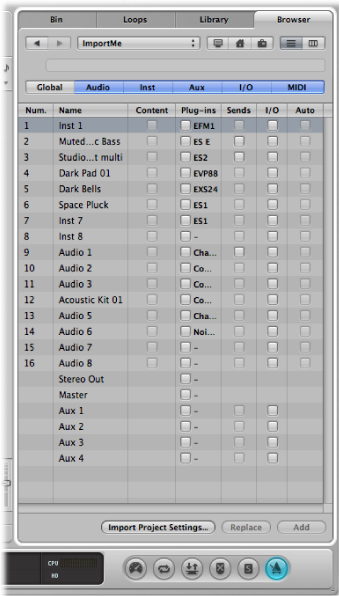
You choose the data to be imported from the source project using the following Track Import view, which is displayed in the Media Browser tab.
Tip: You can customize the column view by Control-clicking (or right-clicking) the table header, then disabling or enabling the columns. You can also change the column order by dragging the column headers. These settings are automatically stored in the Preferences when Logic Pro is closed, and apply to all projects.
- Num: Displays the track number for all tracks available in the Arrange area. Remains empty for those channel strips that are not part of the Arrange track list. Folder tracks are also displayed with an entry such as 3-1, where 3 is the track number and 1 is the folder number. You can double-click a folder track to reveal its contents at the next level. Note that take folder tracks behave like ordinary tracks, and they are imported as they are, with all takes and comps.
- Name: Displays the track or channel strip name as defined in the source project.
- Type: Displays the track or channel strip type.
- Content: Allows you to import the region or folder contents of a track. In the case of folder tracks, you can double-click a folder to access its individual tracks.
- Plug-ins: Allows you to import any plug-ins, and their settings, inserted in a channel strip. The plug-ins are listed according to insertion order, from the top down.
Note: In the case of software instrument channel strips, instrument plug-ins are also imported.
- Sends: Allows you to import any sends inserted in a channel strip, including level, routing, and all destination channel strips.
- I/O: Allows you to import the I/O settings of a channel strip.
Note: In the case of software instrument channel strips, this does not include the instrument plug-in. See the Plug-ins entry above.
- Auto: Allows you to import track automation data.
- Notes: Allows you to import track-specific notes.
- Global, Audio, Inst, Aux, I/O, MIDI: Click these filter buttons to hide or show the track or channel strip types shown in the track import table.
Do one of the following:
Click the Browser tab in the Media area.
Choose File > Import (or use the corresponding key command, default assignment: Command-I).
Navigate to, and select, the required project file.
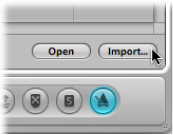
If using the Browser tab, an Import button appears at the bottom-right corner of the tab.
Note: You can use the Quick Look feature to preview the selected project file. For details, see Previewing Projects with Quick Look.
If using the Import dialog, the Import button becomes active.

Click the Import button, or double-click the project file.
The Browser tab updates to show a track import view.
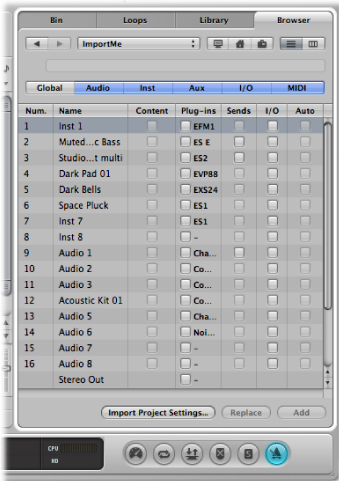
Select the data that you want to import by selecting the relevant checkboxes.
Tip: Press the Right Arrow key to select all checkboxes of the selected line, or the Left Arrow key to deselect them.
Do one of the following:
Click the Add button to add the selected data to the current project (or hold down the Command key while pressing the Down Arrow key).
The tracks are added below the selected track in the Arrange area.
Click the Replace button to replace the data of the currently selected track with the selected data from the other project.
Note: The Replace function only works when data on a single row is selected—not with multiple row selections.
Importing Settings from Another Project
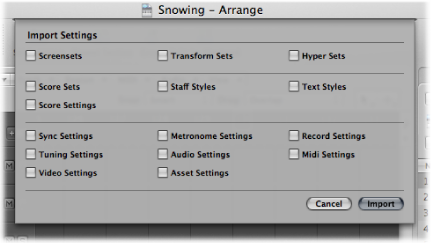
The following image provides an overview of the settings that can be imported from one project to another.
There are a number of different ways to import settings from other projects.
Do one of the following:
Choose File > Project Settings > Import Project Settings (or use the corresponding key command, default assignment: Option-Command-I).
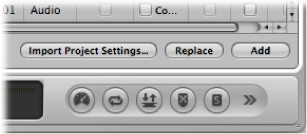
Click the Settings button in the Arrange toolbar, then choose Import Project Settings.
Click the Browser tab in the Media area.
Navigate to, and select, the required project file.
Note: If navigating in the Browser tab, you can use the Quick Look feature to preview the selected project file. For details, see Previewing Projects with Quick Look.
Click the Import button.
Note: If accessing the settings from the Browser tab, you also need to click the Import Project Settings button, which appears after you click the Import button.
In the Import Settings window, select the settings you want to import by selecting the relevant checkboxes.
Click the Import button.
The settings are imported into the active project.