Using Score Sets to Create Scores and Parts
You can use score sets to determine which instrument tracks should be included in the score display. Each project can contain as many score sets as required. Score sets allow you to:
Produce both the full score and individual parts (such as particular groups of instruments).
Arrange the (vertical) order of instrument tracks in the score, independent of the order of tracks in the Arrange area.
Assign a name (and, optionally, an abbreviated name) to each instrument track, which will be displayed and printed as instrument names in the score.
Determine which staffs will be connected by brackets or bar lines.
Exclude the display of tracks that are only relevant for playback, but not for the score (tracks that only contain MIDI controller data, for example).
Simultaneously reduce or enlarge all staffs in each staff set, by using the Scale parameter. This allows you to use the same staff styles for printout of full scores and individual parts.
Select from two different parameter sets (Score or Part) for page margins, header space height, vertical distance between staff systems, and the maximum number of bars per line.
The Relationship Between Score Sets and Display Modes
A score set is only shown as defined if an appropriate display mode is chosen. Content Link and Content Catch only allow the display of one MIDI region at a time, making them unsuitable for work with score sets. It’s usually best to deselect Link, once the desired score set is fully displayed. If only one MIDI region is displayed, double-click below the staff, which displays the full score; then deselect Link.
Tip: It is possible to work with several open Score Editor windows, each showing different display levels or different score sets.
Choosing a Score Set
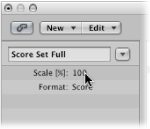
You choose a score set in the Inspector’s Score Set pop-up menu.
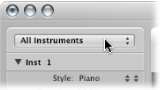
Click the menu to show all available score sets. New projects only show the All Instruments score set, which displays all instruments, depending on the display level.
Getting to Know the Score Set Window
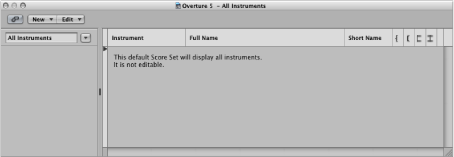
You can create and edit score sets in the Score Set window.
Choose the Open Score Set window command in the Score Set menu (or use the Open Score Set Window key command, default assignment: Control-Option-Command-I).
Choose Layout > Score Sets in the Score Editor.
Note: If you open the Score Set window when the default All Instruments score set is chosen, a warning indicates that the All Instruments score set cannot be edited.
You can edit the name of a score set by double-clicking the name in the left column of the Score Set window, which opens a text entry field.
The narrow column to the left allows you to set an insert mark (>) with a mouse click, or make multiple selection marks by dragging vertically.
This column is used to determine which instruments are included in the score set, and their (vertical) order of appearance in the score. Track instrument icons are also displayed in this column, at the highest zoom level.
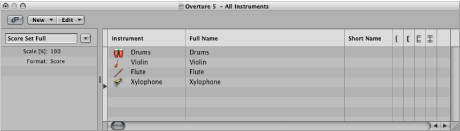
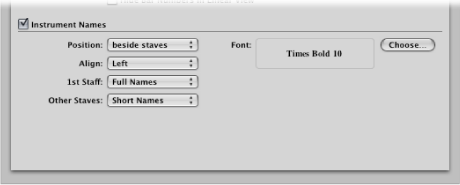
Click any line in this column to open an entry field that contains the default “@(reference).” If you don’t change this, the name of the track’s instrument is used as the name for the instrument in the score. As the track’s instrument name is often identical to the corresponding synthesizer patch (Solo Strings High, for example), you’ll probably want to assign another name here. This name is automatically displayed in the score as the full name: “Violin 1,” for example. Display parameters for instrument names are set in the Numbers & Names pane of the Score project settings. (See Numbers & Names Settings.)
You can also define an abbreviated name for each instrument, which is used if Short Names is chosen in the 1st Staff and Other Staffs pop-up menus of the Numbers & Names pane, in the Score project settings.
You can define which staffs in the score set are connected by brackets or bar lines (either at the beginning of each staff, or throughout), in the last four columns. Any of these connections can be set by dragging vertically in the column, until you see the appropriate display.

Brackets and bar lines can also be interrupted between staffs, allowing you to form groups of connected instruments in a score. If you want to delete a line or bracket, grab the corresponding symbol at its end point (bottom), and drag it upward, until it disappears. You can use the same method to shorten lines.
Bar line connections can also be edited directly in the score. Click the upper end of a bar line to connect it to the next (higher) staff. Repeating the procedure disconnects the bar lines.
Creating and Deleting Score Sets
When you open a Score Editor window while several regions are selected in the Arrange area, Logic Pro automatically creates and displays a score set that only contains the instruments of the selected regions.
You can also use one of the following methods to create a score set manually.
Choose New > New Empty Set in the Score Set window.
You can insert instruments into the empty score set, one by one.
Choose New > Duplicate Set in the Score Set window.
Select at least one MIDI region for all instrument tracks you want to include in the score set.
Choose Layout > Create Score Set from Selection (or use the corresponding key command) in the Score Editor.
Logic Pro creates and displays a new score set, which consists of all instruments used by the currently selected MIDI regions.
Score sets created this way are automatically named after the instruments they contain.
In the Score Set window, choose New > New Complete Set.
Tip: If several instruments or staffs use the same MIDI sound for playback (with the same MIDI channel on the same MIDI instrument), and you want to display these staffs with different instrument names in the score, you need to create a separate track instrument for each staff, in the Arrange area.
All score sets are saved with the project file.
Select the score set in the Score Set window, then choose New > Delete Set.
Editing Score Sets
Once you have created a score set, you can change the assignment of instrument entries, add instruments, or change their order.
Click-hold the name of the instrument you want to replace in the Instrument column, then choose an instrument from the pop-up menu.
Set the insert mark to the desired position, then choose New > Add Instrument Entry.
A new instrument entry is added at the insert mark.
Double-click below the instrument list.
A new instrument entry is added at the bottom of the list.
You can use the usual Cut, Copy, and Paste commands to reorder the instrument entries in a score set. If pasted, they are placed at the insert mark position, which must be set beforehand.
Scaling Score Sets
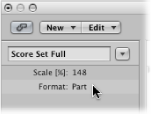
You can scale any score set to a size between 50 and 200 percent of its original size.
Select the score set in the Score Set window, then set the Scale parameter to a new value.
The Scale parameter affects:
All staffs
The distance between the staffs
All symbols associated with staffs (all notes, rests, and other symbols)
All local text, including lyrics
Slur and Tie thickness
The Scale parameter does not affect global text objects (header text, text inserted outside the margins) and text such as page numbers.
Scaling doesn’t take place on instrument parts that were created by Option-clicking the Score Set pop-up menu and choosing the instrument from the pop-up menu (as described below; see Filtering Single Instruments from the Score). As such, you can use the same staff styles for full scores and parts: in extracted parts, the staffs appear at their original size; in the full score, their size is defined by the Scale parameter.
Note: The All Instruments set cannot be edited (and therefore, cannot be scaled), so you need to create a dedicated score set for the full score, in most cases.
Creating Separate Layouts for Full Score and Parts
You can set separate layout parameters for the full score and parts in the Global pane of the Score project settings. The Format parameter in the Score Set window determines which layout parameters a score set uses.
Open the Global Score project settings by choosing File > Project Settings > Score (or using the Open Score Project Settings key command), then click the Global tab.
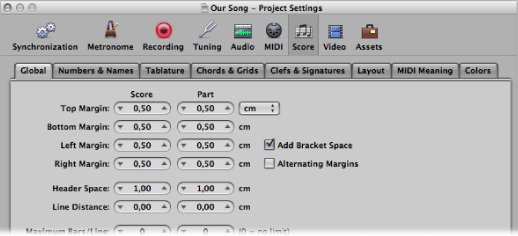
The Global pane offers separate page layout parameters for score and parts.
Set the separate score and part layout parameters.
In the Score Set window, choose a setting from the Format pop-up menu.
For the default All Instruments set, the score settings are always used, except when a single MIDI region is displayed. In this situation, the part settings are used.
Filtering Single Instruments from the Score
You can quickly extract a single instrument from the score, by choosing it from the pop-up menu that appears when you Option-click the Score Set pop-up menu.
This way, you don’t need to create a score set for every instrument in order to produce parts. You should note, however, that only the track instrument names are used as instrument names in the score. So, if you use this method for printout of your parts, you see the real instrument names of the Arrange window track instruments.
Importing Score Sets from Other Projects
You can import score sets from other projects.
Do one of the following:
Choose File > Project Settings > Import Project Settings (or use the corresponding key command).
Click the Settings button in the Arrange toolbar, then choose Import Settings.
Click the Browser tab in the Media area.
Navigate to, and select, the required project file.
Click the Import button.
Note: If accessing the settings from the Browser tab, you also need to click the Import Settings button, which appears after you click the Import button.
In the Import Settings window, select the Score Sets checkbox (and deselect all other settings that you don’t want to import).
Click the Import button.
All score sets are imported from another project into the current project.