Character styles are the font attributes—such as font family; size; color; and attributes like bold, italic, and underline—that you apply to one or more characters. When you apply a number of these character styles to one or more characters, you can save that new look as a custom character style so that you can apply it to other text in your presentation.
Select the character with the formatting you want to save as a style.
Click the Text tab at the top of the sidebar on the right.
If you don’t see a sidebar, or the sidebar doesn’t have a Text tab, click ![]() in the toolbar.
in the toolbar.
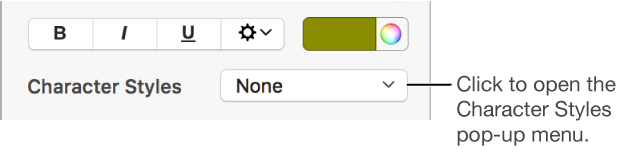
In the Font section, click the pop-up menu next to Character Styles, then do one of the following:
Create a new style with a new name: Click ![]() in the top-right corner of the Character Styles menu, then type a name for the style.
in the top-right corner of the Character Styles menu, then type a name for the style.
Create a new style based on an existing style: Move the pointer over the style name in the list, click the arrow that appears, then choose Redefine from Selection (characters that used the original style aren’t changed).
Type a name for the style.
If you change the appearance of characters that have a character style applied to them, an asterisk, and in some cases an Update button, appears next to the style’s name in the Character Styles pop-up menu. This indicates that the style has an override for those characters.
If you want to keep the overrides without updating the style, do nothing. The text retains your changes, and an asterisk appears next to the character style name whenever you select the text.
If you don’t want to keep the overrides, you can revert back to the original character style, update the character style with your changes, or use the overrides to create a new character style.
Select one or more of the characters you modified.
Click the Text tab at the top of the sidebar on the right.
If you don’t see a sidebar, or the sidebar doesn’t have a Text tab, click ![]() in the toolbar.
in the toolbar.
Click the Style button near the top of the sidebar.
In the Font section, click the pop-up menu next to Character Styles.
Do one of the following:
Update the style to use the overrides: Click the Update button (if there is one), or move the pointer over the style name, click the arrow that appears, then choose Redefine from Selection. All text in the presentation that uses that style is also updated.
Remove the override: Click the style name in the list. The changes that caused the override are removed.
Select a character with the style you want to rename.
Click the Text tab at the top of the sidebar on the right.
If you don’t see a sidebar, or the sidebar doesn’t have a Text tab, click ![]() in the toolbar.
in the toolbar.
Click the Style button near the top of the sidebar.
In the Font section, click the pop-up menu next to Character Styles.
Move the pointer over the style name, click the arrow that appears, then choose Rename Style.
Type a new name for the style.
Click the Text tab at the top of the sidebar on the right.
If you don’t see a sidebar, or the sidebar doesn’t have a Text tab, click ![]() in the toolbar.
in the toolbar.
Click the Style button near the top of the sidebar.
In the Font section, click the pop-up menu next to Character Styles.
Move the pointer over the style name, click the arrow that appears, then choose Delete Style.
If the style is being used in the presentation, you see an alert and can choose a replacement style.
If you often use a character style, you can create a keyboard shortcut to apply the style.