
The easiest way to transcode media files in Compressor is to use or one or more built-in settings or a built-in destination.
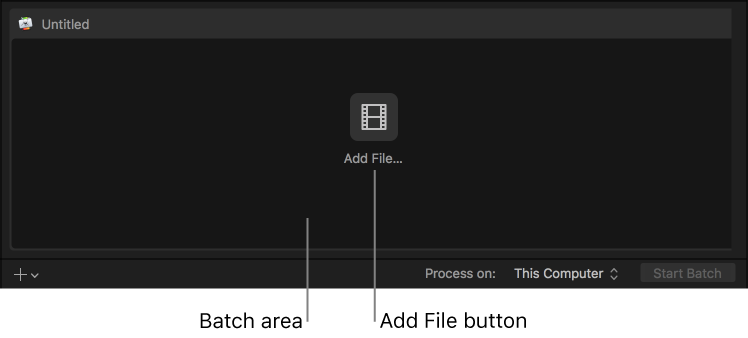
Click the Add File button in the batch area.
In the file window that appears, select a media file, then click Add.
In the settings window that appears, do the following:
Select one or more transcode settings ![]() or a destination
or a destination ![]() from the list.
from the list.
The settings list contains basic settings, as well as destinations, grouped by category. To choose a specific setting, click the disclosure triangle beside a destination or a setting group (Podcasting, for example), then select one or more settings.
Important: For destinations, always select the destination name. If you select a setting that’s in the destination, the destination’s job action will not be used when processing the job.
Choose a save location from the pop-up menu.
When you’re satisfied with your setting and location choices, click OK.
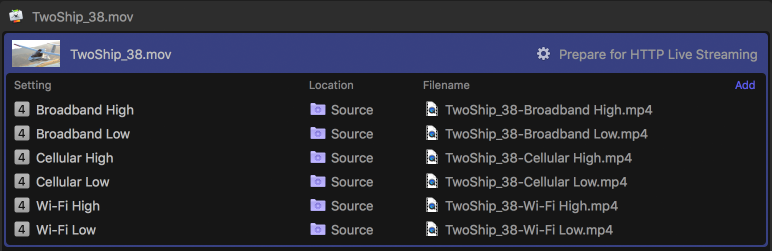
The new job is displayed in the batch area. The job includes a thumbnail of the source file and the transcoding output instructions (setting, location, and filename). If you chose multiple settings, or a destination with multiple outputs, each output appears in a separate row. If you chose a destination, its job action appears in the upper-right corner of the job area.
To learn more about the built-in destinations and settings, see Built-in settings and Built-in destinations.

The job also appears in the preview area (above the batch area), where you can see the video you’re transcoding, as well as perform a number of other tasks. See Preview jobs.
Optionally, you can add additional source files (and transcode instructions) to a batch.
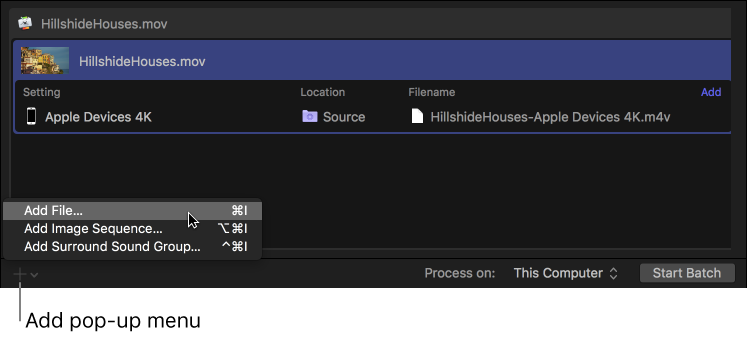
Click the Add pop-up menu ![]() under the batch area, then choose Add File.
under the batch area, then choose Add File.
You can also add a set of image sequence files or surround sound files. For more information, see Work with image sequence files and Import and modify surround sound files.
In the file window that appears, select one or more media files, then click Add.
Shift-click to select consecutive files; Command-click to select nonconsecutive files.
The batch area displays a new job for each source file you add.
To add transcode settings, click the Add Outputs button inside each job in the batch area.
In the settings window that appears, select one or more settings or destinations, choose a save location from the pop-up menu, then click OK.
Tip: Shift-click to select consecutive settings; Command-click to select nonconsecutive settings.
The output instructions that you specified appear in the job. If you chose multiple settings or a destination with multiple outputs, each output appears in a separate row. If you chose a destination, its job action appears in the upper-right corner of the job area.
To change the name of a file to be output, double-click its name in the Filename column, then enter a new name.
The default name assigned to each transcoded file is the source filename appended with the extension of the format used during transcoding (.mov or .mp4, for example).
Note: If you see an alert icon ![]() to the left of the filename, the filename assigned to that output row has already been used. Click the alert icon to view a description of the error. See Errors & Warnings window.
to the left of the filename, the filename assigned to that output row has already been used. Click the alert icon to view a description of the error. See Errors & Warnings window.
To view the properties of a setting, select an output row, then open the inspector by clicking the Inspector button ![]() in the upper-right corner of the Compressor window.
in the upper-right corner of the Compressor window.
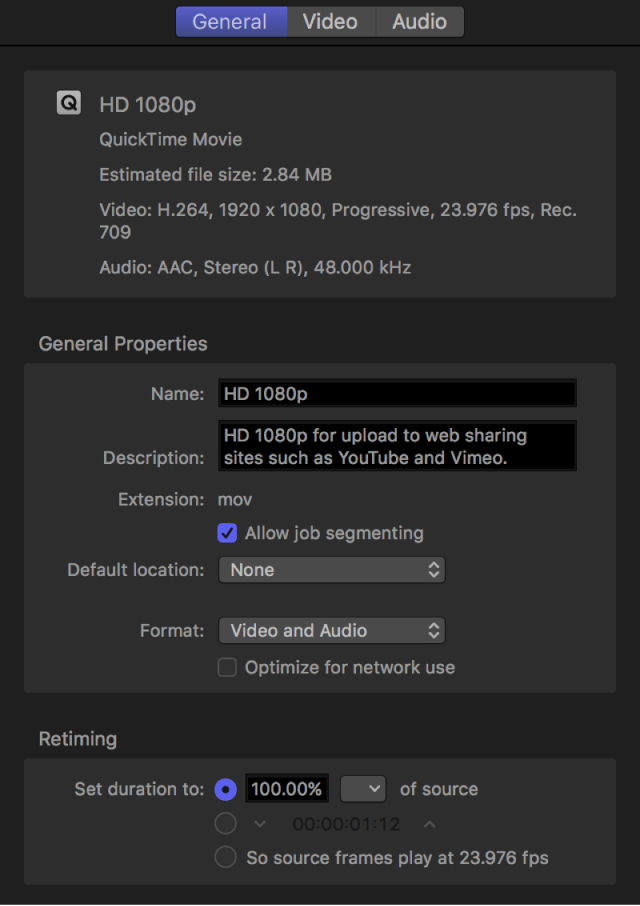
Depending on the setting you’re viewing, general, video, and audio properties are displayed in the inspector. For information about modifying these properties, see View and modify setting properties.
You can add additional transcoding instructions to a job by adding one or more output rows. You can also remove output rows.
Do one of the following:
Add an output row: In the upper-right corner of the job area, click Add, and in the window that appears, select one or more settings, choose a location, then click OK.
Remove an output row: Position the pointer over the output row that you want to remove, then click Remove (at the right end of the row).
After you’ve configured the jobs in your batch using the tasks above, you can transcode the batch.
Click the Start Batch button in the lower-right corner of the batch area and, if necessary, follow the instructions to complete the transcoding process.
The Compressor window switches to Active view, where you can monitor the transcoding process.
In Completed view, you can see how a file was transcoded.
Click the Completed button at the top of the Compressor window.
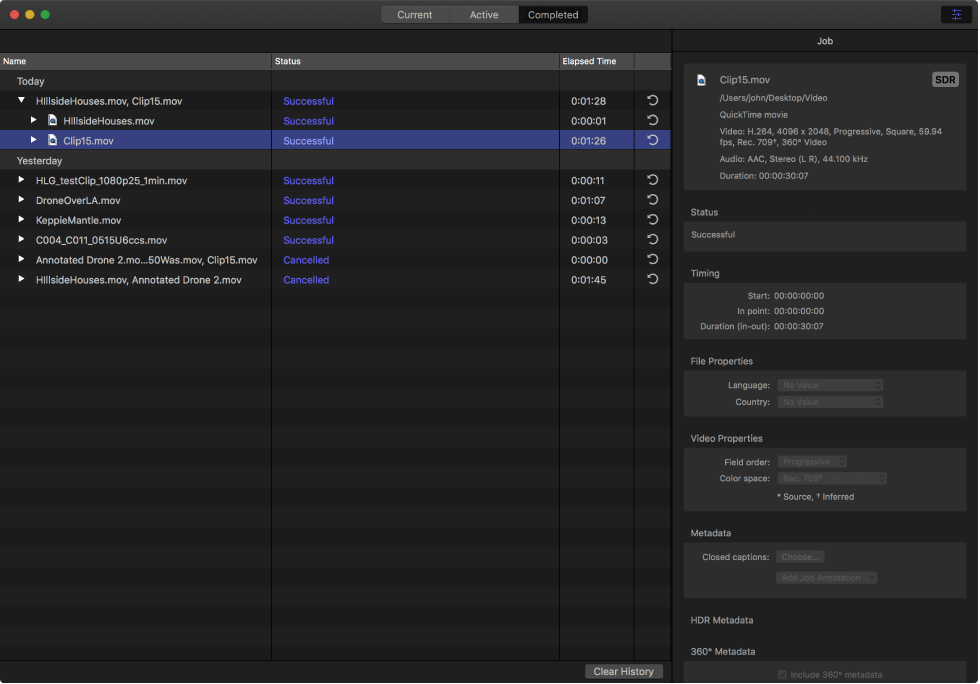
Select a batch, job, or transcoded file and, if necessary, click the Inspector button ![]() .
.
In the inspector (on the right), you can view information about the batch or job, or view the general, video, or audio properties for the setting used to transcode the file.
To view the output file, click the Show in Finder button ![]() .
.
If the Show in Finder button is not visible, click the disclosure triangles on the left side of the Completed view window.
In Completed view, click a job’s Reuse button ![]() .
.
All of the job’s information is copied to Current view, where you can modify the job’s setting properties and other information as necessary, then transcode the new job.