
You can create a branch in a repository to separate feature work or to isolate your changes from others. Later, you can merge the branch with another branch—for example, merge your branch with the main branch—to make your branch changes available to others.
In the navigator area, click the Source Control navigator button (![]() ) in the navigator bar.
) in the navigator bar.
Control-click the parent branch, then choose Branch from [branch] from the pop-up menu (where [branch] is the name of the branch you clicked).
In the sheet that appears, enter the name of the new branch, and click Create.
If the branch you created is from the current working copy, Xcode switches the working copy to the new branch and appends “(current)” to the name in the Source Control navigator.
After you commit changes to a branch and then view the commit history, the branch will appear in the history editor next to the author’s name.
Commit your changes in both branches.
In the navigator area, click the Source Control navigator button (![]() ) in the navigator bar.
) in the navigator bar.
Control-click the branch you want to merge into, then choose Merge [source branch] into [target branch].
In the sheet that appears, click Merge.
In the next sheet that appears, use the controls to resolve differences.
To specify which branch revision to use, select the file in the left column, then click a button in the segmented control under the comparison editor:
left than right: Use the left changes, then the right changes that don’t conflict.
left: Use the left changes only.
right: Use the right changes only.
right than left: Use the right changes, then the left changes that don’t conflict.
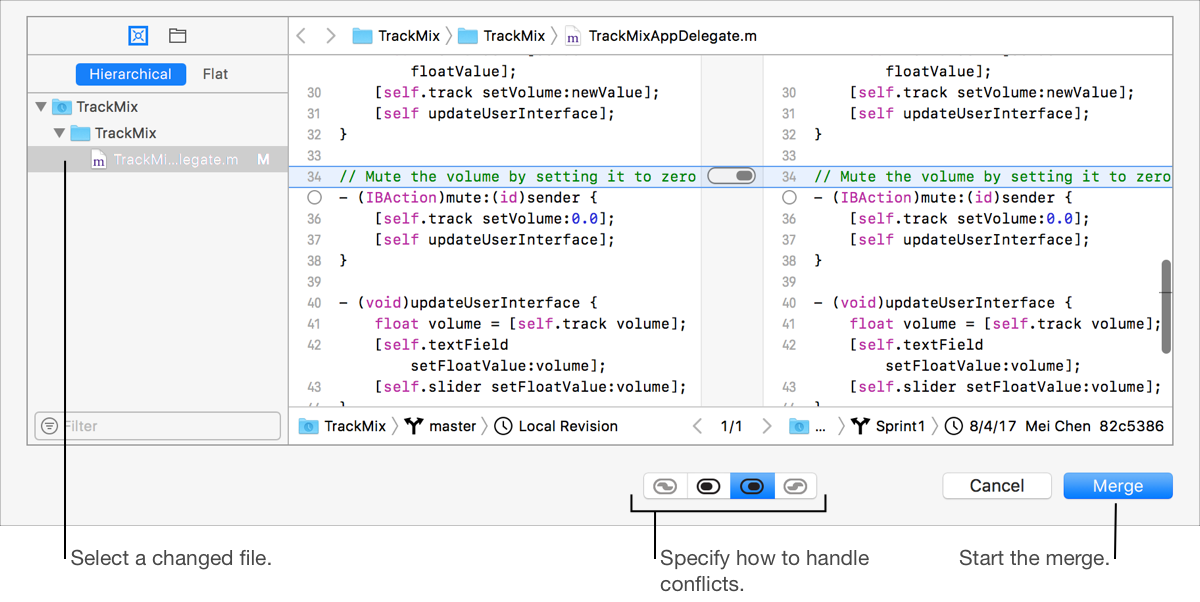
After resolving any differences and conflicts, click Merge.
An up arrow and count appear next to the branch in the Source Control navigator indicating that changes need to be pushed. The branches are merged but you need to push the changes to the remote repository for others to see them.