
You clone a project from a remote source code repository to create a working copy of the project on your Mac.
If you use Bitbucket, GitHub, or GitLab to manage your remote repository, add your remote repository account in Accounts preferences first.
Choose Source Control > Clone.
The window that appears shows your projects, your organizations projects, and your starred projects.
Search for the repository in the following ways:
Enter search text in the search field followed by Return. The matching repositories appear below.
Enter the URL for the repository in the search field followed by Return, then enter the credentials in the sheet that appears.
Select the repository you want to clone and view the details below.
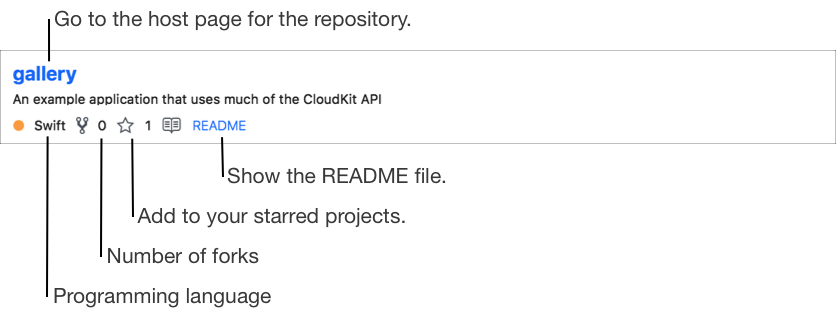
The detail area shows the programming language, number of forks for this project, and number of people who added it to their starred projects.
You can perform the following actions in the detail area:
Go to the host page: Click the repository name link.
Add the project to your starred projects: Click the star icon.
View the README file: Click the README link. A sheet appears showing the file. To dismiss the sheet, click Close.
Click Clone.
In the sheet that appears, enter a folder name and choose a location, then click Clone.
The repository is cloned and downloaded. Then the project in the repository opens in Xcode.
Alternatively, when you create your Xcode project, click Clone an existing project. In the window that appears, follow the same steps to search for and select a repository.