
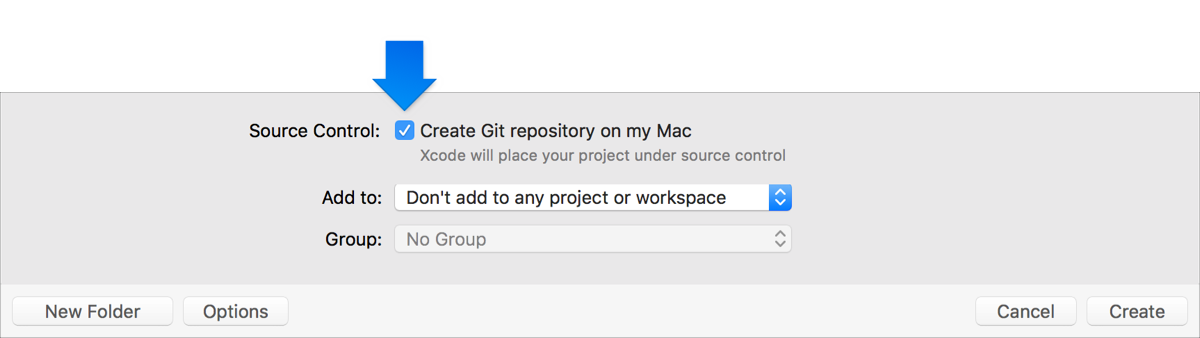
When you create your Xcode project from a template, you can enable source control by selecting “Create Git repository on my Mac” on the last sheet that appears. When selected, Xcode creates a local Git repository for the project.
Later, you can create a remote from a local source code repository to back up your project or share it with others. If you use GitHub for your remote repository, add your GitHub account to Accounts preferences. To check out an existing project, choose Source Control > Clone, choose a GitHub repository from the table, then click Clone. If the repository doesn’t appear or you don’t use GitHub, enter a server address in the text field instead. Xcode downloads a working copy of the project.
To see the files you modified in the navigator, click the Project navigator (![]() ) and click the source control status icon (
) and click the source control status icon (![]() ) in the filter bar. The Project navigator shows only the files that have a source control status such as modified (M). You can use the filter bar to view the set of files you’re actively modifying.
) in the filter bar. The Project navigator shows only the files that have a source control status such as modified (M). You can use the filter bar to view the set of files you’re actively modifying.
To see the changes you’ve made to a file, select the file in the Project navigator, choose the version editor (![]() ) in the toolbar, and choose an option from the pop-up menu. To compare file versions, choose Comparison. To find out who last changed each line in your file, choose Blame. To view the source control log for the file, choose Log.
) in the toolbar, and choose an option from the pop-up menu. To compare file versions, choose Comparison. To find out who last changed each line in your file, choose Blame. To view the source control log for the file, choose Log.

If you choose Comparison, the editor compares the local revision with the last revision committed to source control. For each change, the version editor shows the line that changed and highlights the changes to the line. To compare the local revision to an older revision, choose the older revision from the jump bar on the right. To compare any two revisions, select them from the jump bars on the left and the right.
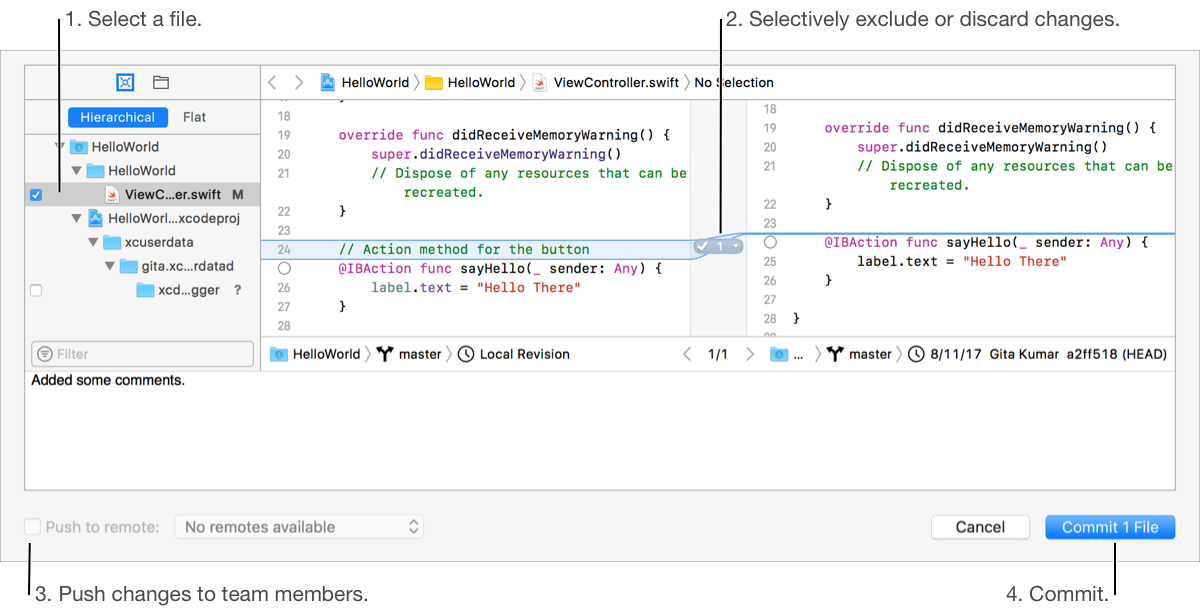
To save the changes you made to files, choose Source Control > Commit. In the sheet that appears, review the changes and exclude or discard specific changes. Then enter a commit log message, optionally select “Push to remote,” and click the Commit button.
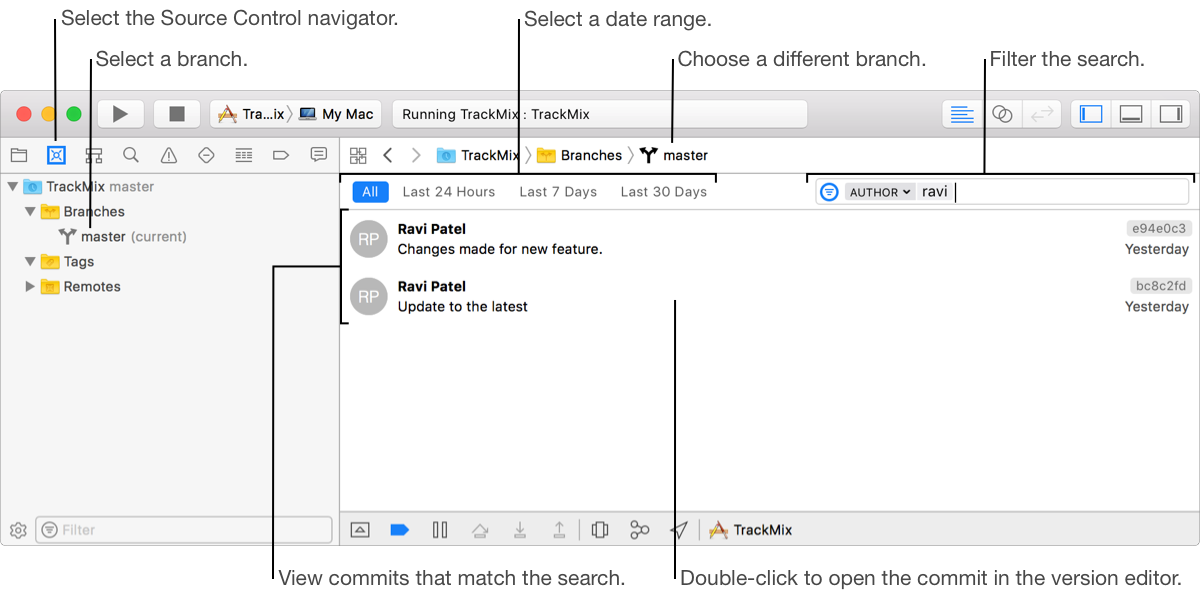
Use the Source Control navigator to see your working copies and view the commits. You can also create a branch in a repository to isolate a feature or changes from the main branch. Then you can tag a commit in a branch before you distribute your app for testing or submit it to App Review.
Next Step: Test your app.