
Upload your app to iTunes Connect to distribute it to users through the App Store, or optionally, to distribute your beta app to testers using TestFlight.
In the Archives organizer, select the archive you want to upload, then click “Upload to App Store.”
Note: If the Upload button is disabled, verify that the archive contains a single top-level app.
In the sheet that appears, choose distribution options, then click Next.
To learn about the distribution options, go to Distribution options.
In the sheet that appears, choose a signing option, then click Next.
To learn about the signing options, go to Distribution signing options. If you select “Manually manage signing”, go to Manually manage distribution signing for alternate steps.
If you are missing a required distribution certificate, follow the instructions in the next sheet to create it.
Review the signing certificate, provisioning profile, and entitlements.
To export the app before uploading it, click Export, select a location for the files, then click Export.
A folder containing the archive export files appears in Finder. You need the ExportOptions.plist file contained in this folder to configure a bot to create iOS App (IPA) files. You can also pass the ExportOptions.plist to the xcodebuild command.
Note:
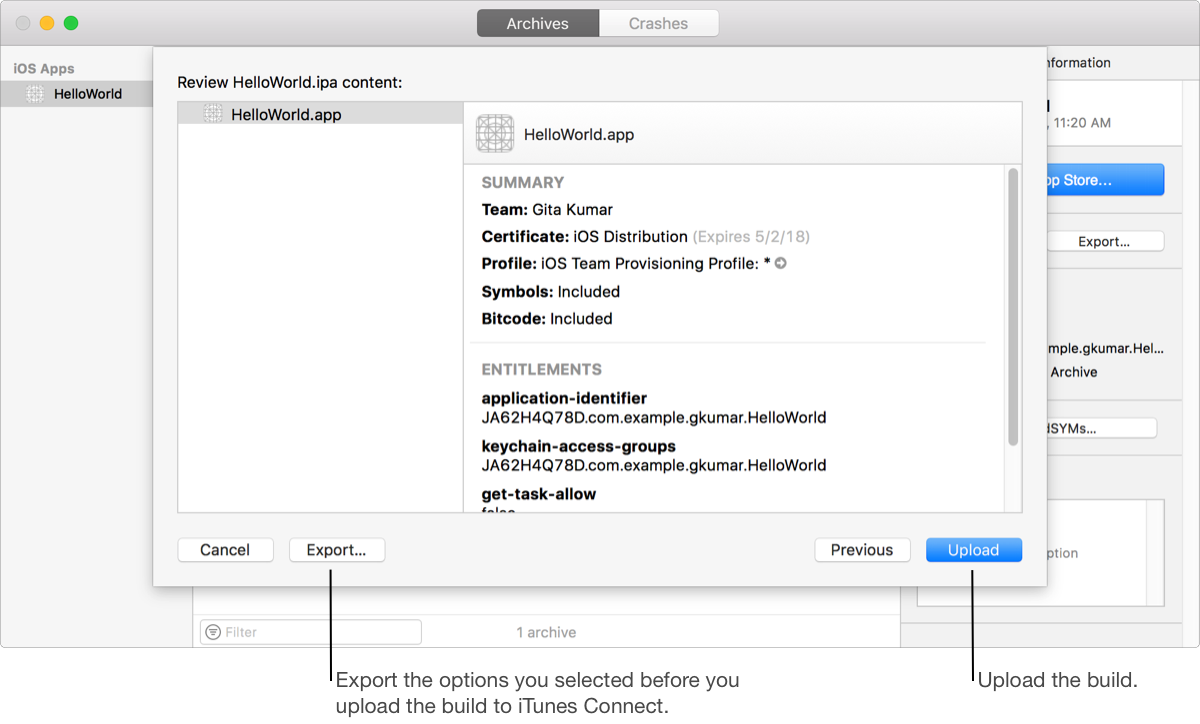
Click Upload.
If you distribute your app using TestFlight or through the App Store, you can view crash reports—collections of crash logs from users running your app on their device—in the Crashes organizer.