
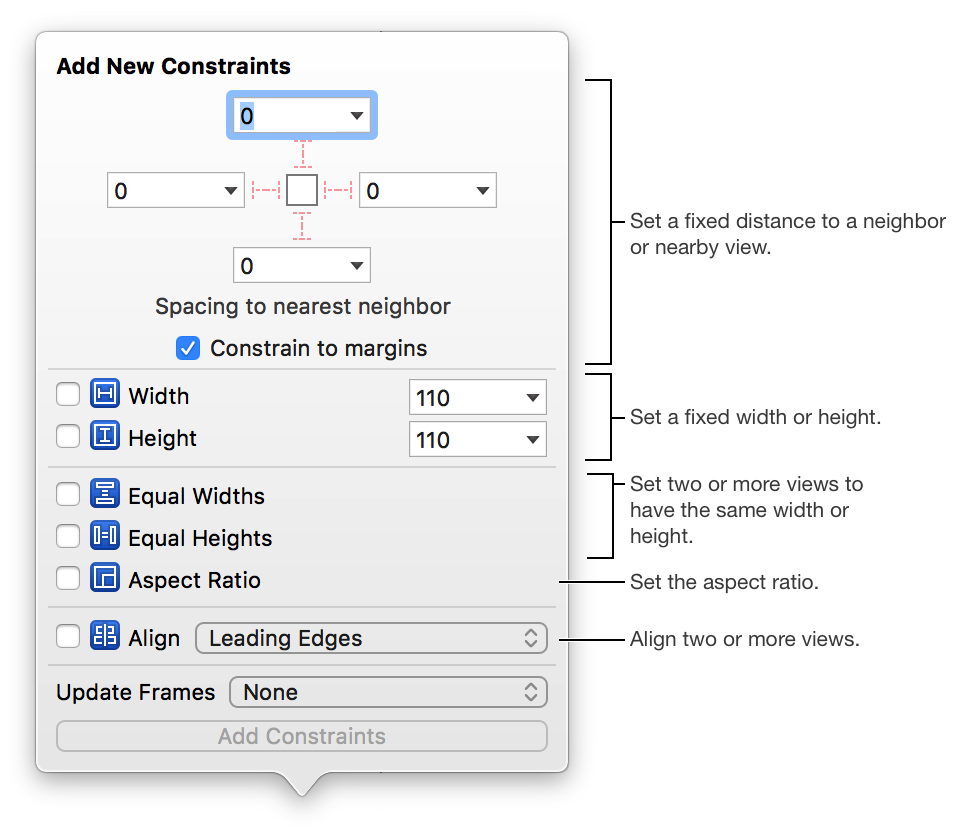
Use the Add New Constraints tool (![]() ) to quickly create fixed size, aspect ratio, or position constraints for one or more views.
) to quickly create fixed size, aspect ratio, or position constraints for one or more views.
In Interface Builder, select one or more views by clicking them in the outline view or on the canvas.
To select multiple views either:
Shift-click a range of views in the outline view
Command-click individual views in the outline view
Shift-click or Command-click individual views on the canvas
At the bottom of the canvas, click the Add New Constraints tool button in the layout bar.

In the Add New Constraints tool, set the properties of the constraints you want to add.
See other tasks in this help topic for examples.
Note: The Add New Constraints tool enables only valid constraint options for the selected views.
From the Update Frames pop-up menu, choose an update option.
None: Don’t update any frames.
Update only the frames of the selected views: Choose “Items of New Constraints.”
Update all frames in the container view: Choose “All Frames in Container.”
Click Add Constraints (the title changes depending on the number of constraints you specify).
The constraints are added to the selected views and appear in the outline view. The canvas updates the Auto Layout lines and badges.
In the Add New Constraints tool, select the dashed red line corresponding to the side of the nearest neighbor.
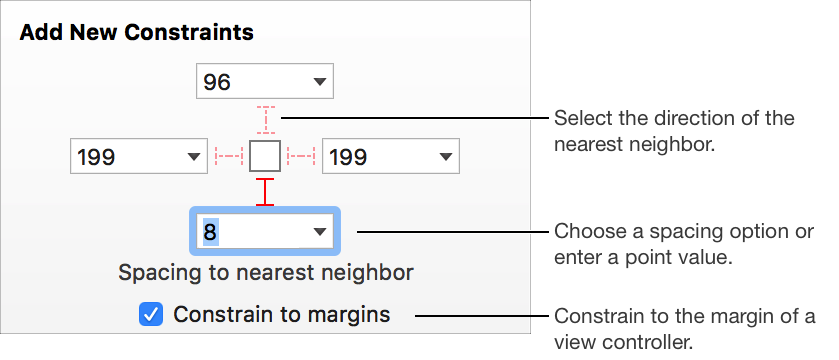
In the adjacent text field, choose a spacing option.
Specify a fixed distance to the nearest neighbor: In the text field, enter the distance in points.
Use the recommended spacing between views: Choose Use Standard Value from the pop-up menu.
Use the current value: Choose Use Current Canvas Value from the pop-up menu.
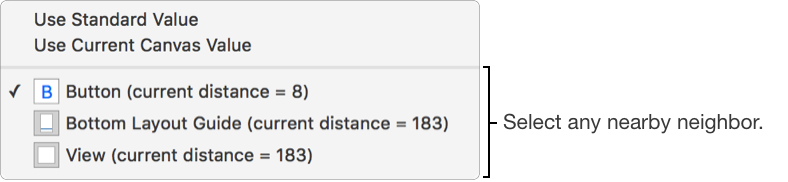
Choose a nearby neighbor: Choose a view below the line in the pop-up menu.
In the Add New Constraints tool, select the Width or Height checkbox and specify the point size in the text field.
In the Add New Constraints tool, select the Aspect Ratio checkbox.
If you selected a single view, the width of the view is used as the numerator for the ratio, and the height is used for the denominator. If you select multiple views, Auto Layout chooses the width of one of the views for the numerator and the height of another view for the denominator.
In the Add New Constraints tool, select the Align checkbox.
You must select two or more views to enable the Align checkbox.
In the Align pop-up menu, choose an alignment attribute.
Choose one of these values:
Leading Edges
Trailing Edges
Top Edges
Bottom Edges
Baselines
Horizontal Centers
Vertical Centers
Note: The Baselines attribute is available only if all the selected views have baselines.
You can also align views using the Align tool.