Creating Clusters with Apple Qadministrator
Once you configure managed service nodes or cluster controllers, they are visible in Apple Qadministrator, which you use to create and modify Apple Qmaster clusters. See the “Apple Qmaster and Distributed Processing” chapter of the Compressor User Manual for information on using the Apple Qmaster Sharing window to create managed service nodes and cluster controllers.
There are two basic steps to creating a managed cluster with Apple Qadministrator. First, you create a new cluster and choose the cluster controller. Then, you add service nodes to the cluster.
Stage 1: Creating a New Cluster
Use the following steps to create a cluster with Apple Qadministrator.
In Compressor, choose Apple Qmaster > Administer Clusters to open Apple Qadministrator.
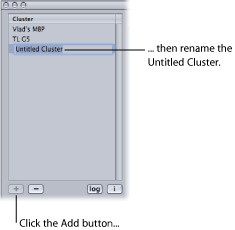
Click the Add (+) button.
Select Untitled Cluster and rename it. (The cluster name you create will also appear in the cluster pop-up menus in Compressor, Share Monitor, Apple Qmaster, Final Cut Pro, and Motion.)
From the Controller pop-up menu, choose a cluster controller from those available on the network.

Note: If a password was created for the cluster controller in the Apple Qmaster Sharing window, a password authentication dialog appears.
Optionally, create cluster passwords by clicking the Security tab and selecting and entering the passwords you want.
- Administrator Password: If you create this password, administrators will need to know it in order to modify this cluster and to view this cluster’s batches in Share Monitor.
- User Password: If you create this password, users will need to know it in order to submit batches to this cluster and to view those batches in Share Monitor.
Stage 2: Assigning Service Nodes
Use the following steps to assign service nodes to a cluster.
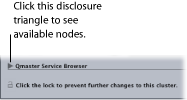
If the Qmaster Service Browser is not already displayed, click the disclosure triangle to see it.
Add service nodes to the new cluster by dragging them from the Qmaster Service Browser list at the bottom of the window to the cluster’s service nodes list.
If there is a closed lock icon next to a computer name, click the lock and enter the password that was assigned to it in the Apple Qmaster Sharing window of Compressor. Otherwise, you won’t be able to drag that service node to the cluster.
Service nodes that are already assigned to another cluster are not shown.

Note: The computer names you see at the top level of the Name columns may appear in one of three formats, depending on your configuration: the computer name (for example, Lemur node), the Apple networking name (for example, Lemur-node.local), or the network address for the computer (for example, 02030b-dhcp45.company.com).
When you have finished adding service nodes, click Apply.
Your cluster is now ready to process batches.
Note: Although Apple Qadministrator currently allows you to create a cluster with unmanaged services, valid clusters require at least one managed service for the cluster to be viewable in Apple Qmaster, Compressor, and Share Monitor.