Add color behind text
Select the text.
Click the Style button near the top of the sidebar on the right.
If you don’t see a sidebar, or it doesn’t have a Style button, click
 in the toolbar. If the text is in a text box, table, or shape, first click the Text tab at the top of the sidebar, then click the Style button.
In the Font section, click
 , then choose a color from either the Character Fill Color well or the color wheel.
The left color well shows colors that match the template. The color wheel on the right opens the Colors window, where you can choose any color.
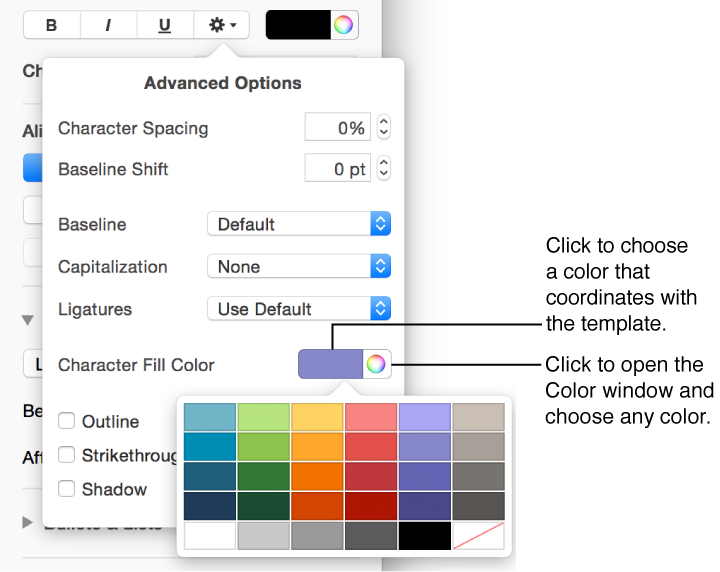
To remove the color, select the text, then click the Character Fill Color well and choose the swatch that has a diagonal line through it at the bottom-right corner of the well.