
A quick way to change how an object looks is to apply an object style to it. Every template includes object styles—sets of attributes like colors, borders, and shadows—that are designed to look good with the template.
You can create your own object style by customizing the look of an object—applying your own color, border, fill, and so on—then saving the look as a new style that you can apply to other objects.
Select an image, shape, text box, line, arrow, or video.
To apply an object style to a table, see Change table gridlines and colors. To apply an object style to a chart, see Use chart styles.
Click the Style tab at the top of the sidebar on the right.
If you don’t see a sidebar, or the sidebar doesn’t have a Style tab, click ![]() in the toolbar.
in the toolbar.
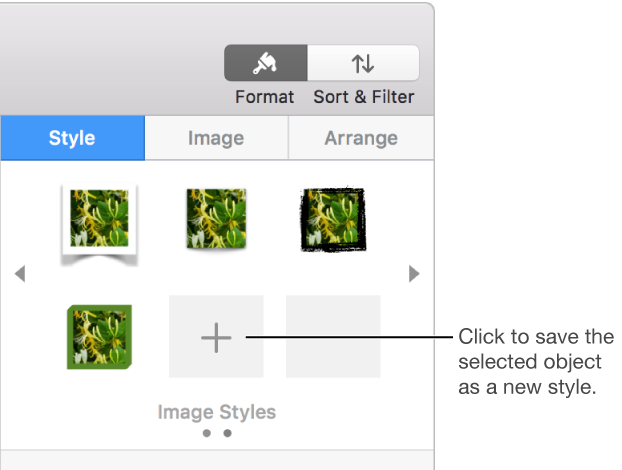
Select a style at the top of the sidebar (click the left or right arrows to see more styles).
If the selected object is a shape that includes text, but you want to apply just the shape style to it (the color and border, for example), Control-click the style thumbnail, then choose Apply Shape Style Only.
If you want to save your changes as a new object style, follow the steps in the next task “Create a new object style.”
Select the image, shape, text box, line, arrow, or video with the changes you want to save as a new style.
To create a new object style for a table, see Use table styles. To create a new object style for a chart, see Use chart styles.
Click the Style tab at the top of the sidebar on the right.
If you don’t see a sidebar, or the sidebar doesn’t have a Style tab, click ![]() in the toolbar.
in the toolbar.
Click the arrow to the right of the style thumbnails to go to the last group of styles.
Click ![]() to add your style.
to add your style.
The style appears as the last thumbnail, but you can drag it to another location.
Note: You can’t create an object style in a spreadsheet shared with others.
You can reorganize the object styles at the top of the sidebar and delete any you don’t want.
Move a style: Click and hold the style you want to move until it flashes, then drag it to a new location. To move it to another group of styles, drag it over a navigation arrow to move to the next group, then drag it to where you want it
Delete a style: Control-click the style, then choose Delete Style.
Note: You can’t create an object style in a spreadsheet shared with others.
You can quickly change the look of all objects that have the same style applied.
Select one of the objects whose style you want to change, then modify the object to look the way you want.
To redefine object styles for tables, see Use table styles. To redefine object styles for charts, see Use chart styles.
Select the object you just modified (if it’s no longer selected), then click the Style tab at the top of the sidebar on the right.
If you don’t see a sidebar, or the sidebar doesn’t have a Style tab, click ![]() in the toolbar.
in the toolbar.
Control-click the style you want to redefine, then choose Redefine Style from Selection.
Choose an option, then click OK.