
Use the Final Cut Effect template to create a custom stylized effect that can be applied to clips in the Final Cut Pro X Timeline.
For information on working with 360° templates, see About creating 360° templates for Final Cut Pro.
In Motion, choose File > New From Project Browser (or press Option-Command-N).
In the Project Browser, click Final Cut Effect, then click the Preset pop-up menu and choose a project size.
Important: Be sure to create the template at the highest resolution you will use in your Final Cut Pro project. If you’re creating 4K-specific templates, you can enable a setting that allows the Final Cut Pro media browsers to display only templates designed for use in 4K projects. For more information, see Set template resolution.
Click Open (or press Return).
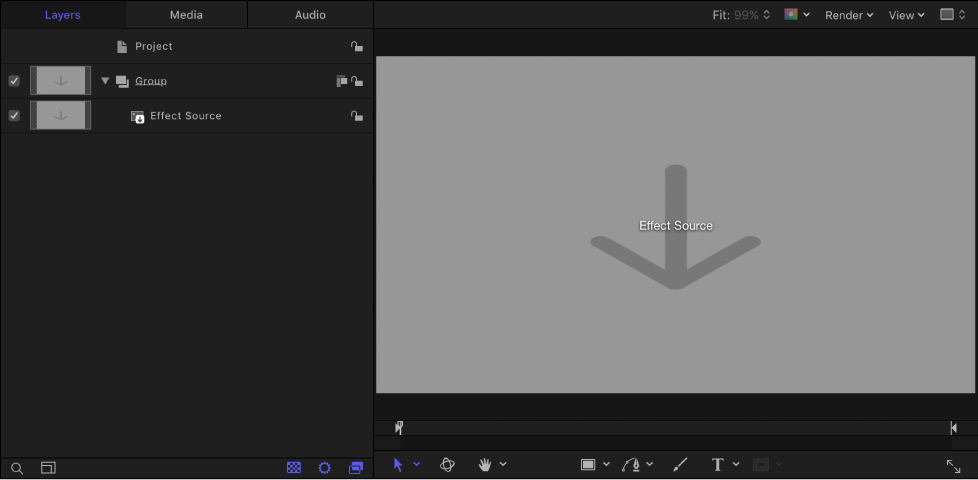
A new, untitled Motion project opens, with the Effect Source placeholder layer selected.
Note: You cannot delete the Effect Source placeholder from an effect template. Nor can you create additional Effect Source placeholders.
To add a reference image to the Effects Source placeholder to preview your work, do one of the following:
In the toolbar, click Import, then drag a still image from the dialog to the placeholder arrow in the canvas (or to the Effect Source layer in the Layers list).
From the Finder or Library, drag a still image to the placeholder arrow in the canvas (or to the Effect Source layer in the Layers list).
Be sure to release the mouse button when the pointer is over the placeholder (the down arrow in the canvas or Effect Source layer in the Layers list). If you miss the target, you create a new layer, which cannot be dragged to the placeholder layer.
The image is added to the Effect Source layer, replacing the arrow graphic in the canvas. This image is temporary media used to preview the result of the effect you are building. It is not used in the Final Cut Pro effect.
Add filters or behaviors to the Effect Source layer to create a custom effect.
The filter and behavior parameters can be modified and animated. For more information on working with filters, see Filters overview. For more information on behaviors, see Behaviors overview.
To allow Final Cut Pro users to modify specific parameters, choose Publish from the Animation pop-up menu of each parameter you want to make accessible.
Publishing a parameter makes its user interface control (the slider, checkbox, or dial) available in the Final Cut Pro Inspector when the custom effect is applied to a clip. Published parameters can be adjusted and keyframed in Final Cut Pro. For more information, see Add parameter controls overview.
Note: If you’re creating your effect template with Color Processing set to Wide Gamut (in the Project Properties Inspector), you can select “Override FCP Color Space” to ensure that the effect retains the same appearance when applied to the Final Cut Pro timeline, regardless of the Final Cut Pro library’s color processing setting. For more information, see Work in wide color gamut.
Optional: When you’re satisfied with the custom effect you’ve built, you can remove the preview image from the template by selecting the Effect Source layer, then clicking the Clear button in the Image Inspector.
Choose File > Save, then do the following:
In the save dialog, enter a name for the template.
If you don’t specify a name, the template appears in the Final Cut Pro Effects Browser as “New Template.”
Choose a category from the Category pop-up menu.
You can also create a custom category. Categories represent how the effects are organized in the Motion Project Browser and in the Final Cut Pro Effects browser. Custom categories also appear in the browsers.
If needed, choose a theme from the Theme pop-up menu.
You can also create themes. Themes appear in the Motion Project Browser and in the Final Cut Pro browsers. A theme is a metadata tag that assists in categorizing different templates as being part of a single family. For example, you may have different template types that are related to the same project, such as a transition, an effect, and a group of titles.
To retain unused media in the project (media or audio in the Media list that’s not used in the template but which you want to save for later inclusion), select “Include unused media.”
For information on where template-related files are saved, see About template files and media save locations.
If you want a preview movie to appear in the Motion Project Browser, select Save Preview Movie.
Click Publish.
The template and remaining media are saved and exported to the Final Cut Pro Effects browser. If you did not remove the reference image, it appears in the template’s thumbnail in the Final Cut Pro Effects browser.
In Final Cut Pro, click the Effects browser button in the toolbar, locate the effect in the browser, then apply the effect to a clip in the timeline.
Images or clips used in the Motion placeholder layer appear in the Effects browser icon, but are not applied to the clip in the Final Cut Pro timeline.
For information about applying and editing effects in Final Cut Pro, see Final Cut Pro X Help.