
You can also use keyframes to animate behaviors. Combining behaviors and keyframes is a powerful way to enhance behaviors’ usefulness.
For example, you might want to apply a Gravity behavior, but delay the object’s fall until five seconds into the clip. Keyframes allow you to manipulate the parameters of each behavior.
Certain parameters cannot be animated, such as the Throw Velocity parameter of the Throw behavior and the Spin Rate parameter of the Spin behavior.
If a parameter can be animated, the following occurs:
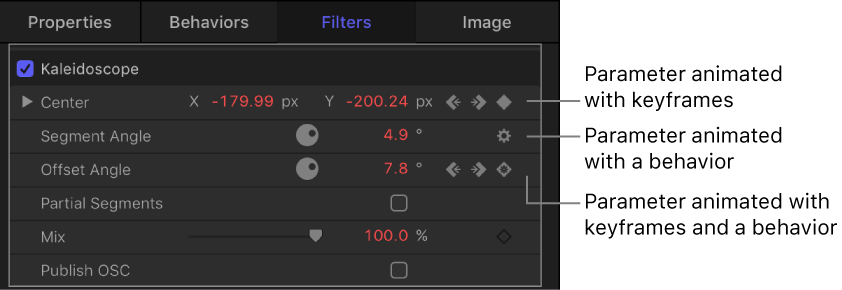
In the Inspector, the parameter row includes an Add/Delete Keyframe button (a diamond outline).
When keyframe recording is turned on (via the Record button) or a keyframe has been added (via the Inspector), the parameter value appears red in the Inspector.
When you add keyframes to a parameter that has been animated with a behavior, a behavior icon (a gear) appears within a keyframe icon (a diamond).
Note: In Motion, you can convert all behaviors applied to an object into keyframes using the Convert to Keyframes command in the Object menu. See Convert behaviors to keyframes.
Select an object in the canvas.
Apply a behavior.
For more information about applying behaviors, see Apply behaviors overview.
In the timing toolbar, click the Record button (or press A) to turn on keyframe recording.
Place the playhead at the frame where you want the effect to begin changing.
In the Inspector or HUD, adjust the behavior’s parameter settings.
For more information, see Animate parameters in the Inspector and Animate in the HUD.
Move the playhead to a new time position.
Adjust the behavior settings again.
Click the Record button (or press A) to turn off keyframe recording.