Stylize Filters
Unlike distortion filters, which warp and deform an image, filters in the stylize subcategory make an image appear as if it was created with a different medium.
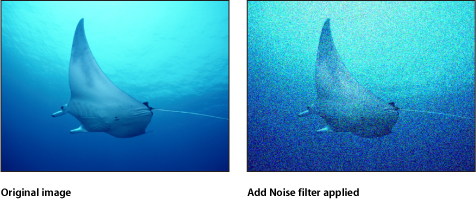
Add Noise
Adds an overlay noise of the selected type to an image. This filter causes rasterization in 3D groups. For more information on rasterization, see About Rasterization.
- Blend Mode: Sets the blend mode used to add noise to the image. For blend mode descriptions, see Using Blend Modes.
The HUD contains the following controls: Amount, Type, Monochrome, Blend Mode, Autoanimate, and Random Seed.
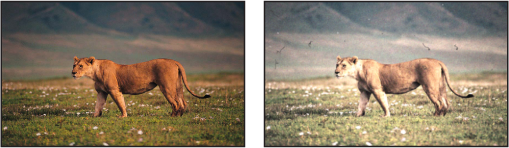
Bad Film
Simulates old or damaged film and/or playback equipment. This filter is animated.
This filter causes rasterization in 3D groups. For more information on rasterization, see About Rasterization.
- Frequency of Change: Defines how often (in frames), the values set in the parameters with variance are recalculated. For example, if Frequency of Change is set to 30, and Jitter Amount and Jitter Frequency are set to values greater than 0, the jitter parameters are recalculated every 30 frames, creating additional randomness.
The HUD contains the following controls: Focus Amount, Focus Variance, Brightness Amount, Brightness Variance, Saturate Amount, Saturate Variance, Scratches, Scratch Color, Hairs, Dust, Jitter Amount, Jitter Variance, Grain, Frequency of Change, and Random Seed.
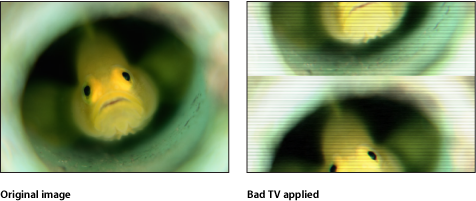
Bad TV
Simulates poor analog television reception, adding attributes like exaggerated video field scan lines, static and roll. This filter causes rasterization in 3D groups. For more information on rasterization, see About Rasterization.
The HUD contains the following controls: Waviness, Roll, Static, Color Synch, Saturate, Scan Line Brightness, Scan Line Percentage, and Number of Scan Lines.
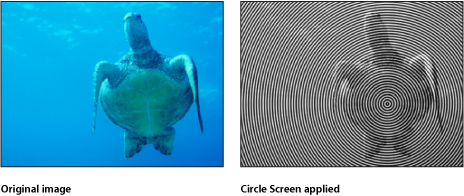
Circle Screen
Reduces an image to a high-contrast grayscale version of itself, then screens the result using a pattern of concentric circles, simulating an etched screening technique. The image is represented by varying thicknesses in the circular pattern.
This filter causes rasterization in 3D groups. For more information on rasterization, see About Rasterization.
- Publish OSC: Publishes the filter’s onscreen controls in Final Cut Pro X. For more information on creating content for use in Final Cut Pro, see Creating Templates for Final Cut Pro X.
The HUD contains the following controls: Scale and Contrast.
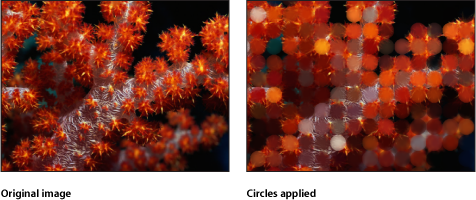
Circles
Adds elliptical facets to an image, giving it a mosaic-like appearance. Each facet takes a color sample from the center of itself. Unlike other mosaic filters, the edges of the facets do not join, allowing parts of the untouched image to be visible between facets.
This filter causes rasterization in 3D groups. For more information on rasterization, see About Rasterization.
The HUD contains the following controls: Size, Falloff, and Invert.
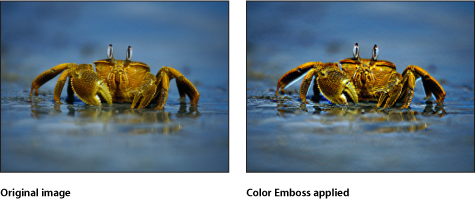
Color Emboss
Traces high-contrast edges in the image with darker versions of the color in the image. This gives the object the appearance of being stamped into the Canvas, while retaining the colors of the original image. The Direction and amount of Relief can be customized.
The HUD contains the following controls: Direction, Relief, and Crop.
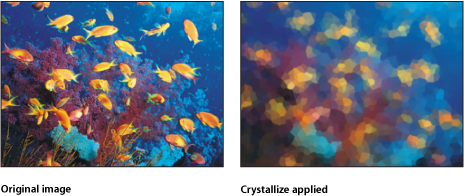
Crystallize
Simulates the effect of viewing an image through a pane of glass with irregular facets patterned into it. These mosaic-like facets give an image a crystallized appearance. This filter is automatically animated, and the facets appear to shift and turn according to the value in the Speed parameter. To prevent the facets from moving, set the Speed to zero.
This filter causes rasterization in 3D groups. For more information on rasterization, see About Rasterization.
The HUD contains the following controls: Size, Speed, Smooth, and Feathering.
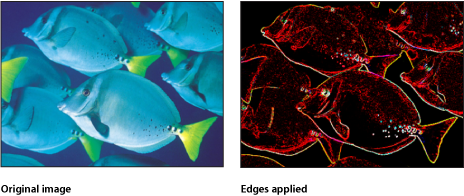
Edges
Creates an edge-detection effect by examining the luminance of an image to render high contrast borders between regions of brightness. These edges are then traced, and all other detail is replaced by black. The amount of eliminated detail depends on the value of the Intensity parameter. The colors of the resulting highlights are intensified variants of the colors from the original image.
This filter causes rasterization in 3D groups. For more information on rasterization, see About Rasterization.
The HUD contains the following control: Intensity.
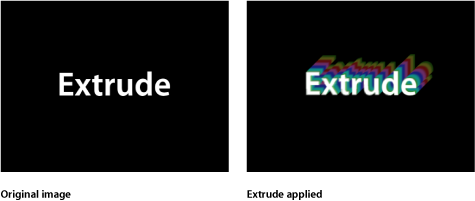
Extrude
Gives an object simulated depth, by creating a front and back side, and then offsetting them and extruding the edges so they connect.
Note: Because this filter only simulates depth, an object with the Extrude filter applied does not interact with 3D aspects of Motion.
This filter causes rasterization in 3D groups. For more information on rasterization, see About Rasterization.
- Publish OSC: Publishes the filter’s onscreen controls in Final Cut Pro X. For more information on creating content for use in Final Cut Pro, see Creating Templates for Final Cut Pro X.
The HUD contains the following controls: Angle, Distance, Clipping, Back Size, Face Brightness, Front Brightness, Back Brightness, Extrude Style, and Gradient.
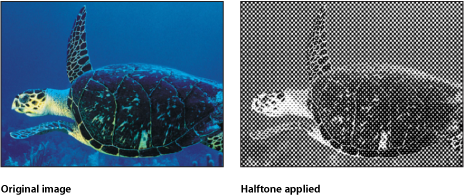
Halftone
Reduces an image to a black and white version of itself, simulating the halftone screening method for print, in which the shadows and highlights of an image are recreated using patterns of small and large dots.
This filter causes rasterization in 3D groups. For more information on rasterization, see About Rasterization.
- Publish OSC: Publishes the filter’s onscreen controls in Final Cut Pro X. For more information on creating content for use in Final Cut Pro, see Creating Templates for Final Cut Pro X.
The HUD contains the following controls: Angle, Scale, and Contrast.
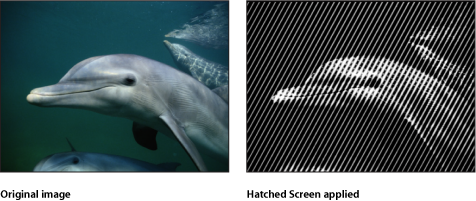
Hatched Screen
Reduces an image to a black and white version of itself, simulating a halftone pen-and-ink method of shading an image, in which the shadows and highlights of an image are recreated using hatched patterns of lines.
This filter causes rasterization in 3D groups. For more information on rasterization, see About Rasterization.
- Publish OSC: Publishes the filter’s onscreen controls in Final Cut Pro X. For more information on creating content for use in Final Cut Pro, see Creating Templates for Final Cut Pro X.
The HUD contains the following controls: Angle, Scale, Skew, Stretch, and Contrast.
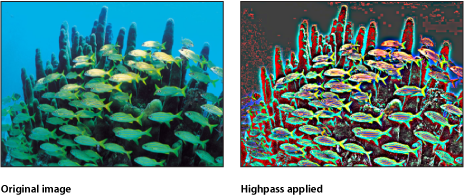
Highpass
Emphasizes areas of detail in an image and stylizes the colors in the resulting image to create a psychedelic display. This filter causes rasterization in 3D groups. For more information on rasterization, see About Rasterization.
The HUD contains the following controls: Radius and Amount.
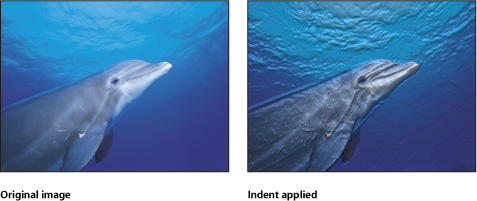
Indent
Creates a shiny, bump-mapped effect, giving the appearance of depressed and flat areas. This filter causes rasterization in 3D groups. For more information on rasterization, see About Rasterization.
- Height Map: Displays a thumbnail of the height map chosen. If present, the height map is used to determine the flat and raised areas of the object. To learn how to add an object to the Height Map well, see Source Well.
The HUD contains the following controls: Softness, Brightness, Ambient, Highlight Brightness, Highlight Sharpness, Light Rotation, Depth, Height Map, Map Channel, Stretch To Fit, Height Map X Scale, Height Map Y Scale, Height Map X Offset, and Height Map Y Offset.
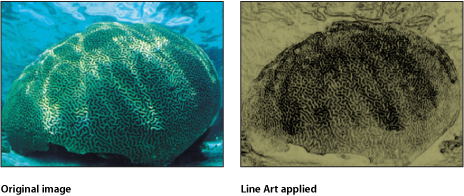
Line Art
Performs an edge detection of the high-contrast borders between regions of differing brightness in an object, tracing the edges and reducing other detail in the image to the color specified by the Paper Color parameter. The color of the resulting outline can also be customized. The effect is that of a line drawing on paper.
This filter causes rasterization in 3D groups. For more information on rasterization, see About Rasterization.
The HUD contains the following controls: Threshold, Smoothness, Paper Color, Paper Opacity, and Ink Color.
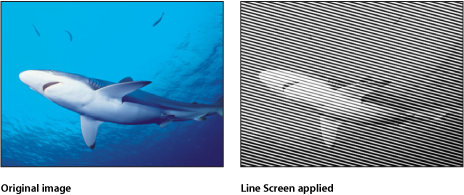
Line Screen
Reduces an image to a high-contrast grayscale version of itself, then screens the image using a pattern of straight lines, simulating an etched screening technique. The image is represented by varying thicknesses in the pattern of the parallel lines.
This filter causes rasterization in 3D groups. For more information on rasterization, see About Rasterization.
- Publish OSC: Publishes the filter’s onscreen controls in Final Cut Pro X. For more information on creating content for use in Final Cut Pro, see Creating Templates for Final Cut Pro X.
The HUD contains the following controls: Angle, Scale, Skew, Stretch, and Contrast.
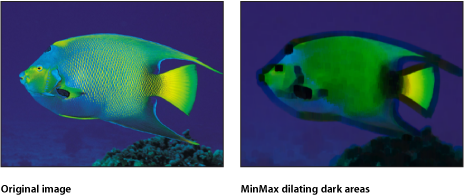
MinMax
Softly patterns an image by choosing a maximum or minimum color value for pixels in the specified radius. The result erodes or dilates the light or dark areas of your object into soft, blocky regions.
This filter causes rasterization in 3D groups. For more information on rasterization, see About Rasterization.
The HUD contains the following controls: Mode and Radius.
Noise Dissolve
Dissolves an object by adding a pattern of noise to it. Raising the value of the Dissolve Amount parameter gradually eats away at more and more of the image. The alpha channel is set to zero within the noisy areas, so background images are revealed as the Dissolve Amount increases.
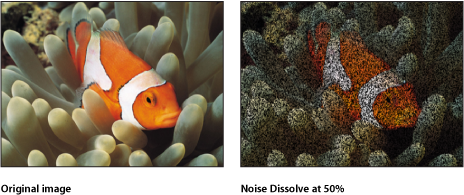
The HUD contains the following controls: Dissolve Amount and Random Seed.
Pixellate
Turns an image into a mosaic of blocks using colors taken from an object. The scale of the blocks can be increased or decreased.
This filter causes rasterization in 3D groups. For more information on rasterization, see About Rasterization.
- Publish OSC: Publishes the filter’s onscreen controls in Final Cut Pro X. For more information on creating content for use in Final Cut Pro, see Creating Templates for Final Cut Pro X.
The HUD contains the following control: Scale.
Posterize
Reduces the number of colors in an image to a set number per color channel, adjustable using the Levels parameter.
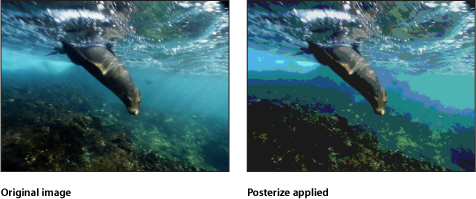
The HUD contains the following control: Levels.
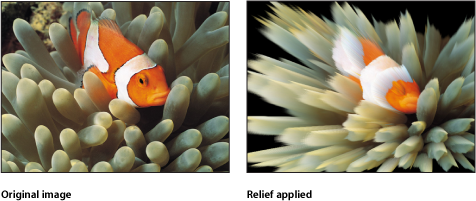
Relief
Uses the color values of an object or height map to calculate height vertices, creating the appearance of a 3D height map.
Note: Because this filter simulates depth, an object with the Relief filter applied does not interact with 3D aspects of Motion.
This filter causes rasterization in 3D groups. For more information on rasterization, see About Rasterization.
- Height Map: Displays a thumbnail of the height map chosen. If present, the height map is used to calculate height vertices. To learn how to add an object to the Height Map well, see Source Well.
- Publish OSC: Publishes the filter’s onscreen controls in Final Cut Pro X. For more information on creating content for use in Final Cut Pro, see Creating Templates for Final Cut Pro X.
The HUD contains the following controls: Front Size, Back Size, Fuzziness, Height Map, and Map Channel.
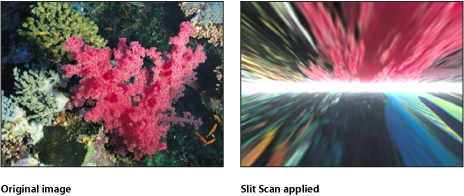
Slit Scan
Creates an animated fly-through effect by simulating the slit scan process used to create “stargate” images in science fiction films.
This filter causes rasterization in 3D groups. For more information on rasterization, see About Rasterization.
- Publish OSC: Publishes the filter’s onscreen controls in Final Cut Pro X. For more information on creating content for use in Final Cut Pro, see Creating Templates for Final Cut Pro X.
The HUD contains the following controls: Rotation, Speed, Perspective, Glow, Glow Color, and Offset.
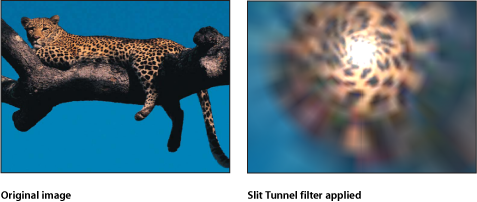
Slit Tunnel
Simulates a circular version of the slit scan process used to create “warp tunnel” images in science fiction films. This filter is automatically animated to create a fly-through effect.
This filter causes rasterization in 3D groups. For more information on rasterization, see About Rasterization.
- Publish OSC: Publishes the filter’s onscreen controls in Final Cut Pro X. For more information on creating content for use in Final Cut Pro, see Creating Templates for Final Cut Pro X.
The HUD contains the following controls: Rotation, Speed, Perspective, Glow, and Glow Color.
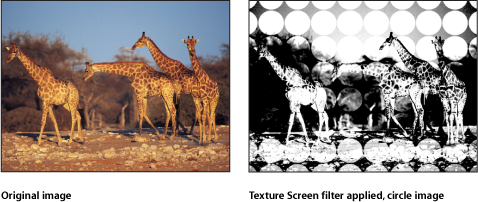
Texture Screen
Uses a source object specified by the Map Image parameter to screen the target. The source object can be any image, movie, or shape. By default, Texture Screen behaves as if there were a black image applied to the Map Image well, which makes the target appear desaturated and washed out.
This filter causes rasterization in 3D groups. For more information on rasterization, see About Rasterization.
- Map Image: Displays a thumbnail of the map chosen to generate the screen. To learn how to add an object to the Map Image well, see Source Well.
- Publish OSC: Publishes the filter’s onscreen controls in Final Cut Pro X. For more information on creating content for use in Final Cut Pro, see Creating Templates for Final Cut Pro X.
The HUD contains the following controls: Map Image, Angle, Skew, Stretch, Scale, Contrast, Threshold, Noise Contrast, and Noisiness.
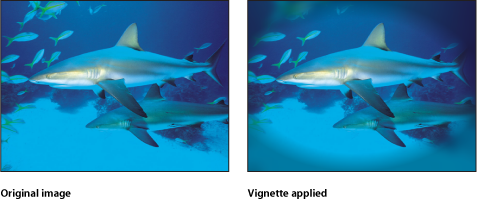
Vignette
Simulates the light fall-off and corner-blurring effect characteristic of images viewed through some camera lenses.
This filter causes rasterization in 3D groups. For more information on rasterization, see About Rasterization.
- Falloff: Sets the amount of feathering applied to the border of the vignette. The higher the falloff, the softer the edge of the vignette. Drag the outer ring of the onscreen control to adjust this value. Drag in the center of the inner and outer rings to adjust the Size and Falloff values simultaneously.
- Publish OSC: Publishes the filter’s onscreen controls in Final Cut Pro X. For more information on creating content for use in Final Cut Pro, see Creating Templates for Final Cut Pro X.
The HUD contains the following controls: Size, Falloff, Blur Amount, Darken, and Saturation.
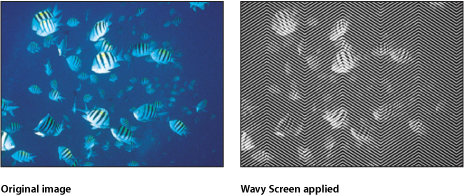
Wavy Screen
Reduces an image to a high-contrast grayscale version of itself, then screens the resulting image using a pattern of angled lines, simulating an etched screening technique. The image is represented by varying thicknesses in the pattern of the zigzagging lines.
This filter causes rasterization in 3D groups. For more information on rasterization, see About Rasterization.
The HUD contains the following controls: Amplitude, Wavelength, Scale, and Contrast.