Animating with the Transform Glyph tool
The Transform Glyph tool allows you to animate text characters independently of their text objects.
Select the text object that contains the glyphs to modify.
Choose the Transform Glyph tool from the 2D transform tools pop-up menu in the toolbar.

Selecting the Transform Glyph tool activates glyph transform handles in the Canvas and adds additional controls to the Text HUD.
In the Text HUD, ensure that the Attribute pop-up menu is set to Transform Glyph.
When Transform Glyph is selected, you can modify and animate the position, rotation, and scale of text characters. You can choose other options from the Attribute pop-up menu to activate transform handles that modify Face, Outline, Glow, and Drop Shadow parameters of text characters.
Move the playhead to the frame where you want the animation to begin, and click the Record button (or press A) to enable keyframing.
In the Canvas, select and drag glyphs to their starting position in the animation sequence.
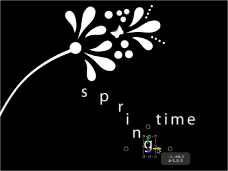
Go to the frame you want the animation to end, and drag the glyphs to their ending positions.

An editable animation path is created for the keyframed glyphs. You can add and remove control points and change the shape of the path in the Canvas. For more information on working with animation paths, see Manipulating Animation Paths in the Canvas.
Move the playhead back to the start frame and play the project (by pressing the Space bar).
The glyphs animate from their starting positions to their ending positions.
Note: The other options in the Attribute pop-up menu—Face, Outline, Glow, and Drop Shadow—can be animated in the same manner as the Transform Glyph option.