Working with Keyframes in the Timeline
When keyframing, it is often helpful to view your keyframes in the Timeline. This lets you move keyframes to line them up with other important timing elements in your project such as edit points, sound cues, markers, and even other keyframes. You can also view keyframe parameters, and delete keyframes you don’t need.
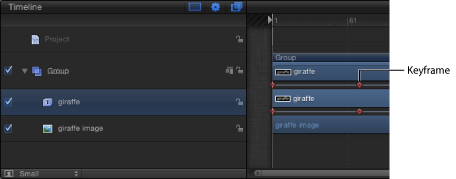
Turn on the Show Keyframes button (in the upper-right corner of the Timeline).

Control-click a keyframe in the Timeline and view its value in the shortcut menu.
Note: Multiple keyframes on the same frame are listed in the menu.
Control-click the keyframe in the Timeline, then choose Show in Keyframe Editor from the shortcut menu.
The Keyframe Editor opens, showing the corresponding parameters in an “Untitled Set.”
Modifying Keyframes in the Timeline
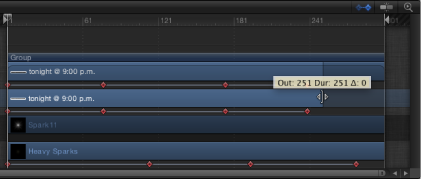
When keyframes are visible in the Timeline, you can change their positions in time by dragging them horizontally in the track. This does not modify the keyframe’s parameter value. Rather, it changes the position in time when the keyframe occurs.
Although moving a keyframe in time does not change the parameter’s value, it can have a significant effect on the nature of the animation. For example, if you have two keyframes that animate an object from the top of the screen to the bottom over five seconds, moving one of the keyframes forces the animation to occur more slowly (if you drag them farther apart) or more quickly (if you drag them closer together).
When multiple keyframe values are set in the same frame, you can choose any value to edit, although the values are represented by a single keyframe marker in the Timeline.
Control-click (or double-click) the keyframe.
A shortcut menu appears. The first items in the list are the keyframe values for keyframes on that frame.
Choose the keyframe value to edit.
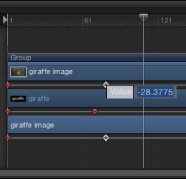
Enter a value into the value field, then press Return.
Note: To exit an active value field without making changes, press Esc.
Control-click the keyframe, then choose Show in Keyframe Editor from the shortcut menu.
The Keyframe Editor appears below the Timeline. For information on working in the Keyframe Editor, see Animating in the Keyframe Editor.
Control-click the keyframe to delete, then choose Delete Keyframes from the shortcut menu.
Control-click any keyframe for the object to clear, then choose Delete All Keyframes from the shortcut menu.
For more control of effects using keyframes, you can use the Keyframe Editor. Any keyframe in the Timeline can be viewed in the Keyframe Editor using the shortcut menu.
Note: Although you can delete keyframes in the Timeline, there is no way to add keyframes in the Timeline.
Aligning Keyframes in the Timeline
The advantage of manipulating keyframes in the Timeline is the ability to line up a keyframe with other important elements in time. For example, you might want to align a filter keyframe applied to one object with the In or Out point of another object, or a marker, or a keyframe in another track.
In this way, you can arrange two objects to fade in or blur into focus at the same frame. It doesn’t matter whether the objects are in the same group.
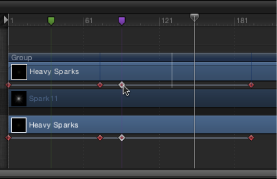
Turn on the Show Keyframes button and identify the keyframe to move.
Press the Shift key and drag the keyframe in the Timeline until it snaps to the marker.
In the following image, the keyframe snaps to the purple marker in the Timeline ruler.
Trimming Keyframed Effects
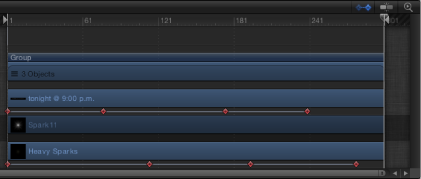
When the duration of an effect such as a filter or behavior is changed in the Timeline, the timing of all keyframes applied to that effect are scaled proportionally. This means that keyframed changes to an effect speed up or slow down if the effect is shortened or lengthened. This happens whether you change the duration of the effect object bar, or the duration of the image object bar an effect is applied to.
You can see in the screenshots below that changing the duration of an object has no effect on keyframes applied to its parameters in the Properties Inspector. Object parameters such as Position, Rotation, Scale, Opacity, and so on remain unaffected.
Trimming Objects Without Retiming Keyframes
If you press Command while resizing an object bar with effects applied in the Timeline, the object is trimmed without altering the timing of its keyframes. This works similarly to trimming a group without modifying durations of the component elements.
You can also prevent automatic keyframe retiming by pressing Command while changing the duration of an effect object bar.