Keyframing in Motion
Keyframing is the process of assigning a parameter value to an object at a point in time. For example, you might want a clip to be scaled to fill the screen five seconds into your project. When you set more than one keyframe, Motion interpolates the in-between frames, generating a smooth change over time.


For example, if you want a title to change from green to blue over time, you can set two keyframes at two points in time. The first keyframe defines the text’s color as green, and the second keyframe sets the color to blue. Motion makes the frames between those points change smoothly from green to blue.
Motion lets you keyframe color values, position, rotation, opacity, and almost every other parameter in the application.
There are several places in Motion to create and edit keyframes and the values between them, represented by animation curves. For example, you can animate basic properties such as scale, rotation, and screen position by manipulating the object in the Canvas.
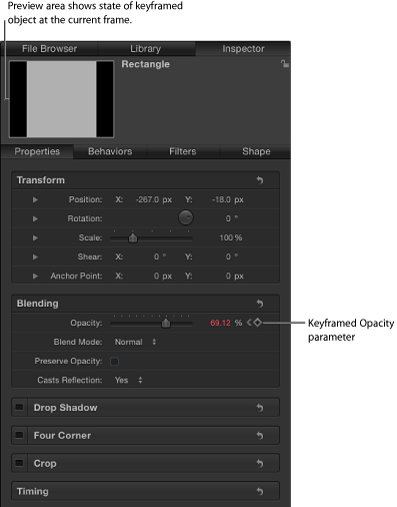
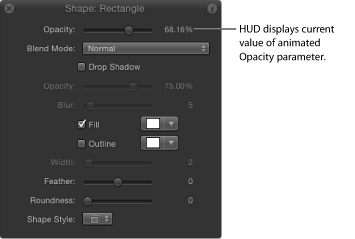
You can also use the Inspector and HUD to set and modify values for most options in the application. Any time you adjust a slider or other control, you can lock that change to the current frame, thereby setting a keyframe. From that point on, no matter what else you do, that parameter finds its way to that specific value when playback reaches that frame.
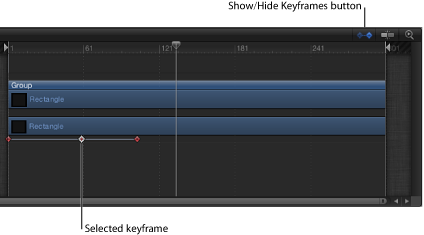
You can also view and modify keyframes in the Timeline by clicking the Show/Hide Keyframes button (in the top-right corner of the Timeline). Keyframes appear as small red (or white, when selected) diamonds beneath their parent object.
Additionally, you can open the Keyframe Editor by clicking the Show/Hide Keyframe Editor button (in the bottom-right corner of the Motion window). Using the Keyframe Editor, you can see and manipulate a graph for every animateable parameter in the application. Again, keyframes appear as diamonds, and the lines (or curves) connecting the keyframes indicate the values for the interpolated frames.
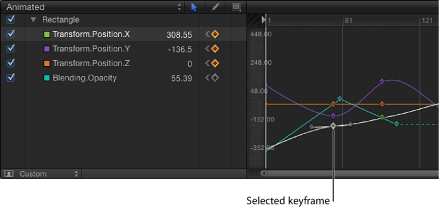
For information on filtering the parameter list in the Keyframe Editor to show only the parameters and keyframes you are interested in, see Filtering the Parameter List.