Working with Key Commands
You can execute nearly every Logic Pro function with a key command or MIDI message. Whenever this documentation mentions a key command, this refers to a function, command, or option that can be accessed by either a computer keyboard keystroke (or keystroke combination—such as Option-R—which opens the Recording project settings) or a MIDI message.
Use of key commands, rather than the mouse, can greatly accelerate your workflow. Throughout this documentation, you will encounter many practical usage examples, often in step form, that include the default key command assignments for particular functions.
Tip: It is recommended that you use these default key commands while getting to know the application. Not only will this help you to remember them, but will also aid in developing good (and faster) working practices from the outset.
Once you have a good understanding of Logic Pro fundamentals, and how you like to work, you can freely assign your own key command set for functions that you use most often.
Note: A number of functions are only available as key commands. Some of these may not have a default key command assignment. In such cases, you will need to create a suitable key command, in order to make use of the function.
Getting to Know the Key Commands Window
You will use the Key Commands window to assign Logic Pro functions to computer keyboard keys or MIDI messages. This allows you to completely customize the application to suit your working style.
Choose Logic Pro > Preferences > Key Commands (or use the Open Key Commands key command, default assignment: Option-K).
Click the Preferences button in the Arrange toolbar, then choose Key Commands from the shortcut menu.
Tip: Holding down Control while choosing a command in a menu opens the Key Commands window, with the respective command selected. This also works with shortcut menus.
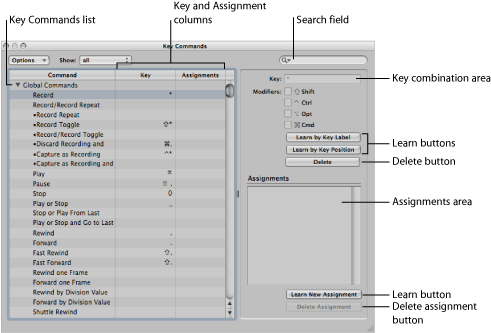
- Key combination area: Displays the key combination associated with the selected key command. Note that this area, along with the modifier checkboxes, is always dimmed. These fields are display-only fields and cannot be edited directly. Use the Learn buttons when you need to change a key command assignment.
Understanding Key Command Groups and Hierarchies
The global key commands are always functional, regardless of the currently active window. Non-global commands require the corresponding window to have key focus (in the foreground, or on top of other windows). This allows you to assign the same key command (or combination of keys) to different functions in different windows.
Important: There is a hierarchy of key command classes, which are not merely separated into global and local key commands. For example, there is a key command class that applies to all windows that display regions. This class has higher priority than global key commands, but a lower priority than local window (Arrange, Score, Piano Roll, and so on) key commands.
Choosing Key Command Sets
The Options menu offers commands that allow you to switch between key command sets, or import and export them. This is particularly useful if you need to work temporarily on another user’s Logic Pro system; you can use your personal key assignments, without altering the settings of the other system.
- Options > Preset menu: Displays all key command sets saved in the ~/Library/Application Support/Logic/Key Commands folder, allowing you to quickly switch between key command sets.
- Options > Import Key Commands: Opens a dialog, allowing you to import key command sets from any folder location. The existing file (on the target system) is automatically saved as a *.bak file. This file contains the old key commands. You don’t need to restart Logic Pro to begin using the new key command set.
- Options > Export Key Commands: Opens a dialog, allowing you to save the current key command assignments to any location. It is important to carry out this command whenever you make changes to your personal key command set. For further details, see Saving Key Command Sets.
Saving Key Command Sets
When you save key commands, your user key assignment sets are stored in a separate file located in ~/Library/Application Support/Logic/Key Commands.
Choose Options > Export Key Commands in the Key Commands window.
A dialog opens, pointing to the default folder location: ~/Library/Application Support/Logic/Key Commands.
Note: It is also possible to save the key command set to another location by browsing to it.
Do one of the following:
- Overwrite an existing key command set: Select the file, then click the Save button.
- Save a new key command set: Enter a new filename in the Save As field, then click the Save button.
Note: All key command sets are available from the Options > Presets menu, if you saved them to the default location.
Saving key commands is also recommended for backup purposes. Following are some recommendations for when you might want to do this:
Export your user key command set (using the above procedure) whenever you make changes to it. Changes to key commands are not automatically saved to the selected key command set.
Make a backup of your user key command set at another hard disk location before changing any key commands.
Make a backup on removable media (a CD-ROM or USB flash drive, for example), or on a networked Mac (using Bonjour) or a MobileMe account (see Sharing Logic Pro Data over a Network). These backup options make it easy to transfer your key commands when using Logic Pro on another computer.
Whenever you install Logic Pro updates, your personal key commands remain unaltered.
Note: Almost all key commands are user-definable. Some of the default assignments for standard commands such as Undo, Save, Quit, New, Open, Cut, Copy, and Paste follow Mac OS X conventions, and probably shouldn’t be altered. Some keys are “hard-wired” to specific functions or commands, and cannot be changed. These are dimmed in the key command listing, to indicate this fixed status.
Browsing Key Commands
Key commands are grouped in various categories. You can extend or collapse groups by clicking the respective disclosure triangle.
The Options > Expand All command displays the contents all key command groups. Options > Collapse All hides the contents of all key command groups.
When you expand key command groups, your key command selection may no longer be visible. You can quickly return to the selected key command by choosing Options > Scroll to Selection. When the list has key focus, you can use a key command (or key command combination) to select the associated function in the list.
Finding Key Commands
You can use the Key Command window’s search field to find key commands by name or partial name:
The search is performed as you enter text. There is no need to press the Return key, unless you want to retain a history of key command searches.
The Cancel button to the right (that appears as soon as any text is entered) clears any entered text, and displays all key commands.
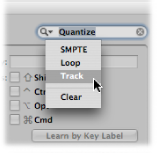
The Search menu to the left (the magnifying glass) retains a history of recently used search terms. The Clear menu item erases the Find history.
Note: The Find history is limited to searches that were completed by pressing the Return key.
Using Special Keys in Key Commands
Some keys have special functions:
The Shift, Control, Option, and Command modifier keys can only be used in conjunction with other keys.
The Delete key has the fixed “delete selected objects” function. It can only be assigned to another function in conjunction with the modifier keys.
The key combinations assigned to the commands in the main menu bar can be reassigned, but it is generally recommended that you leave them at their defaults. The key command assignment is displayed after the main menu items. For example, Command-1 opens the Arrange window, Shift-L locks the current screenset.
The Plus and Minus keys are assigned to the Increase/Decrease Last Parameter by 1 key commands. As the name suggests, this will increase or decrease any selected parameter value in single units.
Using Shift in conjunction with the Plus and Minus keys accesses the Increase/Decrease Last Parameter by 10 key commands.
Assigning Key Commands to Computer Keys
This section shows you how you assign particular computer keyboard keys to Logic Pro functions.
Select a command in the Command column.
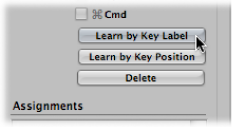
Click the Learn by Key Label button.
Press the desired key, along with the desired modifier key or keys (Shift, Control, Option, or Command).
If you want to make another assignment, repeat steps 1 to 3.
Click the Learn by Key Label button again.
The Learn by Key Position function works in the same way, but differs in that it’s not just a reference to an ASCII code that is stored, but the actual scan code of the key that is pressed.
In practice, this means that you can, for example, assign different commands to the number keys on the numeric keypad and the number keys above the keyboard.
This also means that the key position remains the same if you switch between different operating system language settings, or different keyboards. For example, using a scan code for a function assigned to the Y key on an English keyboard would function in the same way if you switched to a German keyboard—which has a Z key in the same position as the Y key on an English keyboard.
The only disadvantage is that the key code (a number), rather than the ASCII symbol, is displayed in the Key Commands window. The ASCII symbol is more useful for reference purposes.
To clarify the difference between these two functions, here’s a short comparison:
If you use the Learn by Key Label function, and define only one key command for the key, it will be used, no matter which of the two keys (either number 7 key, for example) is pressed.
If you use the Learn by Key Position function, and define two key commands (one for the alphanumeric keyboard, one for the numeric keypad), then the appropriate key command will be used (one for each number 7 key, for example).
In circumstances where an existing local key command combination is used, when assigning a new global key command, a warning message appears. This warning message explains where the existing local key command combination is used and whether it has a higher or lower priority than the one you are trying to assign. You have the following options:
- Cancel: Press this button if you do not want to alter existing assignments.
- Replace: Press this button if you want to replace the existing shortcut (assigned to the chosen key command combination) with the selected function.
- OK: Press this button if you want to assign the key command combination to the selected function, while retaining the existing key command or function.
Select the relevant command (with a key assignment that you want to delete).
Do one of the following:
Click the Learn by Key Label or Learn by Key Position button, then press Delete.
Click the Delete button.
The key assignment of the selected command is deleted.
To erase more assignments, repeat the first and second steps.
Click the Learn by Key Label or Learn by Key Position button again (if you activated them).
Assigning Key Commands to Control Surfaces
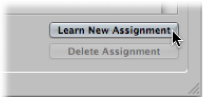
The Learn New Assignment button allows you to assign control surface messages to particular commands—effectively teaching Logic Pro to understand these messages.
Click the Learn New Assignment button.
Select the command in the Command column.
Send the desired MIDI message from your controller.
The Assignments field displays the learned assignment. This may show one or all of the following:
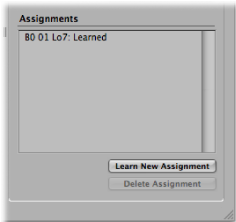
The name of the control surface—or the MIDI string, if the assignment is from an unsupported control surface.
The name of the control.
The zone and mode that the assignment belongs to, if applicable.
Note: The Learn New Assignment button is automatically turned off when the entire message has been received. This avoids reception of further messages (that may be) sent by the device when you release the button. To ensure reliable reception, hold the button for a short period before releasing it.
If you want to make another assignment, repeat steps 2 and 3.
If you want to assign functions—other than key commands—to a control surface, you use the Controller Assignments window. Open this window by double-clicking a row in the assignment section, or by choosing Logic Pro > Preferences > Control Surfaces > Learn Assignment for “destination parameter” from the main menu bar (or use the Open Controller Assignments key command, default assignment: Command-K). For details, see the Logic Pro Control Surfaces Support manual.
Initializing Key Command Assignments
You can reset all key commands to their default assignments. You will lose your existing key command assignments, so make sure that you have created a copy of your key commands file before doing so.
Choose Options > Initialize all Key Commands in the Key Commands window.
Printing a Key Command List
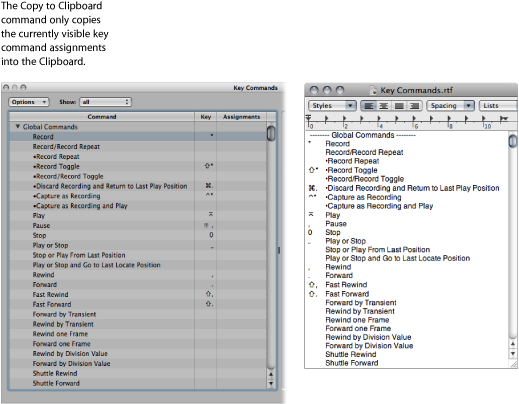
You can use the Options > Copy Key Commands to Clipboard function to copy your key command assignments into the Clipboard as text. From here, it’s a simple matter of pasting the results into any word processor, formatting as desired, and printing them.
The Copy to Clipboard command only copies the currently visible key command assignments. You could, therefore, export a certain group of key commands (those containing a particular character string, for example). What you see in the window display is exactly what’s exported.