Soloing Tracks in the Arrange Area
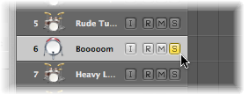
Both MIDI and audio tracks (and folders) offer Track Solo buttons. Soloing a track isolates it while playing, and mutes all other tracks. Use the Track Header Configuration dialog to show or hide the track Solo Buttons.
In a practical, musical situation, it can be useful to hear several tracks in isolation (bass and drum parts, for example) to make it easier to fit other musical parts.
Connecting the Track Solo and Channel Strip Solo Buttons
Solo states can be independent for tracks and channel strips, through use of the respective S buttons in the track header, or corresponding channel strip (Arrange or Mixer).
The behavior depends on the Track Mute/Solo setting chosen in the Logic Pro > Preferences > Audio > General pane:
- Fast (Remote Channel Strips): Clicking a channel strip’s Solo button switches the state of the associated track button, and vice versa.
- CPU-saving (Slow Response): Choose this option to save processing resources, and to make the Track Solo buttons independent of the corresponding channel strips.
Note: The solo states of multiple tracks that are routed to the same channel strip are linked: soloing the channel strip soloes all associated tracks.
Soloing Tracks in CPU-Saving Mode
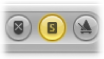
If the Track Mute/Solo preference is set to CPU-saving (Slow Response), activating any Track Solo button enables Solo Lock mode, and adds all regions on that track to the Solo Lock group. Solo Lock mode locks the solo status of all selected regions. For full details, see Soloing Regions. The Transport Solo button turns yellow and displays a padlock icon to indicate Solo Lock mode.
Deactivating a Track Solo button removes all regions on the track from the Solo Lock group and—in cases where no other track’s Solo button is active—disables Solo Lock.
Disabling the global Solo (Lock) button on the Transport bar sets all individual Track Solo buttons to the Off position.
Soloing When the Track Solo Buttons Are Hidden
If the Track Solo buttons are hidden—to save space—you can still solo a track with the Solo button on the Transport bar.
Click the Solo button on the Transport bar, then click the track.
Soloing Multiple Tracks in the Arrange Area
It is possible to solo multiple tracks at one time.
Click and hold a Track Solo button, then drag the pointer up or down.
The Solo buttons of all swiped tracks switch to the same state.
Hold down the Shift key while the Transport Solo button is active, then click the desired track names.