Display Preferences in Logic Pro
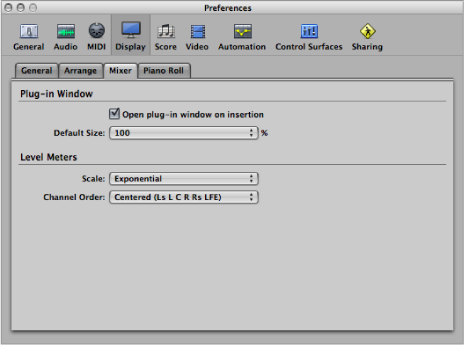
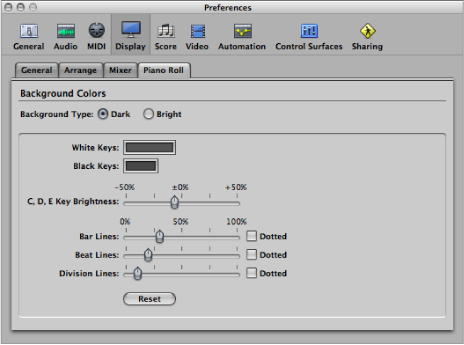
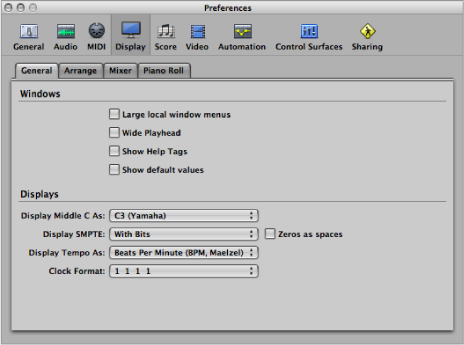
Display preferences consist of the following tabs: General, Arrange, Mixer, and Piano Roll.
To open Display preferences
Do one of the following:
Choose Logic Pro > Preferences > Display (or use the Open Display Preferences key command).
Click the Preferences button in the Arrange toolbar, then choose Display from the pop-up menu.
General Display Preferences
This pane allows you to alter the appearance of several onscreen components that are used throughout the program.

- Show Help Tags checkbox: This enables help tags throughout Logic Pro. When you hold the mouse pointer over parameters and tools, a small pop-up description (and/or value) of the item appears onscreen. When editing, the function name, region or event name/number, position, and parameter values are shown.
- Display Middle C As pop-up menu: This pop-up menu affects the description of notes in the editors. The bottom C on a five-octave keyboard (note # 36) is labeled C1, and middle C (note # 60) is labeled C3. According to this standard, the lowest MIDI note (note # 0) is called C–2. This is the official standard used by most manufacturers. Use of the C3 (Yamaha) setting will set Logic Pro to this standard mode. If you select the C4 (Roland) setting, the bottom C on a five-octave keyboard is labeled C2, and middle C is labeled as C4. In this standard, the lowest MIDI note is C–1.
- Display SMPTE, Display Tempo As, and Clock Format pop-up menus: You can use these pop-up menus to customize the Bar, SMPTE, and Tempo display in the Transport bar. For further details, see Customizing the Bar, SMPTE, and Tempo Display.
Arrange Display Preferences
These preferences specifically affect the appearance of the Arrange area.
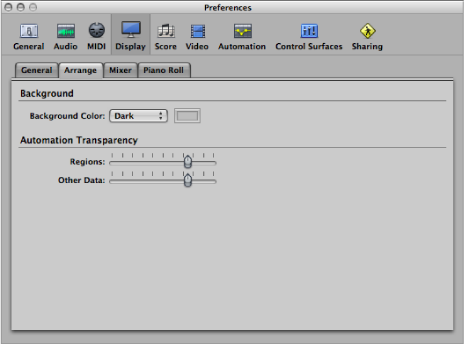
- Background Color pop-up menu: Choose one of three Arrange background color settings: Dark, Bright, and Custom. When the latter is chosen, you can set the custom color by clicking the color field to the right. This opens the Colors window, where you can define a custom color for the Arrange background.