Working with Chord Grids
You can review and edit existing chord grid libraries and chord grids, as well as create your own, in the Chord Grid Library.
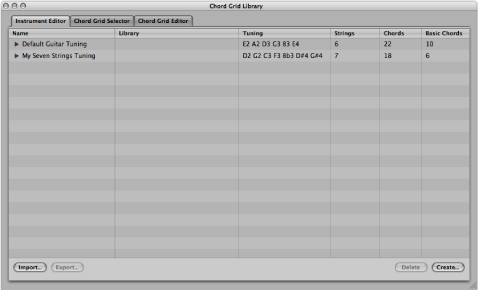
The Chord Grid Library window consists of two or three tabbed pages, depending on which method you use to open the window. These tabbed pages are the Instrument Editor, Chord Grid Selector, and Chord Grid Editor.
Choose Logic Pro > Preferences > Chord Grid Library in the main menu bar.
Click the Preferences button in the Arrange toolbar, then choose Chord Grid Library from the pop-up menu.
Choose Layout > Chord Grid Library in the Score Editor’s menu bar.
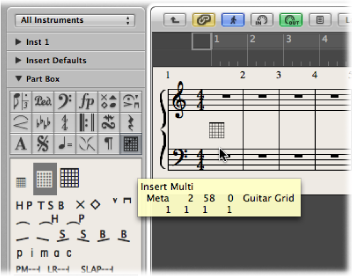
Drag a chord grid symbol from the Part box into the score.
Double-click an existing chord grid symbol in the score.
Note: The Instrument Editor tab is only available if you use one of the first three methods to open the Chord Grid Library.
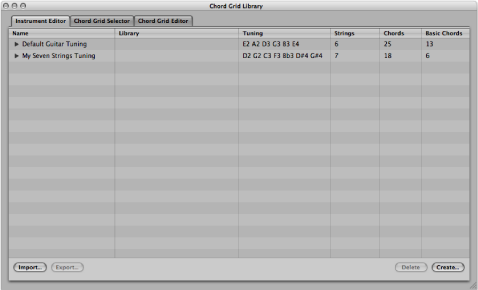
Getting to Know the Instrument Editor
The Instrument Editor pane allows you to view, create, and edit instrument tunings and chord grid libraries. You can also import and export chord grid libraries. The Instrument Editor pane includes the following parameters:
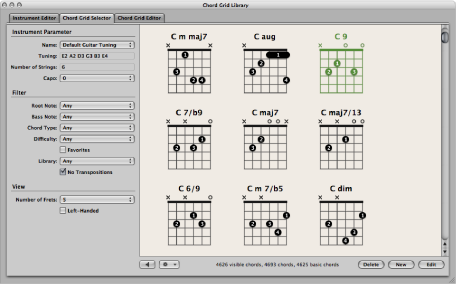
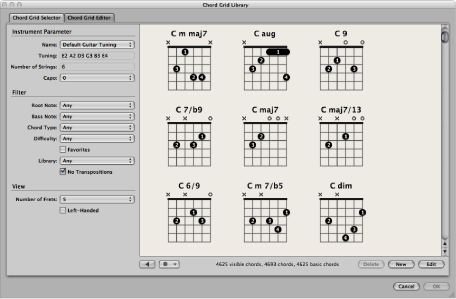
Getting to Know the Chord Grid Selector
The Chord Grid Selector allows you to select and filter individual chord grids from your instrument tunings and chord grid libraries. This pane includes the following parameters:
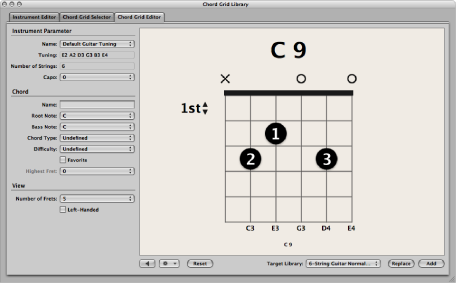
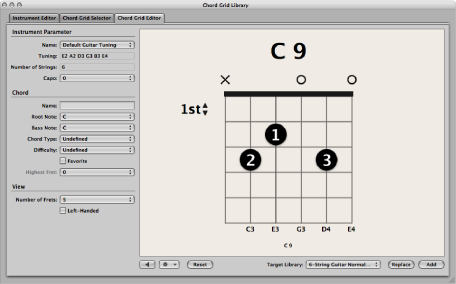
Getting to Know the Chord Grid Editor
The Chord Grid Editor allows you to create or modify chord grids. This pane includes the following parameters:
- Name pop-up menu: Choose the name of the instrument tuning in which to add or replace the chord grid.
- Tuning field: Displays the default tuning for the chosen instrument.
- Number of Strings field: Displays the default number of strings for the chosen instrument.
- Capo pop-up menu: Choose the fret on which to place the Capo. Choose “0” to play at the original chord, “1” to place a Capo on the first fret, and so on.
- Name field: Enter a name for the chord grid.
- Root Note pop-up menu: Choose a root note for the chord grid.
- Bass Note pop-up menu: Choose a bass note for the chord grid.
- Chord Type pop-up menu: Choose a chord type for the chord grid.
- Difficulty pop-up menu: Choose a difficulty level for the chord grid.
- Favorite checkbox: Tag the chord grid in your favorites.
- Highest Fret pop-up menu: Choose the highest fret for the chord grid.
- Number of Frets pop-up menu: Choose the number of frets (four, five, or six) shown in the chord grid view.
- Left-Handed checkbox: Change the chord grid view to suit left-handed users.
- Playback button: Click to listen to the chord grid.
- Action pop-up menu: Choose how the chord grid strings are played back and at what tempo.
- Chord: All strings are played back simultaneously.
- Arpeggio Up, Arpeggio Down: Each string is played back one after the other.
- Slow, Medium, Fast: Playback tempo.
- Reset/Clear toggle button: Click the Reset button to set the chord grid back to its original state (showing either open strings, a new chord grid, or the selected chord grid) within the Chord Grid Selector tab. Click the Clear button to clear the chord grid, providing you with a clean template to work on.
- Target Library pop-up menu: Choose the library in which to add the new or edited chord grid.
- Replace button: Click to replace an existing chord grid.
- Add button: Click to add a chord grid to your chosen library.
Inserting and Editing Chord Grid Symbols in the Score Editor
There are a number of ways to insert chord grid symbols into your score.
Do one of the following:
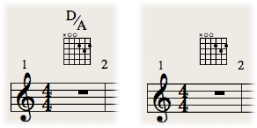
Drag a chord grid symbol from the Part box into the score.
Choose a chord grid symbol in the Part box, then click within the Score Editor with the Pencil tool.
Either technique opens the Chord Grid Selector pane in the Chord Grid Library window.
Select the chord you want to insert.
Click OK.
After inserting chord grid symbols in your score, you can edit their size and position accordingly.
Control-click (or right-click) a chord grid symbol, then choose one of the following from the shortcut menu:
Scale: reduced
Scale: normal
Scale: enlarged
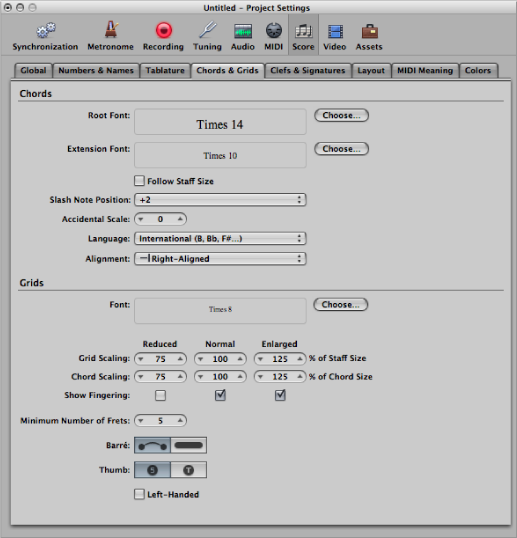
The scaling values are based on the Grid scaling and Chord scaling settings in the File > Project Settings > Score > Chords & Grids pane.
Select multiple chord grid symbols, Control-click (or right-click) any one of them, then choose Align Object Positions Vertically.
The selected chord grid symbols are aligned vertically.
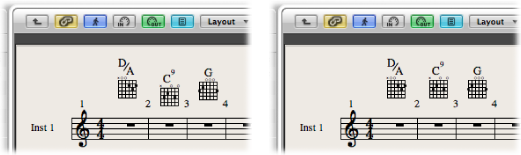
Control-click (or right-click) a chord grid symbol, then choose Align Object Positions Vertically.
You are asked if you want to align all similar objects to this one.
Click OK.
All chord grid symbols are aligned vertically.
You can easily copy an existing chord grid symbol in the Score Editor.
Hold down the Option key while dragging an existing chord grid, then release when you reach the desired position.
You have the option to hide or show the chord name on a chord grid symbol.
Control-click (or right-click) a chord grid symbol, then choose Hide Chord Name from the shortcut menu.
Double-click the chord grid symbol, choose another in the Chord Grid Selector, then click OK.
Creating and Editing Chord Grids in the Chord Grid Editor
You have many possibilities when creating new chord grids from scratch, or when modifying existing chord grids.
For full details about any of the parameters mentioned in this section, see Getting to Know the Chord Grid Editor.
Click the Clear button in the Chord Grid Editor tab.
The chord grid display is cleared, allowing you to create a new one from scratch.
Note: Clicking the Clear button changes it to the Reset button.
Set the Chord and View parameters according to your requirements.
Click the Add button.
The Chord Grid Selector pane opens, with the new chord grid added to your chosen library.
Double-click a chord grid in the Chord Grid Selector tab.
The chord grid opens in the Chord Grid Editor tab.
Set the Chord and View parameters according to your requirements.
Click the Add or Replace button.
The Chord Grid Selector pane opens, with the edited chord grid added or replaced in your chosen library.
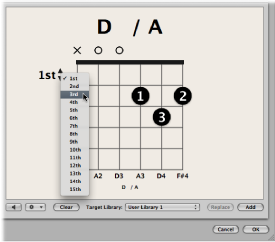
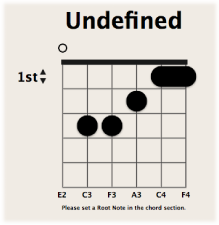
Click 1st to open a pop-up menu, then choose another fret number.
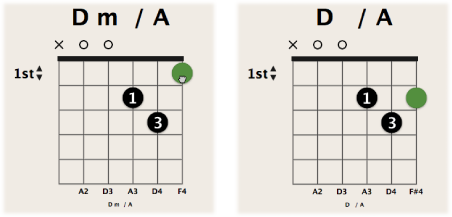
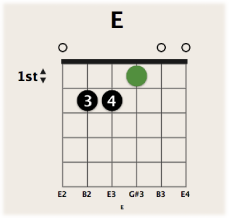
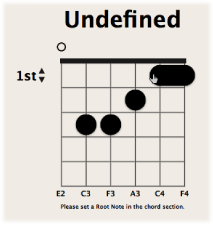
Creating, Editing, and Deleting Fingering Dots
You can create, edit, and delete fingering dots on a chord grid.
Click the string and fret.
A black dot is created.
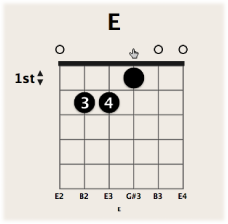
Click another fret on the same string.
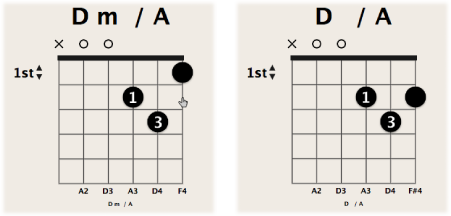
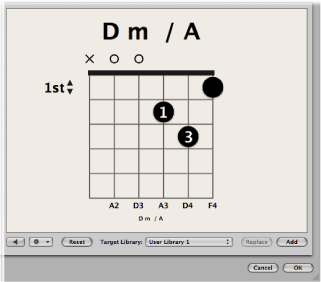
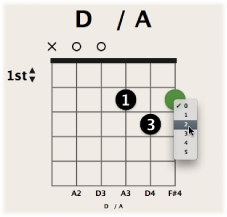
Drag the dot to a new fret position.
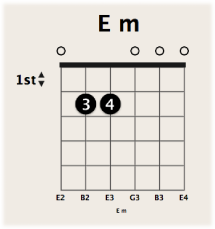
Control-click (or right-click) a dot, then choose a number between 0 and 5.
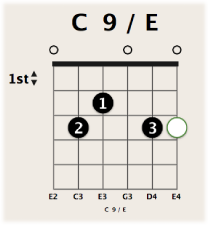
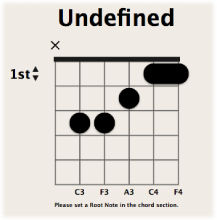
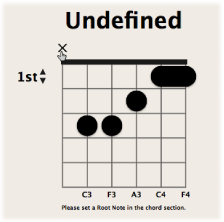
Option-click a string to create an optional dot. If another real dot exists on the same string, the real dot remains.
Option-click an existing dot to change it to an optional dot. An empty string is shown as a result.
Select a dot so that it turns green, then press the Delete key.
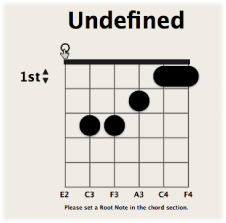
Click the area at the top of the string.
The result is the same using either approach: the string is open.
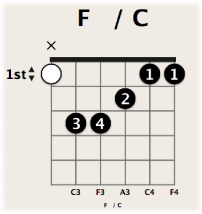
Creating, Editing, and Deleting Barres
You can create, edit, and delete barres on a chord grid.
Drag the left or right edge of an existing dot to the right or left.
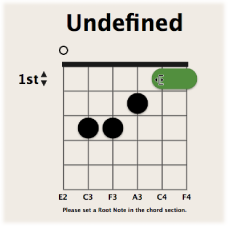
Place the pointer over a string, then drag to the left or right.
Drag the barre to a new fret position.
Select a barre so that it turns green, then press the Delete key.

Creating, Renaming, and Deleting Chord Grid Libraries
You can create a new chord grid library for an existing instrument tuning, or you can create a new chord grid library for a new instrument tuning. You do this from the Instrument Editor tab.
Open the Instrument Editor pane by doing one of the following:
Choose Logic Pro > Preferences > Chord Grid Library in the main menu bar, then click the Instrument Editor tab.
Click the Preferences button in the Arrange toolbar, choose Chord Grid Library from the pop-up menu, then click the Instrument Editor tab.
Choose Layout > Chord Grid Library in the Score Editor’s menu bar, then click the Instrument Editor tab.
Click the Create button.
In the Create Library dialog that appears, define the following parameters:
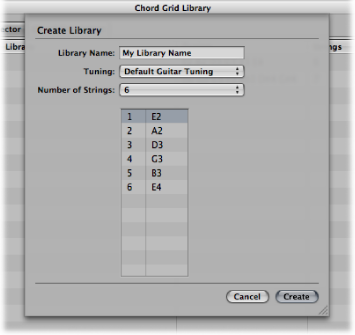
- Library Name field : Type in a name for the chord grid library.
- Tuning pop-up menu: Choose the instrument tuning in which you want to add the library.
- Number of Strings pop-up menu: Leave this at the default setting.
Click Create to add the new chord grid library to the chosen instrument tuning.
Open the Instrument Editor pane by doing one of the following:
Choose Logic Pro > Preferences > Chord Grid Library in the main menu bar, then click the Instrument Editor tab.
Click the Preferences button in the Arrange toolbar, choose Chord Grid Library from the pop-up menu, then click the Instrument Editor tab.
Choose Layout > Chord Grid Library in the Score Editor’s menu bar, then click the Instrument Editor tab.
Click the Create button.
In the Create Library dialog that appears, define the following parameters:
- Library Name field: Type in a name for the chord grid library.
- Tuning pop-up menu: Leave this at the default setting.
- Number of Strings pop-up menu: Choose the number of strings.
Click Create to add a new instrument tuning, also containing the newly created chord grid library.
You can also rename and delete chord grid libraries.
Double-click the name in the Library column, then type a new name in the text input field.
Select the instrument tuning or chord grid library that you want to delete, then click the Delete button.
If you selected an instrument tuning, the entire tuning and its chord grid libraries are deleted. If you selected a chord grid library, only that library is deleted (unless it is the only library within a tuning; then the instrument tuning is also deleted).
Importing and Exporting Chord Grid Libraries
You can import and export chord grid libraries from the Instrument Editor tab.
Open the Instrument Editor pane by doing one of the following:
Choose Logic Pro > Preferences > Chord Grid Library in the main menu bar, then click the Instrument Editor tab.
Click the Preferences button in the Arrange toolbar, choose Chord Grid Library from the pop-up menu, then click the Instrument Editor tab.
Choose Layout > Chord Grid Library in the Score Editor’s menu bar, then click the Instrument Editor tab.
Click the Import button.
Browse to the location of the library you want to import.
Open the Instrument Editor pane by doing one of the following:
Choose Logic Pro > Preferences > Chord Grid Library in the main menu bar, then click the Instrument Editor tab.
Click the Preferences button in the Arrange toolbar, choose Chord Grid Library from the pop-up menu, then click the Instrument Editor tab.
Choose Layout > Chord Grid Library in the Score Editor’s menu bar, then click the Instrument Editor tab.
Select the library you want to export.
Click the Export button.
Enter a name for the library, and browse to the location in which to save it.
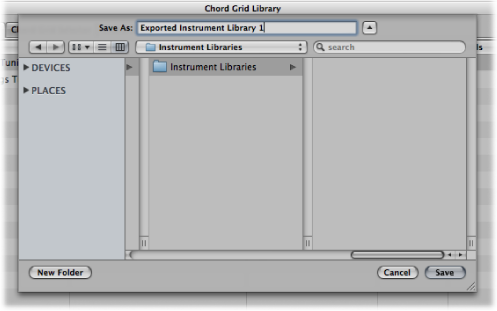
Click Save.