Using the Sample Editor’s Silencer
You can use the Silencer to perform two different functions, either separately or together. These are:
- Spike Reduction: Identifies, and reduces, signals such as pops and clicks.
- Noise Reduction: Lowers the level of any noise in the signal, such as tape noise.
The Silencer function is optimized for normalized data. Low-level material should be normalized before processing.
Tip: Don’t forget that pops and clicks can also be manually removed using the Pencil tool, if the Silencer doesn’t produce satisfactory results (see Using the Pencil Tool to Edit in the Sample Editor).
Opening the Sample Editor’s Silencer
You need to select an area within an audio file before you can open the Silencer.
Select the area of the audio region in the Sample Editor that you want to process through the Silencer.
Choose Factory > Silencer (or use the corresponding key command).
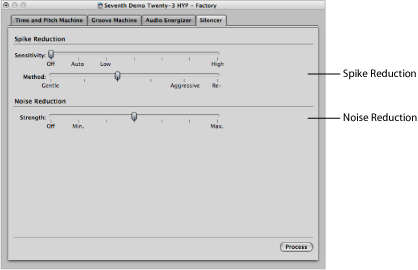
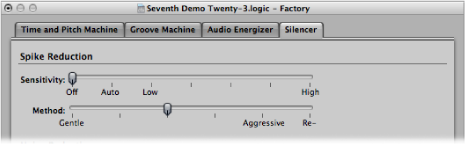
Applying Spike Reduction in the Silencer
The aim of Spike Reduction is to identify and reduce signals such as pops, clicks, or digital spikes, in order to reconstruct a hypothetical original signal. You use the following parameters to do this.
Note: When you are applying Spike Reduction, it is recommended that you turn off the Noise Reduction function. This ensures that only the Spike Reduction function is used.
- Sensitivity slider: Determines the threshold level used for the recognition of spikes in the audio file.
- Off: No edits will occur.
- Auto: Threshold is controlled automatically.
- Low: Most signal peaks are identified as spikes.
- High: Relatively small signal spikes are identified.
Note: You may need to experiment with the parameters. If the Sensitivity slider is set to High (or close to it), there’s a danger that very sharp transients in the main signal will be identified as spikes. Depending on the audio material, it’s sometimes impossible for the Silencer to distinguish between signals you want to keep and signals you want to eliminate. This is particularly the case if the decision between spike or main signal is merely a matter of taste—with some click-like bass drum sounds, for example. The attack phase of these sounds can have similar characteristics to static on vinyl records.
- Method slider: Determines how the identified spike points in the original signal are processed.
- Gentle: Weakest algorithm, only slightly smoothing the original signal.
- Aggressive: Strongest algorithm, with a very noticeable impact on the audio.
- Re-build: Replaces the (often unusable) original signal with an artificially generated estimate of the original signal, at the identified points. This synthesized signal is created by analyzing the audio material surrounding these points.
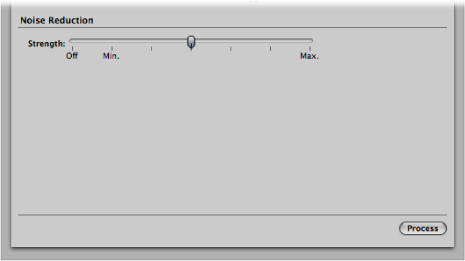
Applying Noise Reduction in the Silencer
The purpose of Noise Reduction is to reduce the noise components of the signal, and also to affect the main signal, particularly the high frequency elements.
The process of Noise Reduction is single-ended, meaning it affects material that is already recorded, and there is no need to decode the signal during playback. Even noise present in the original signal can be processed.
Note: When you are applying Noise Reduction, it is recommended that you turn off the Spike Reduction function. This ensures that only the Noise Reduction function is used.
- Strength slider: Determines the strength of the reduction level used on noise in the audio file.
- Off: No edits will occur.
- Min: Smallest possible edit, with values closer to Min having a small effect.
- Max: Maximum possible reduction of the noise component.
Note: The “correct” value depends on the quality of the material, and your own personal taste. Good-quality material should be edited using Min, or values close to it. You will probably notice only minor changes in the sound. Bad-quality (noisy) material should be processed at higher values, or even Max. If the setting is too high, the treble component of the signal will be reduced.