Audio Take Recording
You can approach audio take recording in the following ways:
- By recording a single audio take: Creates a single audio region on the selected arrange track.
- By recording multiple audio takes: Creates multiple audio regions over the same section of the project, all packed into a single take folder.
- By recording additional audio takes: Creates a take folder or the addition of new recordings to existing take folders.
To facilitate your workflow—in particular when editing audio take recordings at a later stage—use Logic Pro’s take coloring and take marking features. See Coloring Takes While Recording and Marking a Good Take While Recording.
Recording a Single Audio Take
When you record a single audio take—in other words, you make a basic audio recording—recording starts at the playhead position and ends when you click the Stop button (or press the Space bar). The following occurs on your system, and in Logic Pro:
An audio file is created on the hard disk.
An audio region, which represents the entire recorded audio file, is automatically created on the selected arrange track.
The audio file and the audio region are added to the Audio Bin.
Set the playhead to the point where you want recording to start.
Click the Record button in the Transport bar (or use the corresponding key command, default assignment: *).
You will hear the count-in, if it is defined in File > Project Settings > Recording. During recording, a progress indicator displays the remaining recording time and the elapsed time.
Click the Stop button in the Transport bar (or press the Space bar) to stop recording.
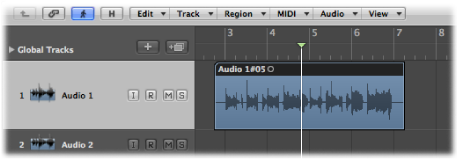
The recording appears as a single audio region on the selected arrange track, with the audio region displaying a graphical overview of the waveform. You can play the new recording while the overview is being created.
Note: If you paused recording by clicking the Pause button in the Transport bar, you can resume recording by clicking either the Pause or Play button. Recording resumes at the current playhead position but in a new audio region. You can later select the regions, then merge them using the Glue tool.
Recording Multiple Audio Takes
You can record multiple audio takes over the same section of your project. This allows you to later choose the best take, or take regions, to create your final composition.
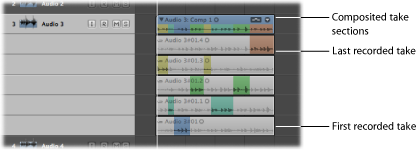
Imagine a guitar solo being performed and recorded multiple times over the same section of a project. The first recording appears as a single take region on the selected arrange track—just like recording a single audio take. When a recording takes place over this existing audio region, a take folder is created—occupying a single audio arrange track—and both regions are added to this folder. Each subsequent recording over the same section is added to the take folder. At the top of the take folder appears a composite of the sections of take regions, which represent a combination of the multiple takes—usually the best performances that can be used as the final version of your take.
To repeatedly record over the same section of a project, you need to turn on Cycle mode and define a cycle area. For details, see Using Cycle Mode.
Turn on Cycle mode by doing one of the following:
Click the Cycle button in the Transport bar (or use the Cycle Mode key command, default assignment: C).

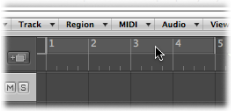
Click in the top part of the Bar ruler.
Set a cycle area by doing one of the following:
Drag the left and right locators in the top part of the Bar ruler.
Use the locator fields in the Transport bar.
Click the Record button in the Transport bar (or use the corresponding key command, default assignment: *).
Note: Recording automatically starts at the beginning of the defined cycle area, so you don’t need to set the playhead position.
Record as many cycle passes as you wish. When the second cycle pass ends and the third cycle pass begins, a take folder is created on the selected audio arrange track. Each subsequent cycle pass is then added to this take folder.
Click the Stop button in the Transport bar (or press the Space bar) to stop recording.
The selected audio arrange track contains a closed take folder, with each of the recorded audio takes inside.

Open the take folder by doing one of the following:
Click the disclosure triangle in the top‑left corner of the take folder (or use the Un/disclose Take Folder key command).
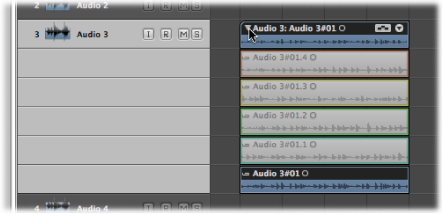
Double-click the take folder.
Recording Additional Audio Takes
After recording single or multiple audio takes to a single arrange track, you can continue to record additional takes on the same track.
You can record over an existing region, or regions.
You can record over an existing take folder, or take folders.
Although this is not a recording function per se, you can also drag and drop other recordings onto an existing take folder. Depending on the size of the recording, it will be added as either a new take or a new comp, and the take folder will be resized accordingly.
Note: Take folders are created only when a recording has been made. If you attempt to drag a region onto another region that was originally imported (not recorded), this will not create a take folder. You can, however, “pack” a take folder from any selected regions—recorded or imported. For details, see Packing Regions into a Take Folder.
Recording over an Existing Audio Region
A take folder is automatically created when you record over an existing audio region.
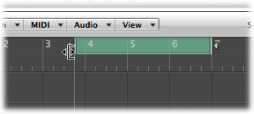
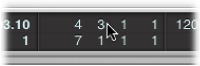
Set the playhead to a position where the new recording will overlap the existing region by a length that exceeds the count-in or pre-roll duration—which you have set in File > Project Settings > Recording.
Click the Record button in the Transport bar (or use the corresponding key command, default assignment: *).
An overlapping audio region is created in real time along the track until you stop recording.
Stop recording by clicking the Stop button in the Transport bar (or press the Space bar).
The result is a closed take folder that contains both audio recordings on a single audio arrange track. The longer of the two regions determines the take folder size.
When you record over multiple existing audio regions, a take folder is also created with all regions packed inside.
Recording over an Existing Audio Take Folder
When you record over an existing take folder, the new recording is added to the take folder and is selected for playback.
Set the playhead to a position where the new recording will overlap the existing take folder.
Click the Record button in the Transport bar (or use the corresponding key command, default assignment: *).
An overlapping audio region is created in real time along the track until you stop recording.
Stop recording by clicking the Stop button in the Transport bar (or press the Space bar).
The new audio recording is automatically added to the take folder.
The following will be taken into account:
If the new recording starts earlier or ends later, the take folder extends to match the size of the new recording.
If the new recording starts later or ends earlier than the start and end points of the take folder, a new comp is created consisting of the former take or comp supplemented by the new recording.
When you record over multiple existing audio take folders—placed one after the other on a track lane—the new recording is split between the take folders. Each section is assigned as a new take in each take folder. Earlier take folders are extended in length until they reach the start point of the ensuing take folder (if there is a gap between take folders).