Selecting Regions
You need to select a region before you can perform any edits, functions, or operations on it. You can select a single or multiple regions, including regions on different tracks and of different types. When selected, a black bar runs across the upper portion of the region to indicate its selected status.

Logic Pro provides a number of sophisticated selection methods. For more information on this, see Using Selection Techniques.
Selecting Parts of a Region
You can select and edit parts of one or more regions, using either of the following:
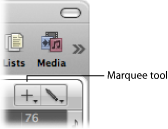
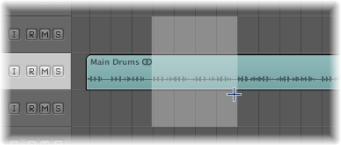
The Marquee tool, which looks like a crosshair
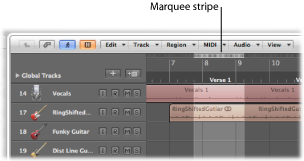
The Bar ruler marquee stripe, a thin marquee stripe shown at the top of the Bar ruler
Only the area that falls inside the marquee is selected. In other words, you can use the Marquee tool or marquee stripe to make selections inside, or across portions of, existing regions; your selection is determined completely by the selected marquee area. Within the selected area, you can perform almost all Arrange editing options, including deletions, moves, cuts, and copies.
Note: When using the Marquee tool or marquee stripe on a region, the selected area becomes a new region once an operation is applied.
If your selected area falls between musically relevant values, the marquee selection rectangle snaps automatically to the nearest musically relevant position. The snap resolution is determined by the current Snap pop-up menu setting.
Select the Marquee tool.
Drag the marquee rectangle to make selections—independent of existing region boundaries.
Click the note icon at the right end of the Bar ruler, and choose the Marquee Stripe setting from the pop-up menu.
Drag in this area of the Bar ruler to create a marquee stripe selection area (also shown on selected arrange tracks).
Click outside the marquee selection.
Shift-click track names in the track list.
Using the Marquee tool:
Hold down the Shift key to alter the current marquee selection, from either the left or right side, or up or down.
Using the marquee stripe:
Use the Left Arrow key or Right Arrow key to modify the marquee end point.
There are the default Select Previous (or Next) Region/Event, or set Marquee End to Previous (or Next) Transient key commands, which behave as described above, depending on the type of region selected (when the marquee stripe is visible).
Hold down the Shift key while using the Left Arrow key or Right Arrow key to move the marquee start point.
There are the default Toggle Previous (or Next) Region/Event, or set Marquee Start to Previous (or Next) Transient key commands, which behave as described when the marquee stripe is visible.
Press Shift–Left Arrow key, the default Select First, or Shift Marquee Selection Left key command.
Press Shift–Right Arrow key, the default Select Last, or Shift Marquee Selection Right key command.
Hold down the Control and Shift keys while making your marquee selection.
This action snaps to ticks or samples when editing MIDI or audio regions, depending on the current zoom level. See Overriding the Snap Grid.
Hold down the Control key while making your marquee selection.
This action snaps to ticks or samples when editing MIDI or audio regions, depending on the current zoom level. See Overriding the Snap Grid.
Choose Region > Set Locators by Regions in the Arrange area (or use the Set Locators by Regions/Events/Marquee key command, default assignment: Control-=).
This action sets the locators to the marquee selection boundaries, rather than the whole region.
Use the “Crop Regions outside Locators or Marquee Selection” key command (default assignment: Control-C).
This action removes all unselected areas from regions which are partly marquee-selected.
Playback with an Active Marquee Selection
Playback starts at the left border, and ends at the right border, of an active marquee selection. If you create a marquee selection while Logic Pro is running, however, playback does not stop at the end of the marquee selection.
Recording with an Active Marquee Selection
If you start recording when a marquee selection is active, the following happens:
Autopunch mode is automatically activated, and the autopunch locators are set to match the marquee selection. The marquee selection is removed (replaced by the autopunch locators).
All tracks within the marquee selection are record-enabled; all other tracks are record-disabled.
Using the Marquee Selection to Create Track Automation Nodes
When you edit automation data that is spanned by a marquee selection, two automation nodes are automatically created at the left border, and two at the right border, of the marquee selection. This provides a quick way to define and create automation data by converting the marquee selection into automation nodes.