The zone parameters provide extensive control over each zone, or sample, in your sampler instrument.
Zone parameters
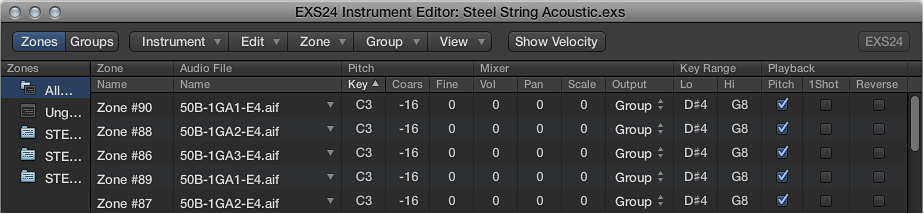
Zone Name field: Displays the zone name. New zones are automatically assigned a consecutive number. Click a zone number to enter a name.
Audio File menu: Displays the audio filename. Move the pointer over a name to reveal a help tag with additional information, such as format, bit depth, sample rate, and so on. To display the full file path in the help tag, press Command before the help tag appears. Click the arrow to open a shortcut menu that contains the following commands:
Load Audio Sample: Opens a dialog where you can select an audio file. Default key command: Control-F.
Open in Audio File Editor: Opens the selected sample in the Logic Pro X Audio File Editor (or the sample editor chosen in the Open External Sample Editor preference). Default key command: Control-W.
Note: This command is available only when Destructive audio editing is enabled in your host application preferences.
Reveal in Finder: Shows the full path of the loaded audio file in the Finder.
Tip: Double-click the name of a sample in the Audio File > Name column to open the audio file in the Logic Pro X Audio File Editor. When no audio file is loaded, the audio file selector opens.
Pitch fields: Key determines the root note of the sample—in other words, the note at which the sample is heard at its original pitch. Use the Coarse and Fine fields to tune the sample in semitone/cent increments.
Volume field: Adjusts the overall output level of the zone.
Pan field: Adjusts the pan position of the zone. This parameter works only when EXS24 mkII is used in stereo.
Scale field: Balances the level of a sample across the selected key range. A negative value makes lower notes softer than higher notes; positive values have the opposite effect.
Output menu: Determines the outputs used by the zone. Choices include the main outputs and paired channels 3 and 4, 5 and 6, 7 and 8, 9 and 10, or individual outputs 11 through 16. This allows individual zones to be routed independently to aux channel strips (in a multi-output EXS24 mkII instance).
Key Range fields: The two key range parameters allow you to define a key range for the zone. Playing notes outside this range does not trigger the sample assigned to this zone.
Lo: Sets the lowest note for the zone.
Hi: Sets the highest note for the zone.
Pitch checkbox: Click to change the sample pitch when triggered by different keys. When disabled, the sample is always played at its original pitch, regardless of the note played.
1Shot checkbox: Click to make the zone ignore the length of incoming MIDI note events—resulting in the sample always being played from beginning to end whenever a note-on event is received. This is useful for drum samples, where you often don’t want the MIDI note length to affect sample playback. Also see the Fade field parameter below.
Reverse checkbox: Click to play the sample from the end to the beginning.
Group menu: Shows the group assignment of a zone. For more information, see Create EXS24 mkII groups and EXS24 mkII group parameters.
Velocity Range checkbox and fields: Click the checkbox, then define a velocity range for the zone. Playing notes outside this velocity range does not trigger the sample assigned to this zone.
Lo: Set the lowest velocity that triggers the zone.
Hi: Set the highest velocity that triggers the zone.
Sample Start and End fields: Set the sample start and end points, respectively. Control-click either field to open a shortcut menu that allows you to open the sample in the Logic Pro X Audio File Editor (or an external editor), where you can set the start and end points graphically. See Edit samples in the Logic Pro X Audio File Editor or Use an external instrument editor with EXS24 mkII.
Fade field: Determines the fade-out time for a one-shot sample. The value is shown in samples. The difference between the value specified in this field and the value shown in the End field determines the fade-out duration. The lower the value, the longer it takes for the sample to reach a 0 level (at the sample end point). This option is dimmed when the Loop On checkbox is active. See EXS24 mkII zone loop parameters.
Note: This parameter defaults to a value of 0, except when the Sampler Instrument is created with the Logic Pro X Audio > Convert Regions to New Sampler Track command. This feature uses transient markers and results in a default Fade field value that matches the slicing offset of the following transient marker.