You can create new delay taps in three different ways: by using the Tap pads, by creating them in the Identification bar, or by copying existing taps.
The fastest way to create multiple taps is to use the Tap pads. If you have a specific rhythm in mind, you might find it easier to tap out your rhythm on dedicated hardware controller buttons, instead of using mouse or trackpad clicks. If you have a MIDI controller, you can assign the Tap pads to buttons on your device. For information about assigning controllers, see the Control Surfaces Support Help.
Taps are assigned letters, based on their order of creation. The first tap to be created is assigned as Tap A, the second tap is assigned as Tap B, and so on. Once assigned, each tap is always identified by the same letter, even when moved in time, and therefore reordered. For example, if you initially create three taps, they are named Tap A, Tap B, and Tap C. If you then change the delay time of Tap B so that it precedes Tap A, it is still called Tap B.
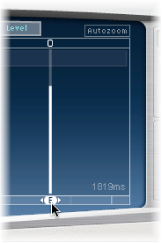
The Identification bar shows the letter of each visible tap. The Tap Delay field of the Tap parameter bar displays the letter of the currently selected tap or the letter of the tap being edited when multiple taps are selected (for details, see Select, move, and delete taps).
Create taps with the Tap pad
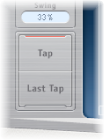
Click the upper pad (Start).
Note: Whenever you click the Start pad, it automatically erases all existing taps. Because of this behavior, after you create your initial taps, you will want to create subsequent taps by clicking in the Identification bar.
The upper pad label changes to Tap, and a red tap recording bar appears in the strip below the view buttons.
To begin recording new taps, click the Tap button.
To create new taps, click the Tap button.
These are created at the exact moments in time of each click, adopting the rhythm of your click pattern.
To finish creating taps, click the Last Tap button.
The final tap is added, ending tap recording, and assigning the last tap as the feedback tap (for more information about the feedback tap, see Delay Designer master parameters).
Note: If you do not click the Last Tap button, tap recording automatically stops after 10 seconds or when the 26th tap is created, whichever comes first.
Create a tap in the Identification bar
Click the position where you want to add a tap.
Copy taps in the Identification bar
Option-drag a selection of one or more taps to the position where you want to add the tap or taps.
The delay time of copied taps is set to the drag position.