Change photo effects
Open the photo in edit view.
If the Effects tab (at the top of the Edit pane) isn’t selected, click it.
Click one or more of the following effects (click multiple times to increase an effect, or combine several to create new effects):
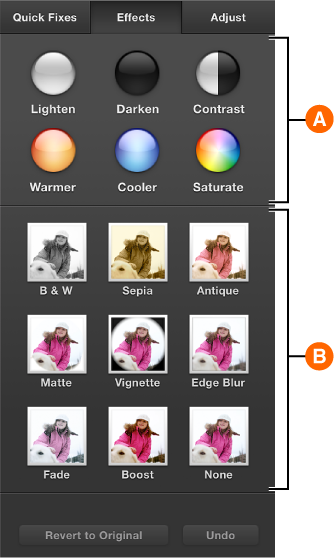

You can click these buttons multiple times to achieve the effect you want.

B & W: Changes the photo to black and white.
Sepia: Applies a yellowish hue.
Antique: Gives the photo an aged appearance.
Matte: Blurs edges and corners in an oval.
Vignette: Darkens the photo’s corners.
Edge Blur: Blurs the photo’s corners.
Fade: Reduces color intensity.
Boost: Increases color intensity.
None: Removes all effects.
Your changes are saved automatically, unless you click Undo or “Revert to Previous.”