You can assign names to people in your photos. Then iPhoto uses Faces (face detection and recognition technology) to help you find other photos in your library that include those people.
If you’re upgrading from an earlier version of iPhoto, iPhoto ’11 scans your photo library for photos that include people’s faces.
If you upgraded from iPhoto ’09, there may be photos in your library that iPhoto earmarked for eventual scan. If this is the case, iPhoto automatically scans only these photos when you upgrade to iPhoto ’11. You can’t pause this scan, but it should take just a few seconds.
If you upgraded from iPhoto ’08 or earlier, the scan may take a little time, depending on the size of your library. You can work in other areas of iPhoto (besides Faces) during the scan.
If you need to stop the scan for any reason, click Faces in the Source list, and then click the Pause button. To resume the scan manually, click the Resume button. If the scan isn’t finished by the time you close iPhoto, iPhoto restarts the scan the next time you open iPhoto.
When the scan is complete, click Faces in the Source list to get started. Depending on whether you’ve used the Faces feature before, you see one of the following in the main viewing window:
If you’ve already used Faces, you see the snapshots of the people you’ve previously named.
If you haven’t yet used Faces, you see suggested faces that you can choose to name or skip.
If you don’t have any photos in your iPhoto library (or no photos that show people’s faces), you see the empty corkboard with the note about getting started.
After you name one or more faces, the named people appear on your Faces corkboard.
See faces iPhoto found in your library, and then name them
To view Faces in full-screen view, click the Full Screen button in the top-right corner of the iPhoto window.
Click the Find Faces button in the toolbar.
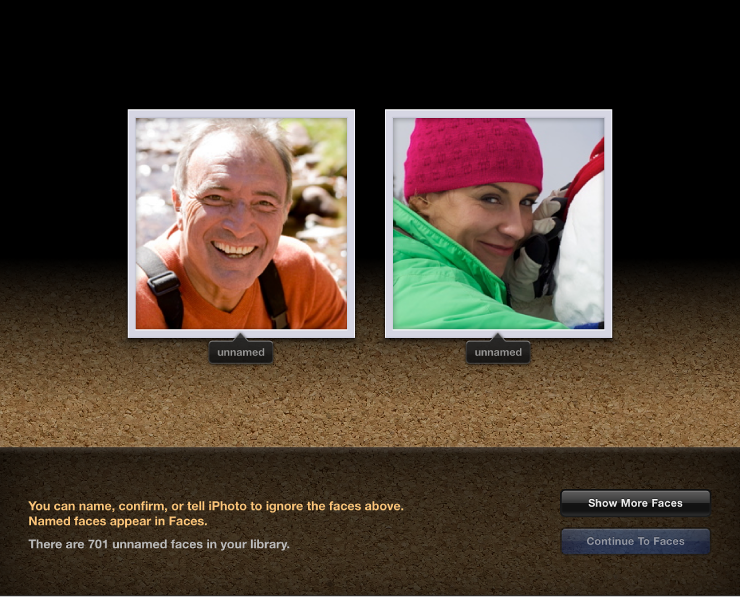
One or more faces appear in the main viewing window, depending on the size of the window.
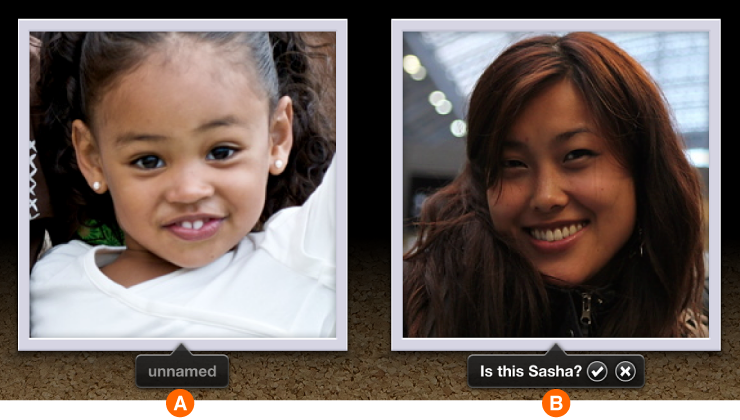
Click the “unnamed” label for each face (A, below), and then type a name. As you type, iPhoto may suggest names, which you can choose from the pop-up menu.
As you add more names to Faces, iPhoto begins to suggest names for unnamed faces. If you see “Is this [name]?” below an unnamed face (B, above), you can click the checkmark to confirm the suggestion or click the X to reject it.
iPhoto also suggests names based on your Contacts and on names of your Facebook friends (if you’ve set up a Facebook account in iPhoto). For more information, see Publish your photos to Facebook.
You don’t have to name every face iPhoto shows you.
To see more photos, click the Show More Faces button. Repeat steps 3 and 4 to name or reject more people.
When you’re done, click Continue To Faces to see your newly named friends and family on your corkboard.
After you name someone in Faces, you can change the person’s name any time. Click to select Faces in the Source list to see your corkboard. Below a snapshot, click the name you want to change and type a new one.
If you want to zoom in on the named faces, double-click the snapshot, and then click the selector in the top-right corner of the Faces window.
Click the Photos side of the selector (A, above) to see the whole photo. Click the Faces side (B, above) to see just the headshots of the person named.
Name the face of a specific friend or family member
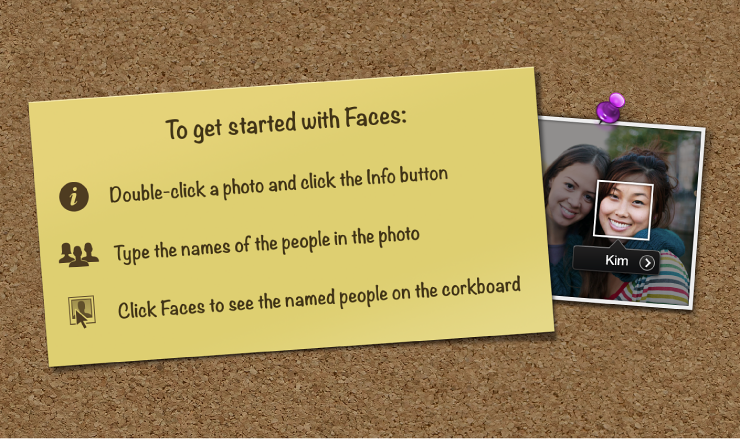
Click to select Events in the Source list, select an event, and then select a photo that includes a person or people you want to name.
Click the Info button in the toolbar to open the Information pane.
Click the “unnamed” label and type a name to a face in your photo.
As you type, iPhoto suggests names based on previous names entered, names in your Contacts application, and names of your Facebook friends (if you’ve set up a Facebook account in iPhoto). If you want, you can choose one of these names from the pop-up menu that appears.
Note: If no label appears below a face, it means iPhoto didn’t detect this face. It’s easy to add a missing face.
Press the Return key.
If the photo shows more than one person, repeat steps 3 and 4 for each face you want to name.
You don’t have to name every person in a photo.
If there are people you don’t intend to name, you can tell iPhoto to ignore their faces. Move your pointer over the face, and then click the X in the top-left corner of the box that appears.
The box and “unnamed” label disappear.
When you’re done naming the people in this photo, click the Info button again to close the Information pane.
After you name someone in Faces, you can change the person’s name or include their full name at any time. Select Faces in the Source list to see your corkboard. Below a snapshot, click the name you want to change and type a new one.