
Configure the settings in the recording options dialog to improve data collection in a trace document by choosing global recording options such as deferring the processing of the results until after a recording, and by customizing the options for an instrument.
For example, you may wish to adjust the sampling rate for the Time Profiler instrument or discard events for free memory while profiling with the Allocations instrument. Customizable settings like these vary, depending on the instrument. Many instruments contain controls for determining what type of information is gathered by the instrument itself.
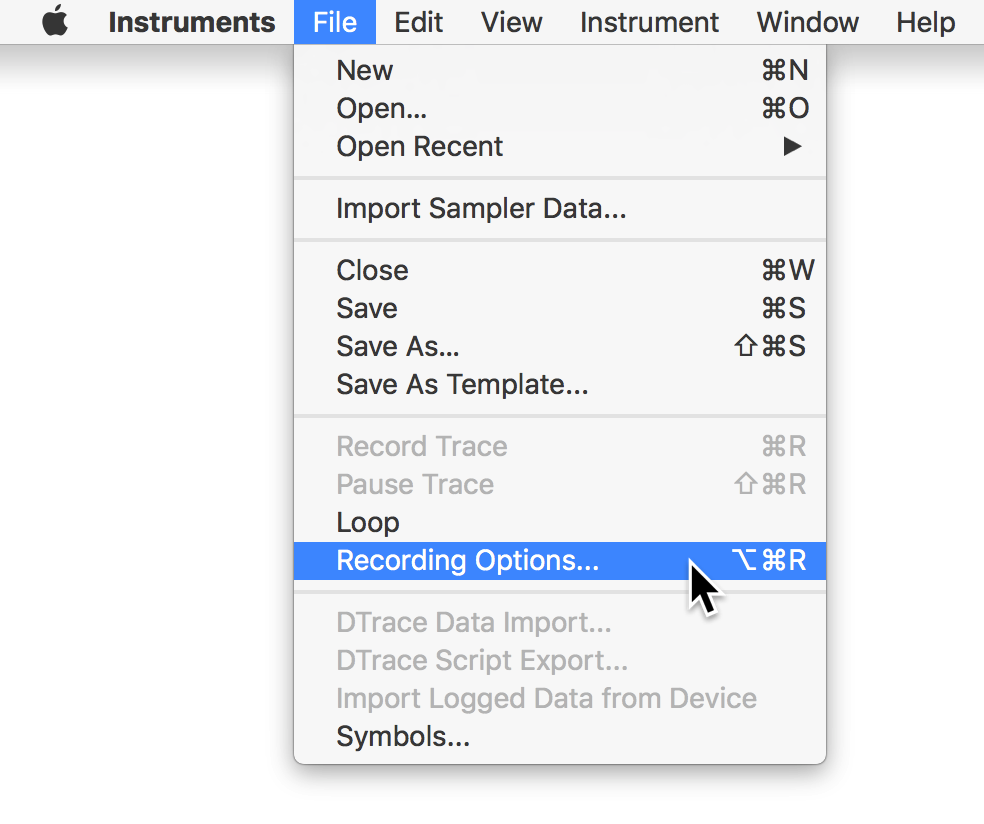
Choose File > Recording Options to open the Record Options dialog.
Click the “Global options” disclosure triangle.
Customize the options as desired.
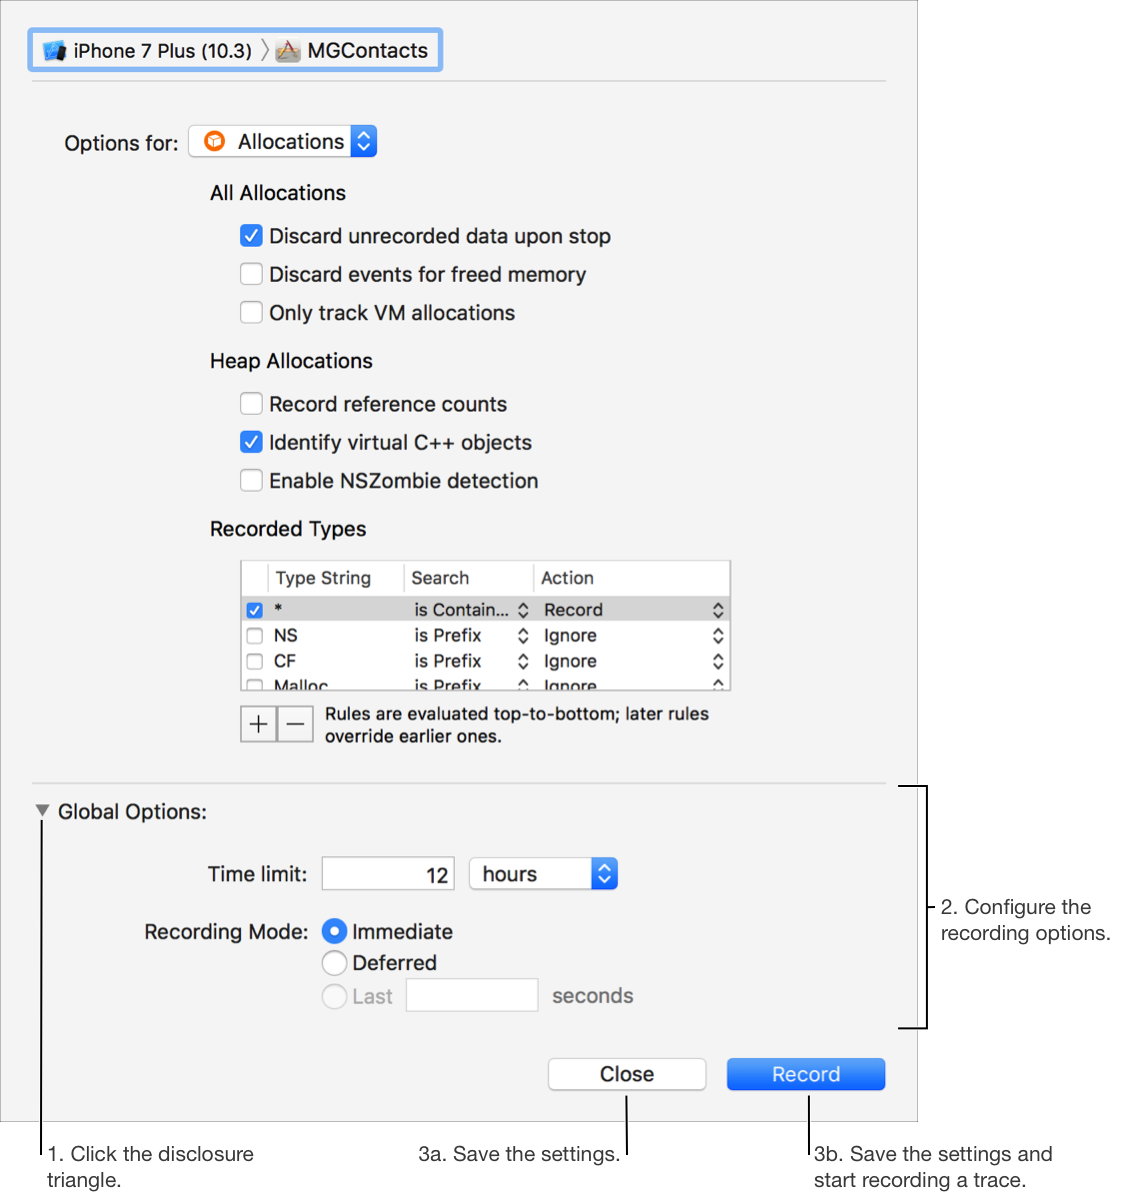
Options include:
Time limit: The maximum amount of time, in seconds, that the instruments will record data.
Window limit: The maximum duration, in seconds, of data that will be saved. If recording continues for longer than the time you specify as the window limit (for example, longer than 4 seconds), only the data collected during the last 4 seconds is saved.
Deferred mode: Select to defer data analysis until after data collection is complete. This can result in faster and more accurate data collection, as more system resources are directed at the process being recorded. No data is displayed in the timeline or detail pane during the recording.
Note: Some options in this dialog may be disabled if not applicable to the instruments in the trace document or to the preference configuration in Instruments. To determine why an option is disabled, hover over it for a few seconds to view its tooltip.
Click the Close or Record button to save the options.
Clicking the Record button starts a trace using the new options.
Choose File > Recording Options.
Open the “Options for” pop-up menu, and then choose an instrument.
Note: The pop-up shows only Instruments that support recording options.
Configure the recording options for the instrument. The settings depend on the selected instrument.
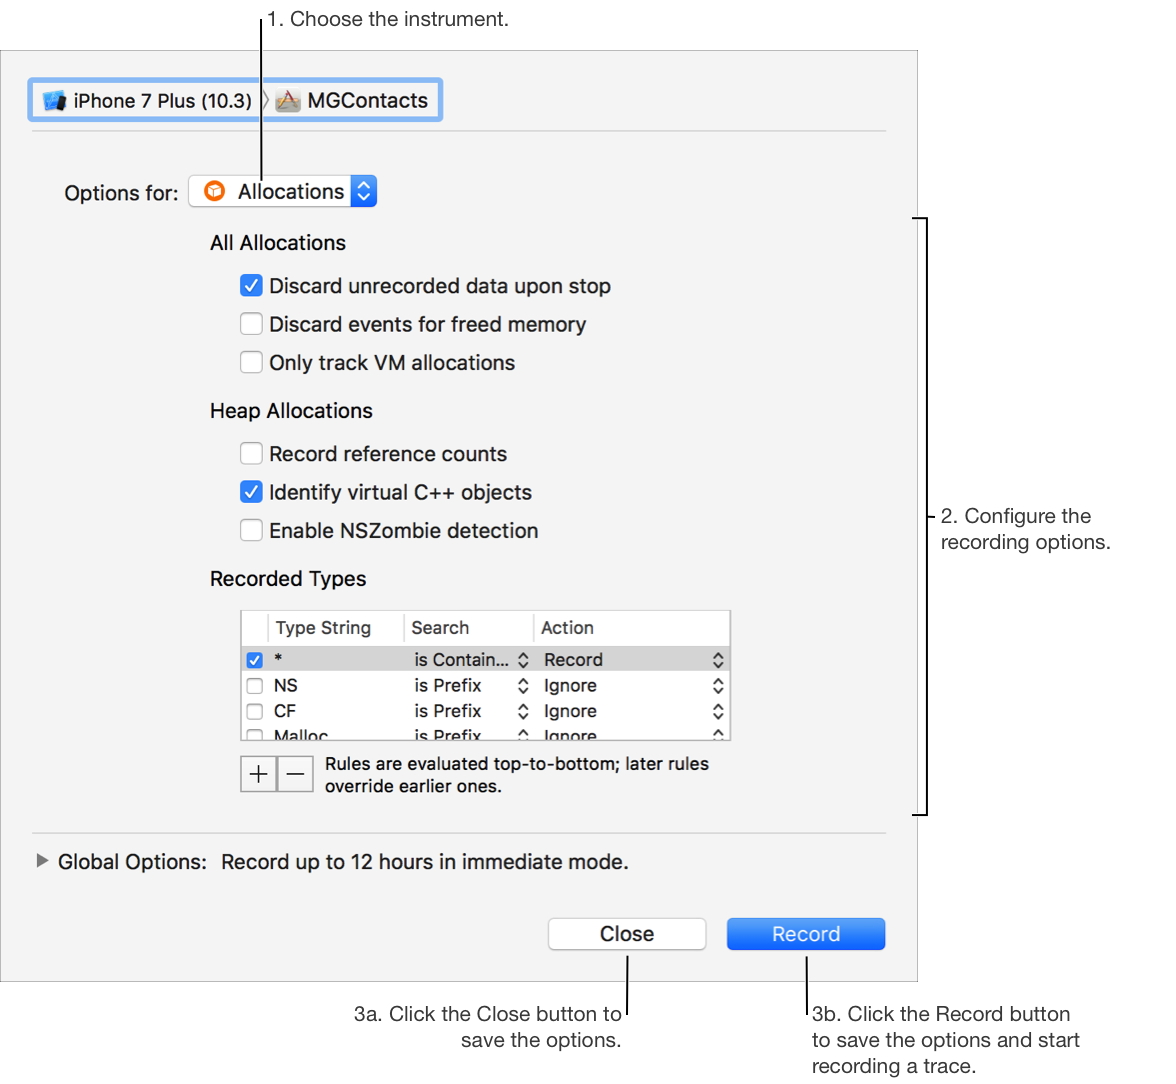
Click the Close or Record button to save the options.
Clicking the Record button starts a trace using the new options.