
A marker flags a specific timing location in a source file. You can append a marker with editing notes or other descriptive information. Additionally, when you output the source file to an H.264, MPEG-2, or MPEG-4 video format, each marker forces the creation of an I-frame. Added I-frames improve compression quality, but can increase overall file size. Compressor can create the following types of markers:
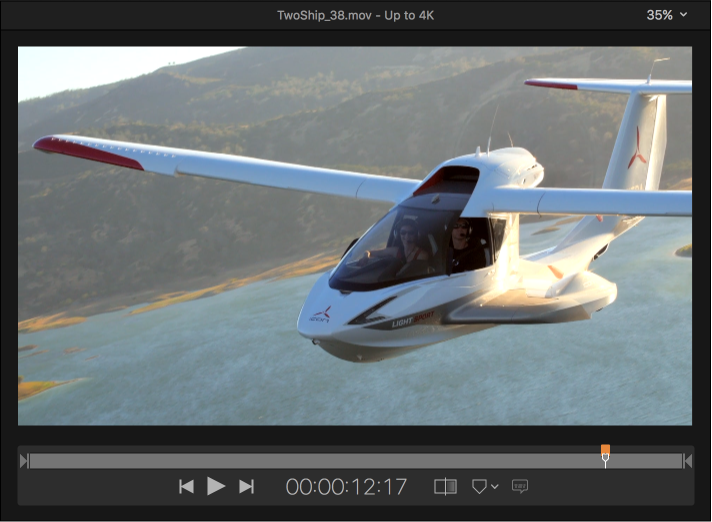
Chapter markers: Generate named index points and thumbnail images for DVDs, QuickTime movies, or video podcasts. You can also assign a URL to a chapter marker to have that URL appear during playback of a podcast. Chapter markers are also included in submissions to the iTunes Store as part of an iTunes Store package. Chapter markers appear orange in the Compressor preview area.
Compression markers: Generate an I-frame, but do not generate thumbnails, chapter-track entries, or other metadata. Add them to a video if a section appears to have lower image quality than the surrounding frames. Compression markers appear blue in the Compressor preview area.
Edit/cut markers: Function identically to compression markers. They are commonly used by compression artists to force an I-frame at an edit point to ensure higher image quality at that moment in the video. Edit/cut markers appear red in the Compressor preview area.
Podcast markers: Like chapter markers, podcast markers can have artwork and a URL assigned to them. Podcast markers are usually used to provide a slideshow (with URLs) for users to view when playing audio podcasts. However, podcast marker names do not appear in the slideshow, and users can’t navigate to a podcast marker in the transcoded file. Podcast markers appear purple in the Compressor preview area.
Markers can be output when using settings based on the following formats:
H.264 for Apple Devices (For more information, see Apple Devices.)
MPEG-2 (For more information, see MPEG-2.)
MPEG-4, when configured for audio podcasting (For more information, see MPEG-4.)
QuickTime Movie (For more information, see QuickTime Movie.)
Important: Although you can set and configure markers for all jobs, only jobs that use the output file formats listed above will output a file that includes markers.
In the batch area, select the job that contains the source file to which you want to add markers.
Tip: To select the job, rather than an output row under the job, click the source filename at the top of the job area.
In the preview area, identify where to place the marker by doing one of the following:
Drag the playhead ![]() to where you want to add a marker.
to where you want to add a marker.
Enter a timecode value in the playhead timecode field.
To add a marker, click the Marker pop-up menu ![]() , then choose Add Marker (or press M).
, then choose Add Marker (or press M).
An orange chapter marker appears in the source file’s timeline in the preview area.
To change the marker type, click the Type pop-up menu in the Marker inspector, then choose a different marker type.
Note: If the Marker inspector is not visible, make sure the marker is selected in the preview area and the Inspector button ![]() in the upper-right corner of the Compressor window is highlighted.
in the upper-right corner of the Compressor window is highlighted.
When you add a new marker, it’s automatically set as a chapter marker. You can change this default so new markers are always added as one of the other types of markers.
Click the Marker pop-up menu in the Preview area and choose an item in the Set Default Marker submenu.
You can specify the properties of a chapter or podcast marker in the Marker inspector.
Note: A podcast can have both chapter markers and podcast markers. The only difference is that a viewer can navigate directly to a chapter marker but can’t navigate to a podcast marker.
Select a job in the batch area, then select a marker in the preview area.
In the Marker inspector, click the Type pop-up menu, then choose either Chapter or Podcast.
Enter a name for the marker in the Name field.
During playback of a transcoded file, chapter marker names are displayed on Apple playback devices, in QuickTime Player, and in DVD menus. Podcast marker names are not displayed.
Enter a web address in the URL field.
When viewing the transcoded file, you can click the URL to open a web browser and view a website.
Select an image to be displayed at the marker point by choosing an option from the Image pop-up menu:
Frame: Uses the frame on which the marker is placed as the display image. To use a different frame in the source file, enter a different timecode value in the viewer that appears at the bottom of the Marker inspector.
File: Uses an image file that you select via the window that appears. To change the image file after you’ve already added it to the Marker inspector, click Choose, then select a different image file.
You can create a list of timecode points (using values that match the timecode on the track’s video clip) and then import that list to create chapter markers.
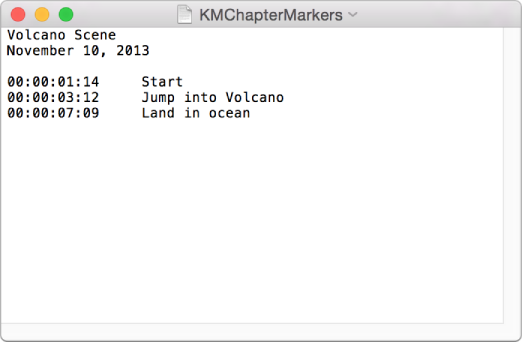
The file containing the list of timecode points must follow these rules:
The list of timecode values must be a plain text file. For best results, create the list with TextEdit and save the files using the .chp or .txt extension.
Each marker must be on a new line that starts with a timecode value in the format 00:00:00:00.
After the timecode value, you can include a name for the marker. You can use a space or tab character to separate the timecode value from the marker name.
Any lines that do not begin with a timecode value are ignored. This makes it easy for you to add comments to the list.
The timecode values do not have to be listed in chronological order.
After creating the list, you import it into Compressor:
In the batch area, select the job that you want to add markers to.
In the preview area, click the Marker pop-up menu ![]() , then choose Import Chapter List.
, then choose Import Chapter List.
In the window that appears, select the chapter marker file and click Open.
The markers are added to the source file as chapter markers. You can view them in the preview area.
You can manually change the markers to podcast or compression markers. You can also add URLs and artwork to them as needed. For more information, see the previous tasks.
You can set Compressor to show or hide the different types of markers.
Click the Marker pop-up menu ![]() , then choose Hide Chapter/Podcast Markers, Hide Compression Markers, or Hide Edit/Cut Markers.
, then choose Hide Chapter/Podcast Markers, Hide Compression Markers, or Hide Edit/Cut Markers.
To reveal a type of markers, select the same item in the pop-up menu.
Select a job in the batch area and then select a marker in the preview area.
You can also select markers by clicking the Next button ![]() or Previous button
or Previous button ![]() in the preview area.
in the preview area.
Do one of the following:
Remove all markers in the source file: Click the Marker pop-up menu ![]() , then choose Remove All Markers.
, then choose Remove All Markers.
Remove one marker: Select a marker by clicking it or clicking the Next button ![]() or Previous button
or Previous button ![]() in the preview area. Then, click the Marker pop-up menu
in the preview area. Then, click the Marker pop-up menu ![]() and choose Remove Marker.
and choose Remove Marker.